Writing plugins
This page shows you how to write and publish your own Buildkite plugins, and how to validate the plugin.yml file which describes it against the plugin schema.
A number of tools are also available to help you develop your plugin.
Tutorial: write a plugin
In this tutorial, you will create a Buildkite plugin called "File Counter", which counts the number of files in the build directory once the command has finished, and creates a build annotation with the count.
steps:
  - command: ls
    plugins:
      - a-github-user/file-counter#v1.0.0:
          pattern: '*.md'
Step 1: Create a new git repository
The most common kind of Buildkite plugin is a Git repository, with a descriptive name ending in -buildkite-plugin. This suffix is required to allow using the user/plugin-name syntax in pipelines. Let's create a new Git repository following these naming conventions:
mkdir file-counter-buildkite-plugin
cd file-counter-buildkite-plugin
git init
We recommend using the -buildkite-plugin suffix in the repository name because:
user/plugin-name syntax rather than the full URL.
Step 2: Add a plugin.yml
Next, create plugin.yml to describe how the plugin appears in the Buildkite plugins directory, what it requires, and what configuration options it accepts.
name: File Counter
description: Annotates the build with a file count
author: https://github.com/a-github-user
requirements: []
configuration:
  properties:
    pattern:
      type: string
  additionalProperties: false
The configuration property defines the validation rules for the plugin configuration using the JSON Schema format. The plugin in this tutorial has a single pattern property, of type string.
Configuration properties are available to the hook script as environment variables with the naming pattern BUILDKITE_PLUGIN_<PLUGIN_NAME>_<CONFIGURATION_PROPERTY> where <PLUGIN_NAME> is not the name defined in plugin.yml but the repository or folder name compatible with Bash environment variables (in uppercase and only letters, numbers, and underscores). In this case, the configured value of pattern will be available as BUILDKITE_PLUGIN_FILE_COUNTER_PATTERN.
Accessing properties on plugins referenced with Git URLs
Note that if you reference a plugin with a full URL ending in .git and that plugin's name does not end with -buildkite-plugin, variable names will include _GIT as part of the plugin name. For example, the value of the configuration pattern in https://github.com/my-org/my-plugin.git#v1.0.0 will be available as BUILDKITE_PLUGIN_MY_PLUGIN_GIT_PATTERN.
Valid plugin.yml properties
| Property | Description |
|---|---|
| name | The name of the plugin, in Title Case. |
| description | A short sentence describing what the plugin does. |
| author | A URL to the plugin author (for example, website or GitHub profile). |
| requirements | An array of commands that are expected to exist in the agent's $PATH.
|
| configuration | A JSON Schema describing the valid configuration options available. |
Step 3: Validate the plugin
The Buildkite Plugin Linter is an app that helps ensure your plugin is up-to-date and has all the files required to list it in the plugins directory. The app is available as a Docker image you can run on the command line, with a dedicated plugin, or with Docker Compose. We recommend you start by running the linter on the command line, and then include the dedicated plugin in the pipeline for your plugin.
Run on the command line
You can run the plugin linter with the following Docker command:
docker run -it --rm -v "$PWD:/plugin:ro" buildkite/plugin-linter --id a-github-user/file-counter
Run with the dedicated plugin
If your plugin has a Buildkite pipeline, you can add a step to lint it using the corresponding plugin:
  - label: "🐚 Lint"
    plugins:
      plugin-linter#v3.3.0:
        id: a-gihub-user/file-counter
Run with Docker Compose
If you want to run the linter using Docker Compose, you can add the following to a docker-compose.yml file:
services:
  lint:
    image: buildkite/plugin-linter
    command: ['--id', 'a-github-user/file-counter']
    volumes:
      - ".:/plugin:ro"
You can then run the tests using the following command:
docker-compose run --rm lint
Step 4: Add a hook
Plugins can implement a number of plugin hooks. For this plugin, create a post-command hook in a hooks directory:
mkdir hooks
touch hooks/post-command
chmod +x hooks/post-command
#!/bin/bash
set -euo pipefail

PATTERN="$BUILDKITE_PLUGIN_FILE_COUNTER_PATTERN"

echo "--- :1234: Counting the number of files"

COUNT=$(find . -name "$PATTERN" | wc -l)

echo "Found ${COUNT} files matching ${PATTERN}"

buildkite-agent annotate "Found ${COUNT} files matching ${PATTERN}"
Step 5: Add a test
The next step is to test the post-command hook using BATS, and the buildkite/plugin-tester Docker image.
mkdir tests
touch tests/post-command.bats
chmod +x tests/post-command.bats
Create the following tests/post-command.bats file:
#!/usr/bin/env bats

load "$BATS_PLUGIN_PATH/load.bash"

# Uncomment the following line to debug stub failures
# export BUILDKITE_AGENT_STUB_DEBUG=/dev/tty

@test "Creates an annotation with the file count" {
  export BUILDKITE_PLUGIN_FILE_COUNTER_PATTERN="*.bats"

  stub buildkite-agent 'annotate "Found 1 files matching *.bats" : echo Annotation created'

  run "$PWD/hooks/post-command"

  assert_success
  assert_output --partial "Found 1 files matching *.bats"
  assert_output --partial "Annotation created"

  unstub buildkite-agent
}
To run the test, run the following Docker command:
docker run -it --rm -v "$PWD:/plugin:ro" buildkite/plugin-tester
 ✓ Creates an annotation with the file count

1 test, 0 failures
To make it easier to run this command, create a Docker Compose file:
version: '2'
services:
  tests:
    image: buildkite/plugin-tester
    volumes:
      - ".:/plugin:ro"
You can now run the tests using the following command:
docker-compose run --rm tests
Step 6: Add a readme
Next, add a README.md file to introduce the plugin to the world:
# File Counter Buildkite Plugin

Annotates the build with a file count.

## Example

Add the following to your `pipeline.yml`:

```yml
steps:
  - command: ls
    plugins:
      - a-github-user/file-counter#v1.0.0:
          pattern: '*.md'
```

## Configuration

### `pattern` (Required, string)

The file name pattern, for example `*.ts`. Supports any pattern supported by [find -name](http://man7.org/linux/man-pages/man1/find.1.html).

## Developing

To run the tests:

```shell
docker-compose run --rm tests
```

## Contributing

1. Fork the repo
2. Make the changes
3. Run the tests
4. Commit and push your changes
5. Send a pull request
Developing a plugin with a feature branch
When developing plugins, it is useful to have a quick feedback loop between making a change in your plugin code, and seeing the effects in a Buildkite pipeline. Let's say you're developing your feature on my-org/plugin#dev-branch. By default, if a Buildkite agent sees that it needs the plugin my-org/plugin#dev-branch, and it already has a checkout matching that, it will not pull any changes from the Git repository. But if you do want to see changes reflected immediately, set plugins-always-clone-fresh to true.
One way to try this is to add the following step to the Buildkite pipeline where you're testing your plugin. Configuring BUILDKITE_PLUGINS_ALWAYS_CLONE_FRESH on only one step means that other plugins, which are unlikely to be changing in the meantime, won't get unnecessarily cloned on every step invocation. You need agent version v3.37.0 or above to use BUILDKITE_PLUGINS_ALWAYS_CLONE_FRESH.
steps:
  - command: ls
    env:
      BUILDKITE_PLUGINS_ALWAYS_CLONE_FRESH: "true"
    plugins:
      - a-github-user/file-counter#dev-branch:
          pattern: '*.md'
Publish to the Buildkite plugins directory
To publish your plugin to the Buildkite plugins directory:
- Host your plugin in GitHub as a public repository.
- Ensure your repository contains a valid
plugin.ymlfile containing at least thenameanddescriptionfields. - Add the
buildkite-pluginGitHub repository topic tag (your plugin will become discoverable under thebuildkite-pluginrepository topic tag as a result). - Wait until the next Sunday (UTC) for the plugins directory to sync with GitHub, and for your plugin to appear.
For example:
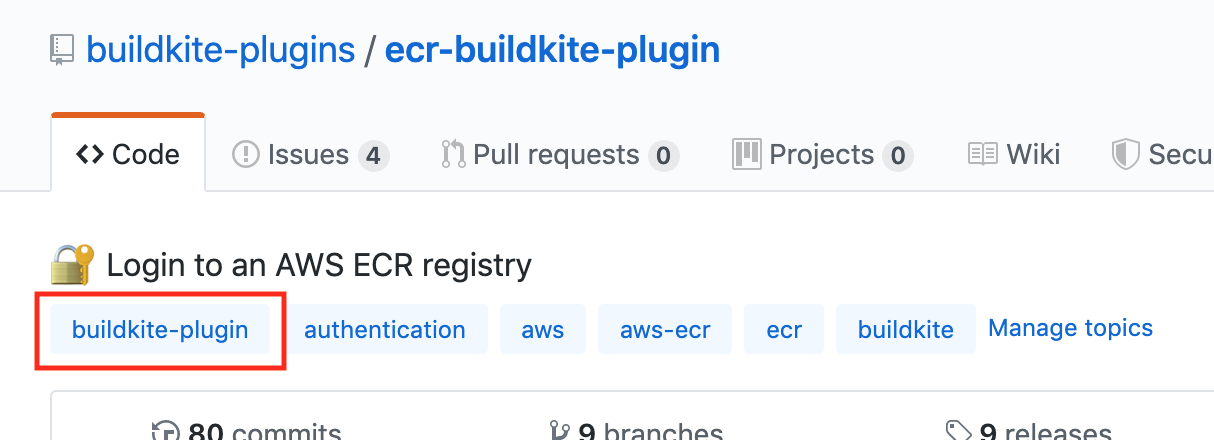
Once completed, your plugin will appear in the directory:
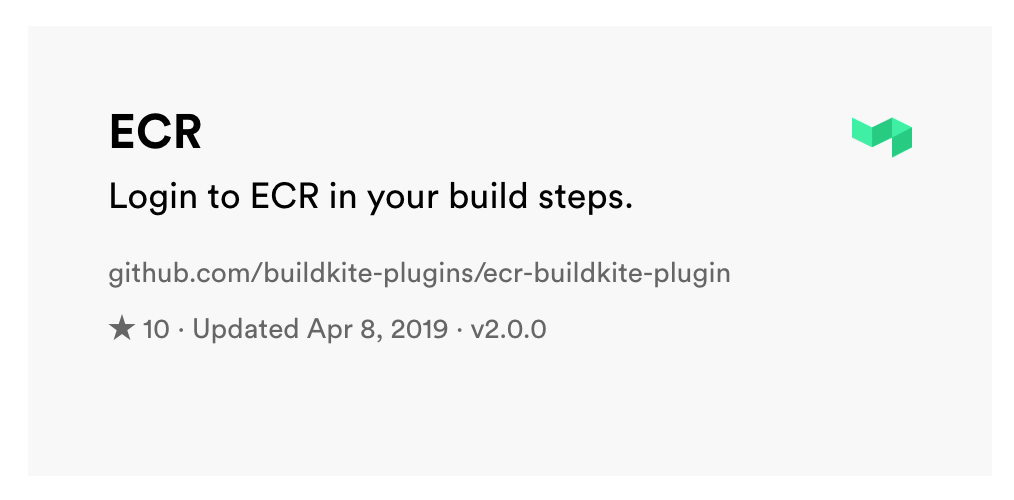
If you would like your plugin to appear in a certain category in the plugins directory, you need to add the corresponding GitHub label(s). Currently, the following labels will be recognized by the plugins directory:
- Task
- Code checkout:
checkout,git,svn - Tests:
test,testing,junit,jest - Cache:
cache,caching - Containers/Docker:
docker,container,containers - Running jobs in Kubernetes :
kubernetes,k8s - Secrets:
secret,secrets,vault - Authenticate:
auth,authenticate - Writing Buildkite pipelines:
pipeline,pipelines - Deploy:
deploy,deployment,release - Running jobs in VMs:
vm,virtual machine - Security & compliance:
security,compliance,audit,scan,scanning,vulnerability - Running jobs in Windows:
windows - Observability:
observability,monitoring,logging,metrics - Mobile app development:
mobile,ios,android,react-native - Notify:
notify,notification - Linting & formatting:
lint,linting,format,formatting,shellcheck - Packages:
package,packaging,npm,pip - AI/LLMs:
ai,llm,ml,machine learning - Project management:
project,management - Incident management:
incident,incident-response,alert
- Code checkout:
- Integration
- Integrations:
integration,integrations,slack,discord,jira - AWS:
aws,amazon - GCP:
gcp,google-cloud,google - Azure:
azure,microsoft
- Integrations:
- Language
- Java:
java,maven,gradle - Ruby:
ruby,rails - Golang:
go,golang - JavaScript:
javascript,typescript,node,nodejs - Bazel:
bazel - Infrastructure as code:
terraform,cloudformation,cfn,infrastructure - Other languages:
julia,python,rust,c++,c#,dhall
- Java:
If you've completed the above steps and your plugin doesn't appear in the directory, send an email to support@buildkite.com and we'll investigate it for you.
Designing plugins: single-command plugins versus library plugins
When writing plugins, there are two patterns you can choose from:
- A single-command plugin: a small, declarative plugin, which exposes a single command for use in your pipeline steps. Most plugins follow this pattern.
- A library plugin, or super-plugin: this plugin type assembles multiple commands into one plugin. Refer to the library example Buildkite plugin for an example of how to set up this type of plugin.
Vendored plugins
If you don't plan to share the plugin outside of one repository, you can use a vendored plugin. Vendored plugins sit alongside the rest of the repository code, and you include them with a relative path:
steps:
  - command: ls
    plugins:
      - ./relative/path/to/plugin:
          pattern: '*.md'
Vendored plugins run after non-vendored plugins and don't have access to all the same hooks. See the documentation about job lifecycle hooks to learn more.
Subdirectory plugins
You can store multiple plugins in subdirectories of a single Git repository and reference them by appending the subdirectory path to the plugin URL. This lets you manage a collection of related plugins in one repository instead of maintaining separate repositories for each plugin.
steps:
  - command: ls
    plugins:
      - https://github.com/my-org/my-buildkite-plugins.git/plugin-one#v1.0.0: ~
      - https://github.com/my-org/my-buildkite-plugins.git/plugin-two#v1.0.0: ~
      - https://github.com/my-org/my-buildkite-plugins.git/nested/plugin-three#v1.0.0: ~
Each subdirectory should contain its own plugin.yml and hooks/ directory, just like a standalone plugin:
my-buildkite-plugins/
├── plugin-one/
│   ├── hooks/
│   │   └── environment
│   └── plugin.yml
├── plugin-two/
│   ├── hooks/
│   │   └── post-command
│   └── plugin.yml
└── nested/
    └── plugin-three/
        ├── hooks/
        │   └── pre-exit
        └── plugin.yml
The agent clones the entire repository, then uses the hooks and configuration from the specified subdirectory.
Subdirectory plugins requires v3.108.0 or later of the Buildkite agent.
Cross-platform plugins
Plugins can support multiple operating systems by including platform-specific hook scripts. The Buildkite agent automatically selects the appropriate hook file based on the operating system it's running on.
How hook file selection works
On Windows, the agent searches for hook files in the following order:
hooks/<hook-name>.bathooks/<hook-name>.cmdhooks/<hook-name>.ps1hooks/<hook-name>.exe-
hooks/<hook-name>(no file extension, for Bash for Windows)
On Linux and macOS, the agent only looks for no file extension hook files (for example, hooks/<hook-name>).
The agent uses the first matching file it finds.
Writing a cross-platform plugin
To support both Windows and Unix-like systems, include both hook variants in your plugin:
my-plugin/
├── hooks/
│   ├── post-checkout      # Linux and macOS (no file extension, executable)
│   └── post-checkout.bat  # Windows Batch script
├── plugin.yml
└── README.md
The agent running the job selects the appropriate file automatically. You don't need separate plugins for different operating systems.
Example hooks
A Linux/macOS hook (hooks/post-checkout):
#!/bin/bash
set -euo pipefail

echo "Running on Unix-like system"
export MY_VAR="value"
An equivalent Windows hook (hooks/post-checkout.bat):
@ECHO OFF

echo Running on Windows
SET MY_VAR=value
Plugin tools
The following tools can be helpful when creating and maintaining your own Buildkite plugins:

For help writing the JSON Schema in the configuration key of your plugin.yml file, the following resources may be useful:
 JSON Schema
The official JSON Schema specification.
json-schema.org
JSON Schema
The official JSON Schema specification.
json-schema.org
JSON Schema Lint
Validating your JSON schema with YAML.
jsonschemalint.com