Deploying to Kubernetes
This tutorial demonstrates deploying to Kubernetes using Buildkite best practices.
The tutorial uses one pipeline for tests and another for deploys.
The test pipeline runs tests and push a Docker image to a registry. The deploy pipelines uses the DOCKER_IMAGE environment variable to create a Kubernetes deployment using kubectl. Then, you'll see how to link them together to automate deploys from the main branch.
First up, you need to add a step to your existing test pipeline that pushes a
Docker image. Also check your agents have kubectl access to your target
cluster. Refer to the notes at the end of tutorial for tips on setting this
up.
Create the deploy pipeline
This section covers creating a new Buildkite pipeline that loads steps from .buildkite/pipeline.deploy.yml. We'll use a trigger step later on to connect the test and deploy pipelines.
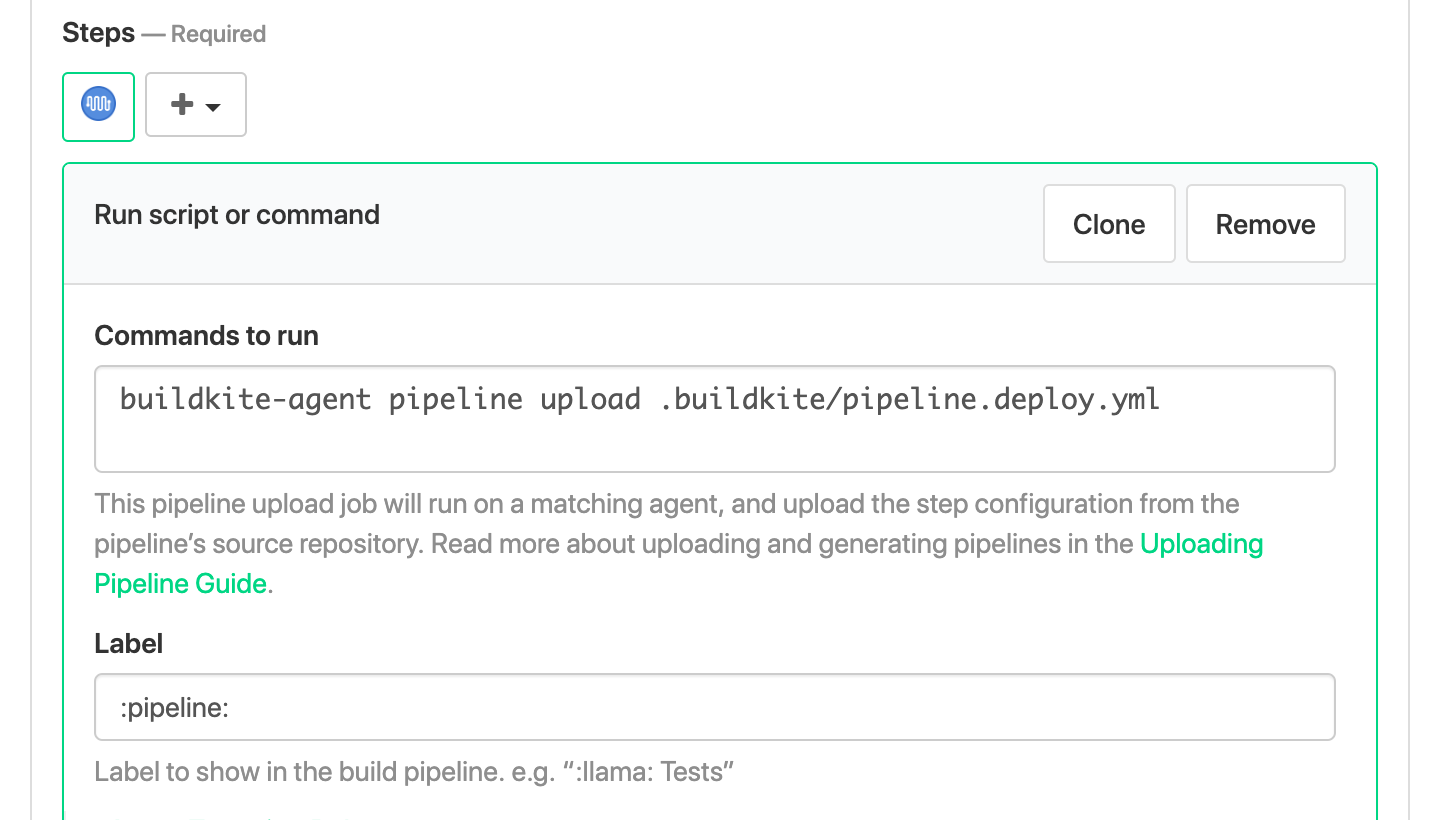
The first step will be a pipeline upload using our new deploy pipeline YAML
file. Create a new pipeline. Enter buildkite-agent pipeline upload
.buildkite/pipeline.deploy.yml in the commands to run field.
Now create .buildkite/pipeline.deploy.yml with a single step. We'll write the
deploy script in the next step.
steps:
  - label: ":rocket: Push to :kubernetes:"
    command: script/buildkite/deploy
    concurrency: 1
    concurrency_group: deploy/tutorial
Set concurrency and concurrency_group when updating mutable state. These
settings ensure only one step runs at a time.
Writing the deploy script
The next step is writing a deploy script that generates a Kubernetes deployment
manifest from the DOCKER_IMAGE environment variable.
Let's start with manifest file. This sample file creates a Deployment with
three replicas (horizontal scale in Kubernetes lingo) each listening port
3000. Change the containerPort to fit your application.
The official deployment documentation covers much more than what fits in this tutorial. Refer back to these docs for information on setting CPU and memory, controlling networking, deployment update strategies, and how to expose your application to the internet.
Let's call this file k8s/deployment.yml.
---
apiVersion: apps/v1
kind: Deployment
metadata:
  name: tutorial
  labels:
    app: tutorial
spec:
  # TODO: replace with a value that fits your application
  replicas: 3
  selector:
    matchLabels:
      app: tutorial
  template:
    metadata:
      labels:
        app: tutorial
    spec:
      containers:
        - name: app
          image: "${DOCKER_IMAGE}"
          ports:
            # TODO: replace with the correct port for your application
            - containerPort: 3000
Note manifest includes ${DOCKER_IMAGE}. There is no environment variable
substitution in YAML or kubectl itself. This is where our custom deploy script
comes in. Our deploy script will use envsubst ("environment substitute";
docs) as a minimal templating solution.
The resulting output may be piped directly into kubectl.
The full script has three parts:
- Check
$DOCKER_IMAGEis set - Generate a complete manifest with
envsubstand apply withkubectl - Wait for Kubernetes to complete the deploy.
This fits neatly into a Bash script. Here's the complete script/buildkite/deploy:
#!/usr/bin/env bash

set -euo pipefail

if [ -z "${DOCKER_IMAGE:-}" ]; then
  echo ":boom: \$DOCKER_IMAGE missing" 1>&2
  exit 1
fi

manifest="$(mktemp)"

echo '--- :kubernetes: Shipping'

envsubst < k8s/deployment.yml > "${manifest}"
kubectl apply -f "${manifest}"

echo '--- :zzz: Waiting for deployment'
kubectl wait --for condition=available --timeout=300s -f "${manifest}"
You can test your pipeline now that everything is in place. All you need is your Docker image.
Test the pipeline
Open the deployment pipeline and click "New Build". Click "Options" and set the
DOCKER_IMAGE environment variable.
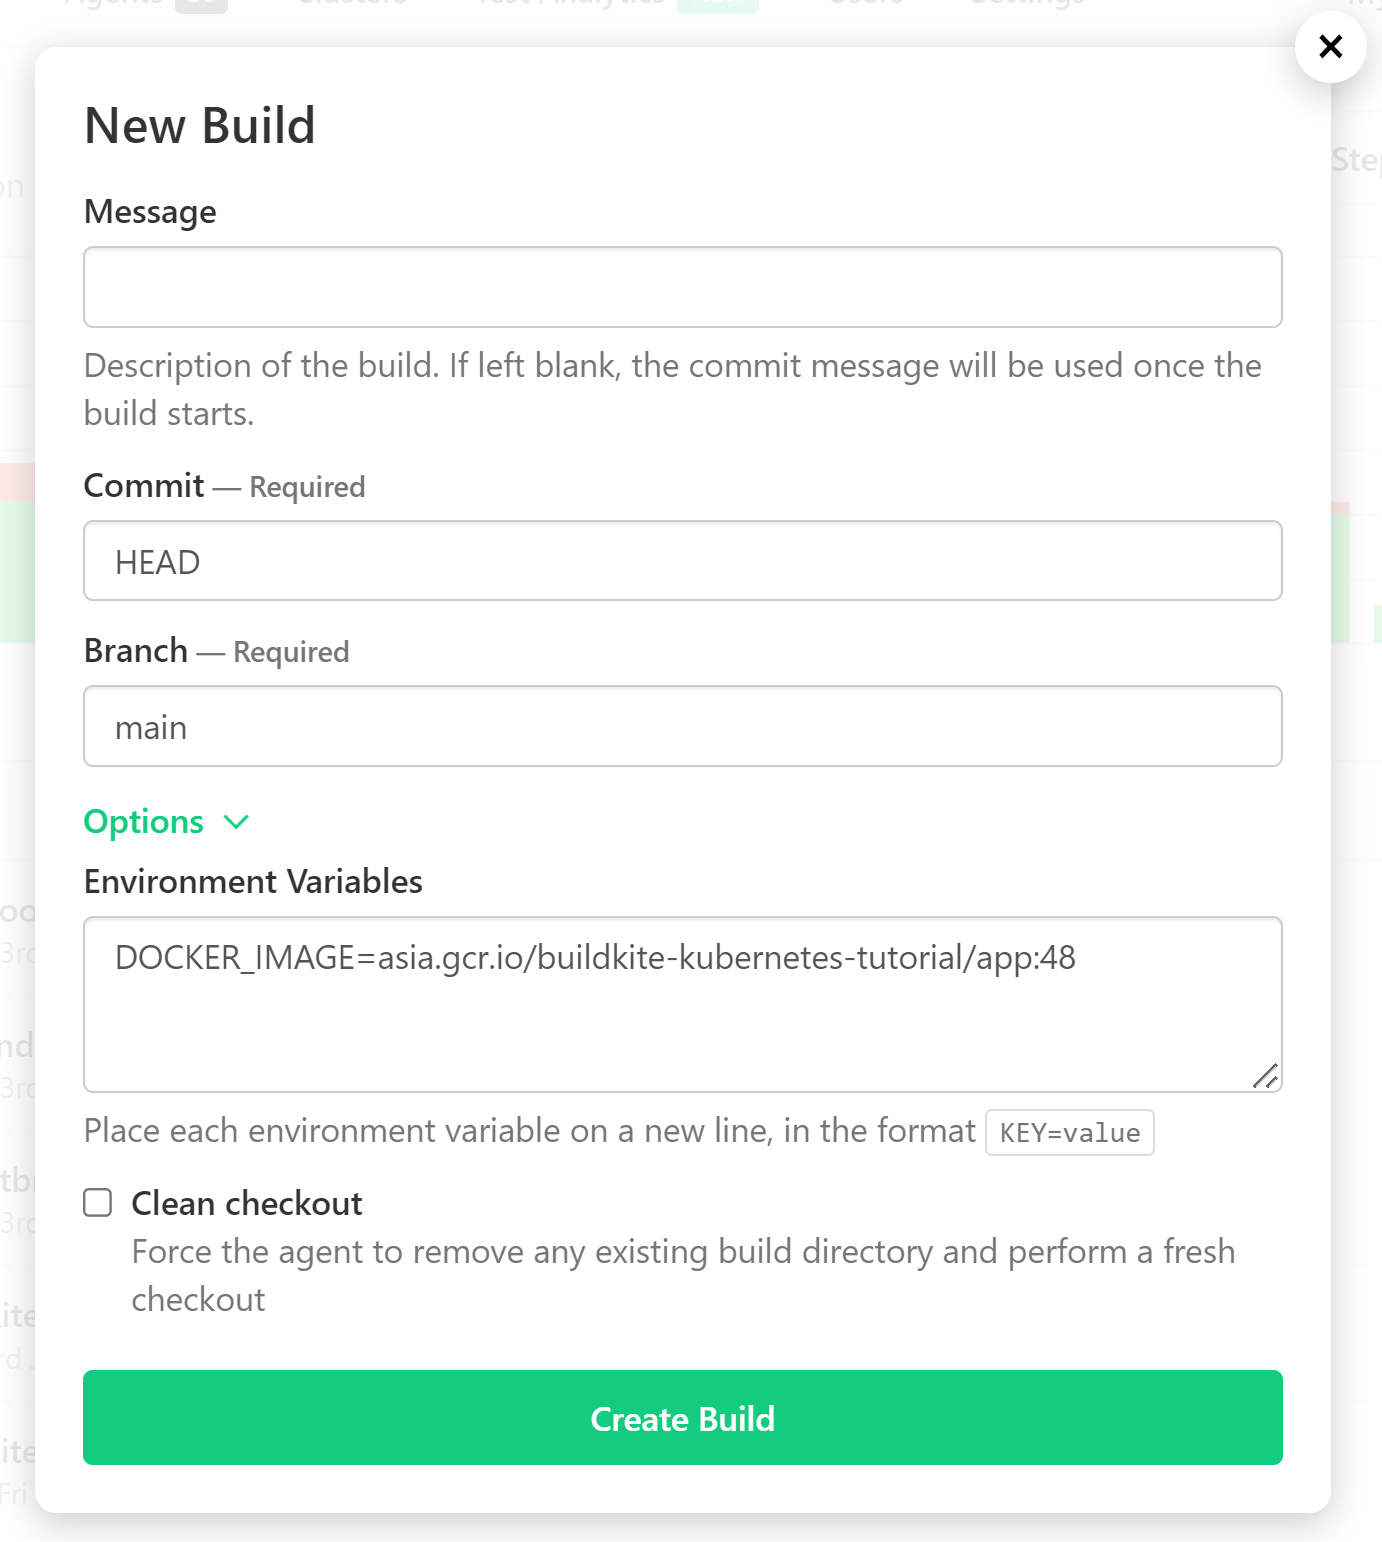
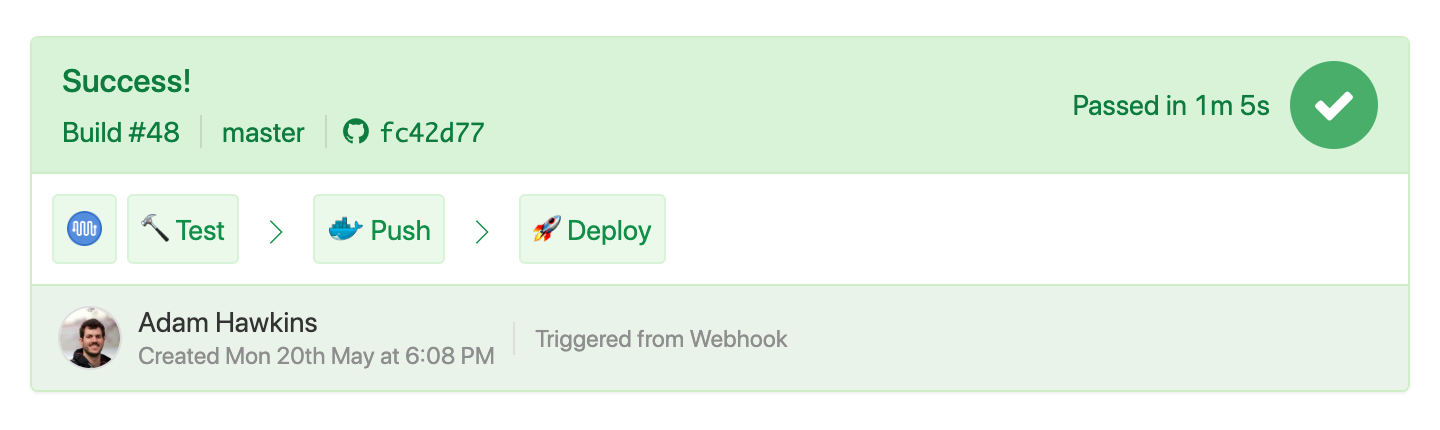
Assuming your agents have the required access to run kubectl against your cluster, then success! 🎉

Continuous deployment
We'll use a trigger steps to connect the test and deploy pipelines. This effectively creates a continuous deployment pipeline.
First, add a wait step at the end of your existing .buildkite/pipeline.yml
otherwise deploys will trigger at the wrong time, and even for failed builds!
  # Add a wait step to only deploy after all steps complete
  - wait

  # More steps to follow
Next add a trigger step:
  - label: '🚀 Deploy'
    # TODO: replace with your deploy pipeline's name
    trigger: kubernetes-tutorial-deploy
    # Only trigger on main build
    build:
      message: "${BUILDKITE_MESSAGE}"
      commit: "${BUILDKITE_COMMIT}"
      branch: "${BUILDKITE_BRANCH}"
      env:
        # TODO: replace with your Docker image name
        DOCKER_IMAGE: "asia.gcr.io/buildkite-kubernetes-tutorial/app:${BUILDKITE_BUILD_NUMBER}"
    branches: main
This trigger step creates a build with the same message, commit, and branch.
buildkite-agent pipeline-upload interpolates environment variables so the
correct values are replaced when the pipeline starts. The env setting passes
along the DOCKER_IMAGE environment variable.
Lastly, the branches options indicates to only build on main. This
prevents deploying unexpected topic branches.
It's magic time. Push some code. 🎉 Continuous deployment! If something
goes wrong, then verify your kubectl and Kubernetes versions are compatible.
You can check with kubectl version. If your agents cannot connect to the
cluster, then check the kubectl access section for setup advice.
Deploying with the Helm chart plugin
For complex applications that are already packaged as Helm charts, the Buildkite deployment Helm chart plugin provides a robust deployment solution. Unlike the kubectl approach, Helm maintains deployment history and enables safe rollbacks when deployments fail or cause issues in production. The ability to instantly revert to the previous working version without manual intervention or complex recovery procedures is a critical advantage for production environments where downtime must be minimized.
Deployment example
Instead of a custom deploy script, you can use the Helm plugin in your .buildkite/pipeline.deploy.yml. The plugin will receive the same DOCKER_IMAGE environment variable from your trigger step:
steps:
  - label: "🚀 Deploy to Production"
    command: |
      echo "Deploying Docker image: $${DOCKER_IMAGE}"
      echo "Extracting image repository and tag..."
      export IMAGE_REPOSITORY="$$(echo "$${DOCKER_IMAGE}" | cut -d: -f1)"
      export IMAGE_TAG="$$(echo "$${DOCKER_IMAGE}" | cut -d: -f2)"
      echo "Repository: $${IMAGE_REPOSITORY}"
      echo "Tag: $${IMAGE_TAG}"
    plugins:
      - deployment-helm-chart#v1.0.0:
          mode: deploy
          chart: ./k8s/helm-chart
          release: tutorial
          namespace: default
          values:
            - k8s/helm-chart/values.yaml
          set:
            - image.repository=${IMAGE_REPOSITORY}
            - image.tag=${IMAGE_TAG}
            - replicas=3
          create_namespace: true
          wait: true
          atomic: true
          timeout: 600s
Rollback example
steps:
  - label: "🔄 Rollback Deployment"
    plugins:
      - deployment-helm-chart#v1.0.0:
          mode: rollback
          release: tutorial
          namespace: default
          revision: 15  # Optional: specific revision to rollback to
Note that while the example above shows how to integrate the Helm plugin with the existing kubectl workflow using DOCKER_IMAGE, the plugin can also be used independently. You can configure it with its own parameters as below:
steps:
   - label: "🚀 Deploy to Production"
     plugins:
       - deployment-helm-chart#v1.0.0:
           mode: deploy
           chart: ./k8s/helm-chart
           release: tutorial
           namespace: production
           repo_url: https://charts.yourcompany.com
           repo_name: yourcompany
           values:
             - k8s/helm-chart/values.yaml
             - k8s/helm-chart/values-prod.yaml
           set:
             - image.tag=v1.2.3
             - replicas=5
             - environment=production
           create_namespace: true
           wait: true
           atomic: true
           timeout: 600s
     concurrency: 1
     concurrency_group: deploy/production
Next steps
Congratulations! 🎉 You've set up a continuous deployment pipeline to Kubernetes. Here are some things to do next:
- Try a block step before the trigger to enforce manual deploys.
- Use GitHub's Deployment API to trigger deployments from external tooling (for example, ChatOps).
- Expose the application to the internet with Kubernetes Service.
- Replace the
envsubstimplementation with something like kustomize
Configuring kubectl and Helm access
Configuring kubectl and helm access depends on your infrastructure. Here's an overview
for common scenarios.
If you're on GCP using agents on GCE and a GKE cluster:
- Grant GCE agents GKE access with a service account
- Install
gcloudandhelmon agent instances - Use
gcloud container clusters get-credentialsto getkubectlaccess - Helm will automatically use the same kubeconfig as kubectl
If you're on AWS using agents on EC2 and an EKS cluster:
- Grant agent access to EKS API calls with an instance profile
- Register the Buildkite agent IAM role with EKS
- Install kubectl and helm on agents
- Install IAM authenticator on agents
- Install the AWS CLI
- Use
aws update-kubeconfigto get kubectl access - Helm will automatically use the same kubeconfig as kubectl