Pipeline triggers
A pipeline trigger is a type of incoming webhook that creates new builds of a Buildkite pipeline, based on events from external systems.
To trigger pipelines from source control events, see Source control for a list of source control systems that Buildkite supports and integrates with.
Pipeline triggers are HTTP endpoints that create builds when they receive POST requests. Each pipeline trigger has a unique URL that accepts JSON payloads, making them ideal for integrating Buildkite with the other tools you use.
A pipeline trigger is scoped to a specific Buildkite pipeline, and can be used to trigger builds from monitoring alerts, deployment systems, or any service that can send outbound webhooks.
The pipeline triggers feature is currently in public preview. To provide feedback, please contact Buildkite's Support team at support@buildkite.com.
Supported incoming webhooks
Buildkite's pipeline triggers feature supports the following types of incoming webhooks:
- Webhook: A generic webhook from any service that can send HTTP POST requests.
- GitHub: A GitHub webhook trigger with signature verification support. This is supplementary to Buildkite's GitHub repository provider integration.
- Linear: A Linear webhook trigger with signature verification support.
Create a new pipeline trigger
To create a new pipeline trigger using the Buildkite interface:
From your Buildkite dashboard, ensure that Pipelines is selected in the global navigation, and then select your pipeline.
Select your pipeline's Settings button > Triggers.
On the Triggers page, select the New Trigger button to create a new pipeline trigger.
Select the Add button next to one of the supported types of incoming webhooks.
-
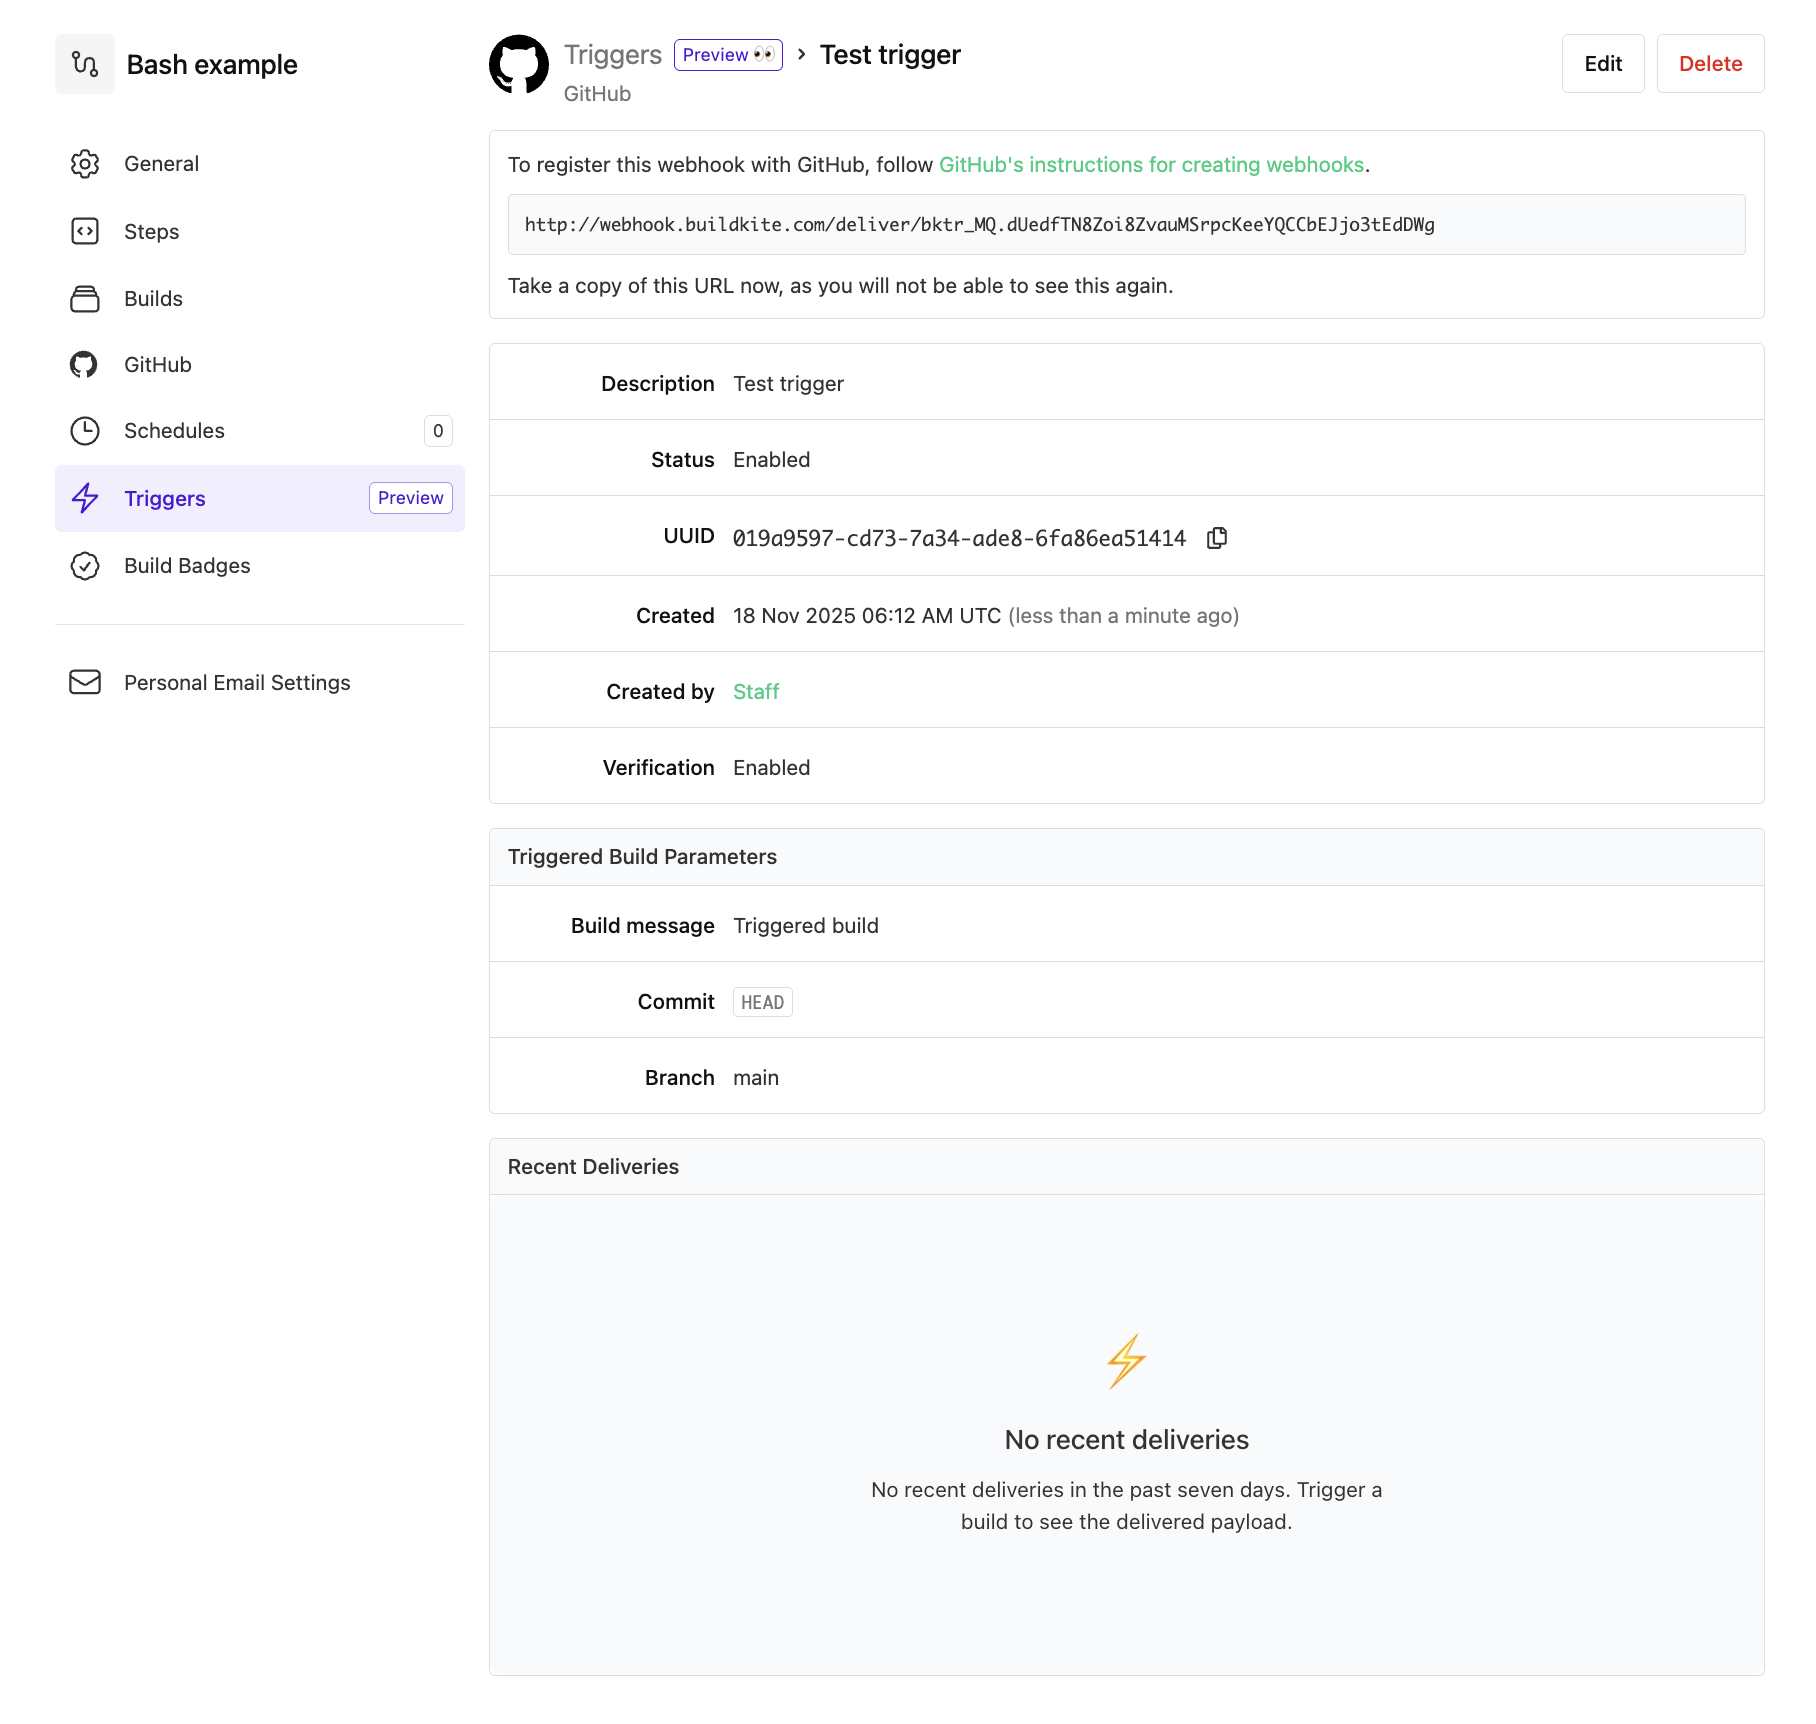
Configure your pipeline trigger, by completing its fields, noting that the Description, Branch, and Commit fields are required to generate a unique endpoint.
Description The description for the pipeline trigger, which is its name in the list of existing triggers on the Triggers page. Enabled If this checkbox is selected, then the pipeline trigger will be active and accept incoming webhook events as soon as this pipeline trigger is created. Clear this checkbox if you don't want the pipeline trigger to be active immediately after its creation. Build message The message for your triggered build, which appears on the pipeline page as part of its build history. If none is specified, this value defaults to Triggered build. Commit The commit ref the triggered build will run against. If none is specified, this value defaults to HEAD.Branch The branch the triggered build will run against. If none is specified, this value defaults to main.Environment variables Optional environment variables to set for the build. Each new environment variable should be entered on a new line.
Example:FOO=bar
BAZ=quux -
If you had chosen either GitHub or Linear as your incoming webhook for this pipeline trigger, you can optionally choose validate the authenticity of these webhook payloads. Learn more about this feature in Webhook verification. To do this:
- Expand the Security section and select Validate/Verify webhook deliveries.
- In the Secret/Signing secret field, enter the webhook secret/token that you configured in your GitHub or Linear webhook settings.
-
After completing these fields, select Create Trigger to create the pipeline trigger.
-
On the next page, follow the instructions in the Webhook URL (or equivalent) field to copy and save your webhook trigger's URL to a secure location, as you won't be able to see its full value again through the Buildkite interface.
Important: If you created a pipeline trigger for a GitHub or Linear incoming webhook, then before leaving from this page, follow any additional linked instructions to register this URL for your pipeline trigger (webhook) as part of your incoming GitHub or Linear webhook.
That's it! You've completed creating your pipeline trigger, and the new pipeline trigger appears in the list of existing triggers on the Triggers page. See the following section on Endpoint to learn more about the pipeline trigger and how it works, and you're now ready to invoke your trigger.
Endpoint
Each pipeline trigger has a unique endpoint with the following URL structure:
https://webhook.buildkite.com/deliver/bktr_************
All requests sent to this endpoint must be HTTP POST requests with application/json encoded bodies.
Response
A successful trigger request returns a 201 Created response with an identifier for the webhook delivery:
{
  "id": "f62a1b4d-10f9-4790-bc1c-e2c3a0c80983"
}
Error responses
400 Bad request |
{ "message": "Invalid pipeline trigger token" } |
|---|---|
403 Forbidden |
{ "message": "Pipeline trigger is disabled" } |
404 Not Found |
{ "message": "Pipeline trigger not found" } |
Webhook verification
When creating or editing your Buildkite pipeline trigger based on either the GitHub or Linear incoming webhook types, you can optionally validate the authenticity of these webhook payloads. This mitigates the risk of unauthorized parties tampering with webhook payloads from these services.
If you want to validate the authenticity of these incoming webhook types, ensure you have configured their respective secret/token, which you'll need for your Buildkite pipeline trigger configuration.
Learn more about to configure these secrets/tokens in the following relevant documentation:
Buildkite pipeline triggers with verification enabled will ensure that all their incoming webhooks match the signature types in their request headers, before these webhooks and their payloads are accepted:
GitHub: HMAC-SHA256 signatures in the
X-Hub-Signature-256header.Linear: HMAC-SHA256 signatures in the
Linear-Signatureheader.
Be aware that this verification feature is not available for generic incoming webhooks (that is, the Webhook pipeline trigger option).
Invoke a pipeline trigger
To create a build using a webhook pipeline trigger, send an HTTP POST request to the trigger URL. Each trigger accepts a JSON payload, which is accessible to all build steps (see Accessing pipeline trigger data for details).
Here's an example using curl:
curl -H "Content-Type: application/json" \
  -X POST "https://webhook.buildkite.com/deliver/bktr_************" \
  -d '{
    "id": "P2LA89X",
    "message": "A fix for this incident is being developed",
    "trimmed": false,
    "type": "incident_status_update",
    "incident": {
      "html_url": "https://acme.pagerduty.com/incidents/PGR0VU2",
      "id": "PGR0VU2",
      "self": "https://api.pagerduty.com/incidents/PGR0VU2",
      "summary": "A little bump in the road",
      "type": "incident_reference"
    }
  }'
You've just created your first build using a pipeline trigger.
Be aware that the presence of a "message": "Any value" field in the JSON payload does not override the value of the Build message set when creating the pipeline trigger. All such values in the payload form part of the pipeline trigger's data.
Accessing pipeline trigger data
JSON payloads sent to a pipeline trigger URL are accessible in all steps of the triggered build.
You can retrieve the webhook payload using the Buildkite agent CLI command buildite-agent meta-data.
Example
The following sample JSON payload is obtained from a GitHub webhook event for closing a GitHub pull request:
{
  "action": "closed",
  "number": 123,
  "organization": "Buildkite",
  "pull_request": {
    "url": "https://www.github.com/buildkite/dummy-repo",
    "id": 456,
    "number": 123,
    "state": "closed",
    "title": "Integrate into Buildkite pipeline triggers",
    "closed_at": "2025-10-14T02:14:39Z",
    "merged": false,
    "merged_at": null
  }
}
Accessing this JSON payload posted to your pipeline trigger endpoint can be done using the buildkite:webhook meta-data key, which is a special Buildkite meta-data key:
steps:
  - command: |
      WEBHOOK="$(buildkite-agent meta-data get buildkite:webhook)"
      ACTION="$(jq -r '.action' <<< "$WEBHOOK")"
      MERGED="$(jq -r '.pull_request.merged' <<< "$WEBHOOK")"

      if [[ "$ACTION" == "closed" && "$MERGED" == "false" ]]; then
        echo "PR was manually closed"
      fi
The buildkite:webhook meta-data itself is only available to builds triggered by any incoming webhook, and only for as long as the webhook data remains cached, which is typically for 7 days.
Limitations
Be aware that pipeline triggers have the following limitations:
- Custom webhook triggers do not support webhook signature verification (for example, HMAC signatures).
- A pipeline trigger's URL cannot be rotated. If the trigger's
bktr_value has been compromised, you'll need to delete and re-create a new trigger with the same attributes. - The Commit and Branch build attributes are only supported by their values defined in the pipeline trigger itself, when it was either created or last edited, and these values cannot be mapped from fields of the incoming webhook's JSON payload.
- A successful POST request to a pipeline trigger will always trigger a build. Pipeline triggers cannot be selectively triggered based on any content from the incoming webhook's JSON payload.
- Pipeline triggers can only be managed through the Buildkite interface. There is no support for managing pipeline triggers (that is, creating, editing or deleting pipeline triggers) through the Buildkite API.
- There is no Buildkite interface or API support for listing builds created from a pipeline trigger.
- Unlike JSON payloads, HTTP headers are not accessible to pipelines in requests to pipeline triggers.
- A pipeline trigger's webhook cannot be restricted by IP address.
- A pipeline trigger's JSON payload is limited to a maximum size of 5MB.
- Trigger URL endpoints have a request limit of 300 requests per hour. This limit is shared across all pipeline triggers for an organization.
- Webhook metadata payload retrieval is rate limited to 10 requests per minute per build.
- Each pipeline is limited to 10 configurable triggers.
Next steps
Learn more about how pipeline triggers integrate with other aspects of Buildkite Pipelines from the follow topic sections:
- Special meta-data—covers details on how to retrieve meta-data from a Buildkite pipeline.
-
buildkite-agent meta-dataCLI command—covers details on this actual meta-data retrieval command of the Buildkite agent and all of its options. - Incoming webhook security overview—provides information on the type of data logged by incoming webhooks.