Backstage
Backstage is an open source framework for building developer portals that provide a unified front end for many development and CI/CD tools in one place. The Buildkite plugin for Backstage integrates your Buildkite CI/CD pipelines directly into your Backstage service catalog, providing real-time build monitoring and management capabilities.
Features
The Buildkite plugin for Backstage provides integration capabilities that allow for:
- Real-time build status monitoring - view the current status of your builds and build information directly in Backstage.
- Comprehensive build log tracking - access detailed build logs with syntax highlighting without leaving Backstage.
- Advanced filtering and search capabilities - quickly find specific builds using powerful multiple-criteria filters.
- Interactive build management - trigger rebuilds and manage builds from within Backstage or click through to Buildkite.
- Customization options - configure the plugin to match your team's workflow with custom styling and time settings.
Installation requirements
Before installing the Buildkite Backstage plugin, ensure you have:
- At least one existing Buildkite pipeline.
- An up-to-date Backstage instance.
- A Buildkite API access token with the following permissions:
read_pipelinesread_buildsread_user-
write_builds(for rebuild functionality)
Installation
Regardless of whether you are installing the Buildkite plugin for Backstage from your project's plugins directory or from an external package, run the following command to install the plugin:
yarn workspace app add @buildkite/backstage-plugin-buildkite
Plugin configuration
Follow these steps to configure the Buildkite plugin for Backstage after the installation.
Add proxy configuration
Add the proxy configuration to your app-config.yaml:
proxy:
  endpoints:
    '/buildkite/api':
      target: https://api.buildkite.com/v2
      headers:
        Authorization: Bearer ${BUILDKITE_API_TOKEN}
        Accept: application/json
      allowedHeaders: ['Authorization']

buildkite:
  apiToken: ${BUILDKITE_API_TOKEN}
  organization: ${BUILDKITE_ORGANIZATION}
Make sure to set the BUILDKITE_API_TOKEN environment variable with your Buildkite API access token.
Add the API factory
Add the API factory in packages/app/src/apis.ts:
import { buildkiteAPIRef, BuildkiteClient } from '@buildkite/backstage-plugin-buildkite';

export const apis: AnyApiFactory[] = [
  createApiFactory({
    api: buildkiteAPIRef,
    deps: { discoveryApi: discoveryApiRef, fetchApi: fetchApiRef, configApi: configApiRef },
    factory: ({ discoveryApi, fetchApi, configApi }) => {
      const buildkiteConfig = configApi.getOptionalConfig('buildkite');
      return new BuildkiteClient({
        discoveryAPI: discoveryApi,
        fetchAPI: fetchApi,
        config: {
          organization: buildkiteConfig?.getOptionalString('organization') ?? 'default-org',
          defaultPageSize: buildkiteConfig?.getOptionalNumber('defaultPageSize') ?? 25,
          apiBaseUrl: buildkiteConfig?.getOptionalString('apiBaseUrl') ?? 'https://api.buildkite.com/v2',
        },
      });
    },
  }),
];
Add the routes
Add the routes to the Buildkite plugin in packages/app/src/App.tsx:
import { PipelinePage } from '@buildkite/backstage-plugin-buildkite';

const routes = (
  <FlatRoutes>
    {/* Other routes... */}

    {/* Buildkite Plugin Routes */}
    <Route path="/buildkite" element={<PipelinePage />} />
    <Route path="/buildkite/pipeline/:orgSlug/:pipelineSlug" element={<PipelinePage />} />
  </FlatRoutes>
);
Add the plugin to your Entity Page
Add the Buildkite plugin for Backstage to your Entity Page in Backstage:
import { isBuildkiteAvailable, BuildkiteWrapper } from '@buildkite/backstage-plugin-buildkite';

const cicdContent = (
  <EntitySwitch>
    <EntitySwitch.Case if={isBuildkiteAvailable}>
      <BuildkiteWrapper />
    </EntitySwitch.Case>
    <EntitySwitch.Case>
      <EmptyState
        title="No CI/CD available for this entity"
        missing="info"
        description="Add a Buildkite annotation to enable CI/CD visualization"
      />
    </EntitySwitch.Case>
  </EntitySwitch>
);

const defaultEntityPage = (
  <EntityLayout>
    {/* Other routes... */}

    <EntityLayout.Route path="/ci-cd" title="CI/CD">
      {cicdContent}
    </EntityLayout.Route>
  </EntityLayout>
);
Configuration
To link a component in your Backstage catalog to a Buildkite pipeline, add the Buildkite annotation to the component's catalog-info.yaml:
metadata:
  annotations:
    buildkite.com/pipeline-slug: organization-slug/pipeline-slug
The pipeline-slug should be in the format organization-slug/pipeline-slug, where:
-
organization-slugis your Buildkite organization's slug. -
pipeline-slugis the specific pipeline's slug.
Deployment tracking
The Buildkite plugin for Backstage can track deployments across your pipelines. Here are the ways to mark builds as deployments. Choose the one that suits your use case.
Using the metadata
You can mark builds for deployment by setting the environment metadata field in your Buildkite pipeline build using the following command:
# In your pipeline.yml
steps:
  - label: "Deploy to Production"
    command: |
      buildkite-agent meta-data set "environment" "production"
      ./scripts/deploy.sh
Using the deployment pattern settings
If you would like to track both the application name and environment for your deployments, use the app:environment:deployed pattern:
# In your pipeline.yml
steps:
  - label: "Deploy Frontend to Staging"
    command: |
      buildkite-agent meta-data set "frontend:staging:deployed" "true"
      ./scripts/deploy-frontend-staging.sh
    branches: "main"

  - label: "Deploy Backend to Staging"
    command: |
      buildkite-agent meta-data set "backend:staging:deployed" "true"
      ./scripts/deploy-backend-staging.sh
    branches: "main"
This way, you can track multiple applications deployed to different environments. Backstage will display both the application name and environment in the deployments view.
Using environment-specific deployment flags
If you would like to track multiple deployments from a single build as they sequentially progress through your environments (for example, from staging to production), you can use environment-specific flags:
# In your pipeline.yml
steps:
  - label: "Deploy to Staging"
    command: |
      buildkite-agent meta-data set "staging_deployment" "true"
      ./scripts/deploy-staging.sh
    branches: "main"

  - block: "Promote to Production?"
    branches: "main"

  - label: "Deploy to Production"
    command: |
      buildkite-agent meta-data set "production_deployment" "true"
      ./scripts/deploy-production.sh
    branches: "main"
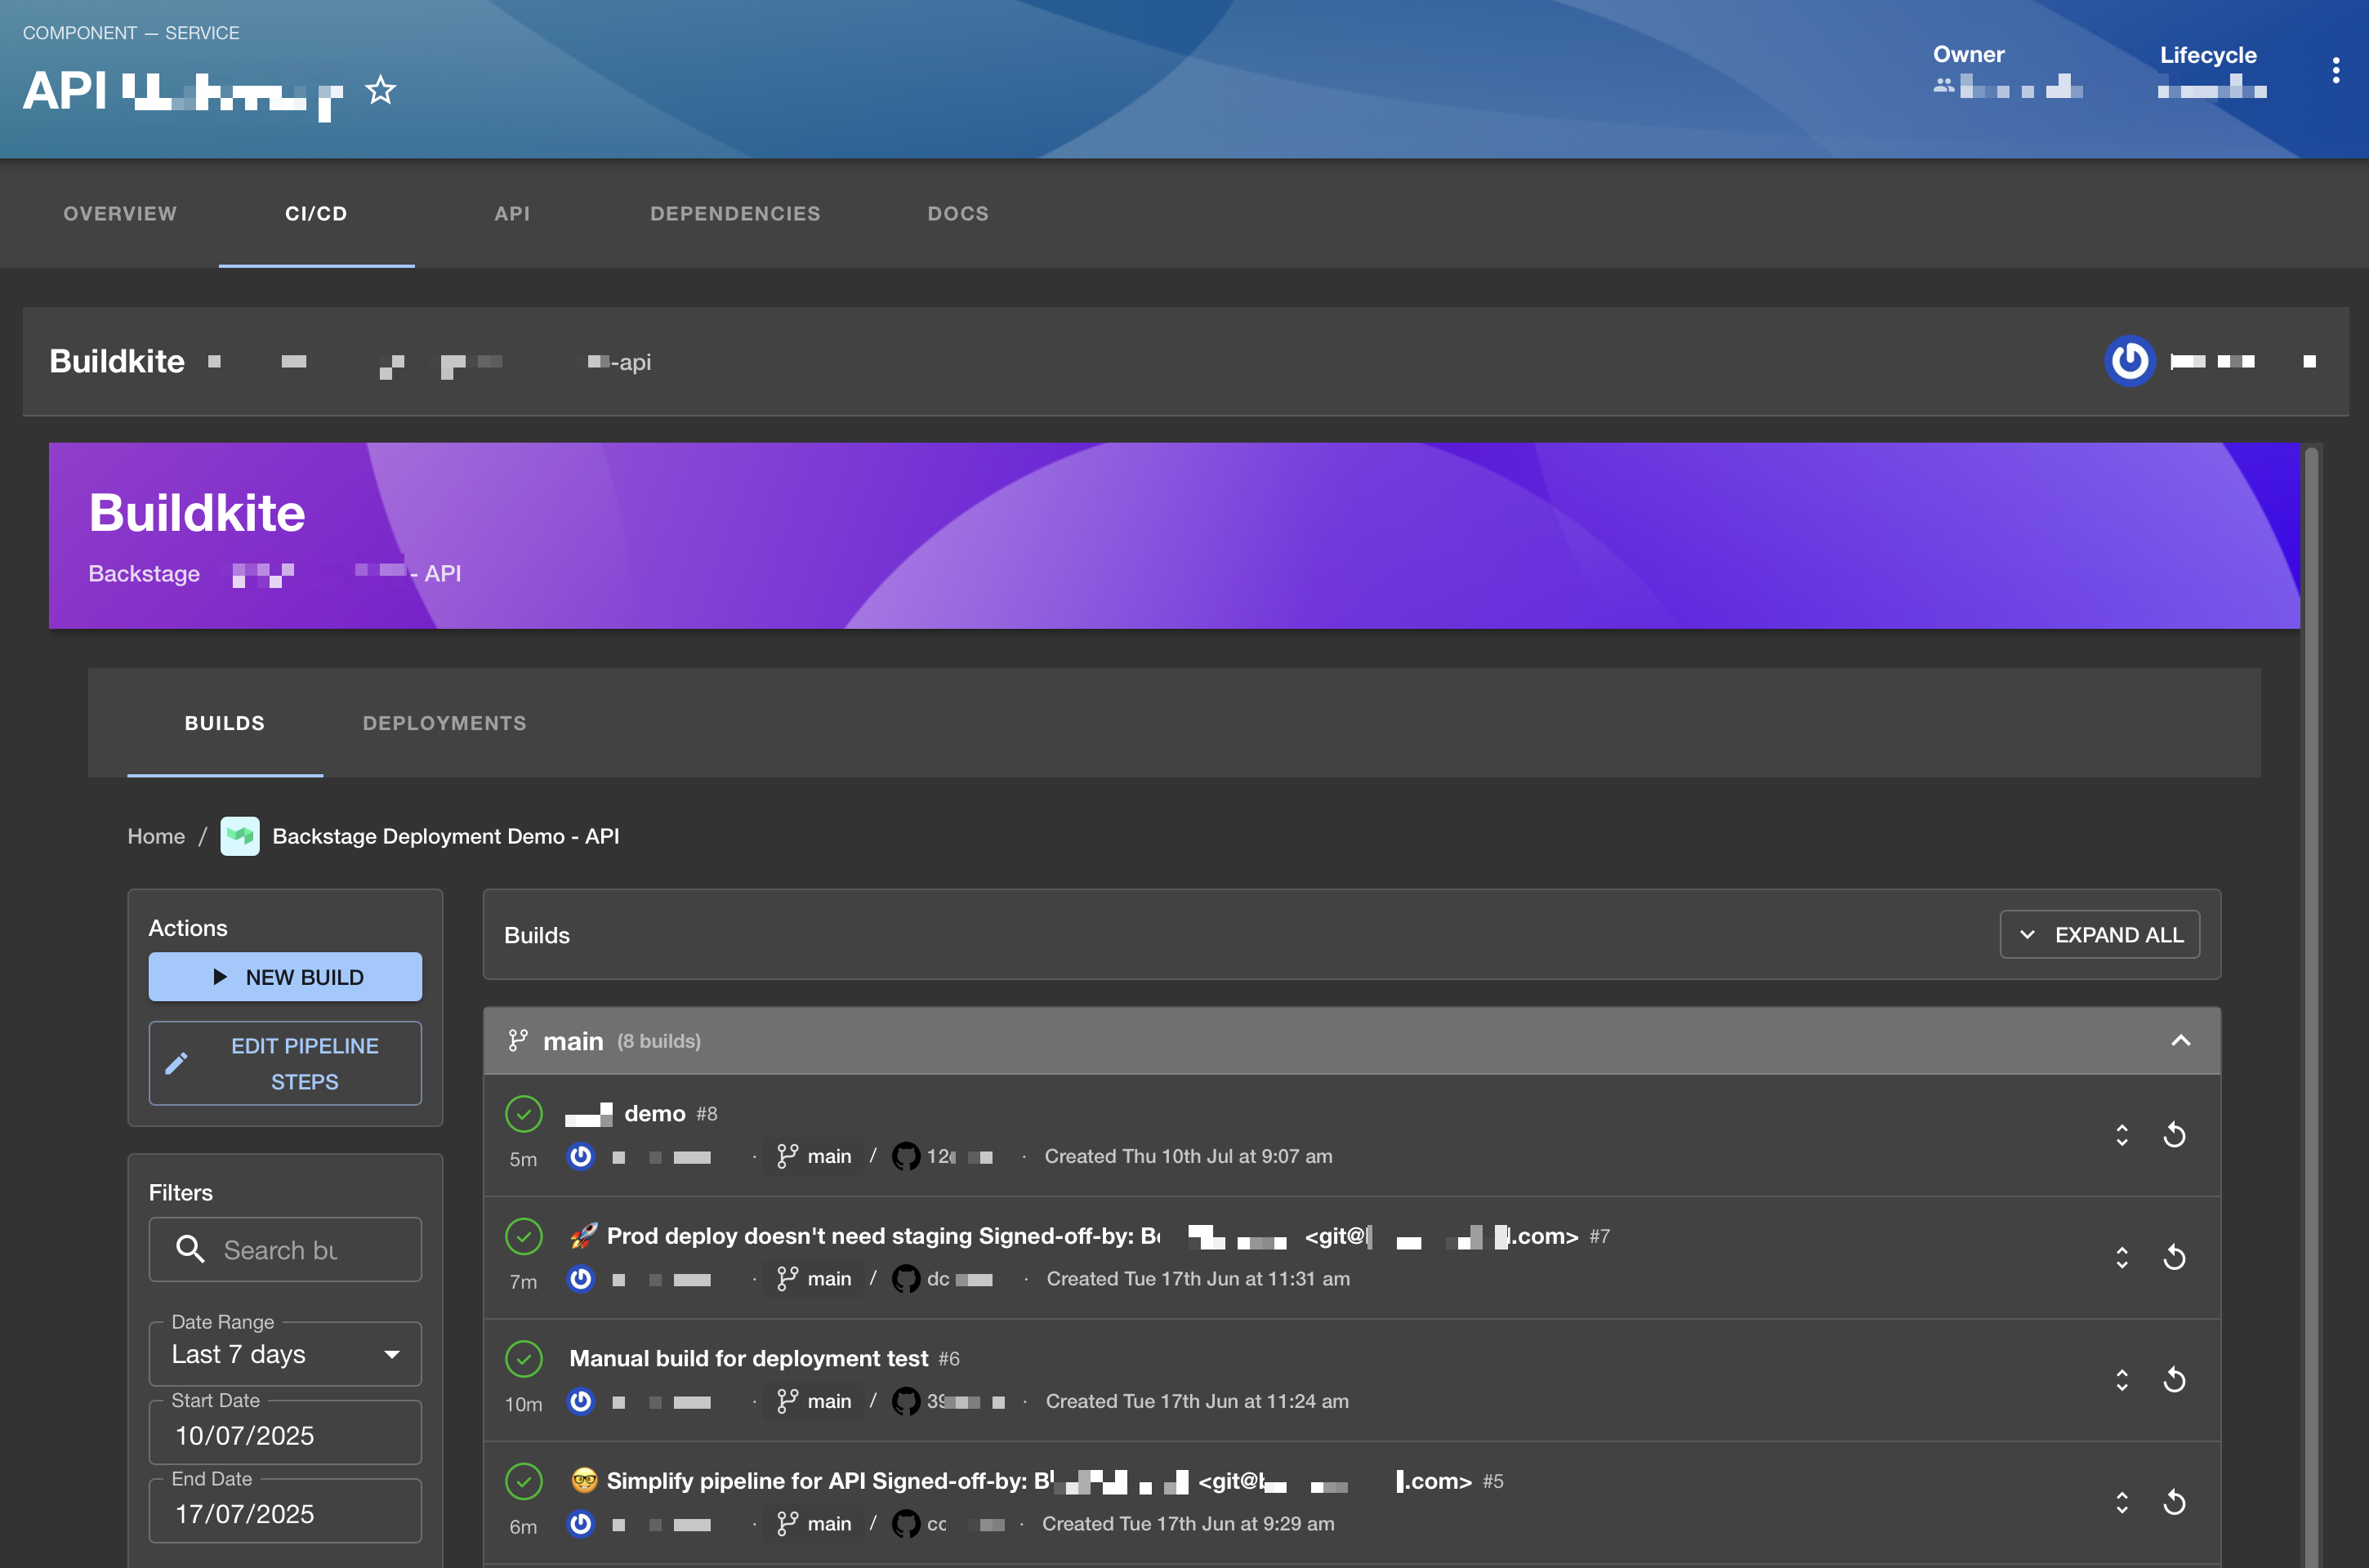
Usage
Once you have configured the Buildkite plugin for Backstage and marked your builds for deployment tracking, you can:
- View build status directly on the component's overview page in Backstage.
- Navigate to the CI/CD tab to see detailed build information.
- Filter builds by status, branch, or other criteria.
- Click on individual builds to view logs and artifacts.
- Trigger new builds directly from Backstage.
See Deployment visibility with Backstage page for an in-depth coverage of deployment visibility and tracking, as well as some optimization and troubleshooting tips.