
Starting a new build
A build is a single run of a pipeline. This page explains the most common ways to start a new build of an existing pipeline:
- Pushing code to your repository
- Selecting New Build in the Buildkite interface
- Running a command with the Buildkite CLI
- Sending a request to the Buildkite APIs
If you don't have a pipeline yet, follow the Getting started tutorial first. If a build doesn't start, or starts but doesn't run, see Troubleshooting.
Start a build by pushing code
When your pipeline's source control provider sends webhook events to Buildkite Pipelines, pushes that match the pipeline's build trigger settings and branch filters start builds automatically. This is the most common way to start a build.
If you created your pipeline from a GitHub repository in the Buildkite interface, Buildkite Pipelines creates this webhook for you by default. Your organization can disable this behavior (see Auto-create build triggers). For other source control providers, follow the webhook setup instructions shown after you create the pipeline, or see the setup page for your provider in Source control.
To start a build by pushing code:
-
In your local repository, make a change, then stage and commit it. Replace
path/to/filewith the file you changed:git add path/to/file git commit -m "Update the build script" -
Push the commit:
git push In Buildkite, select Pipelines in the global navigation, and then select your pipeline. A new build for your commit appears at the top of the builds list, and uses your commit message as its build message.
You can also start builds from pull requests and other repository events. For GitHub, see Running builds on pull requests.
Start a build from the Buildkite interface
Start a build from the Buildkite interface when you haven't configured webhooks. This method is also useful when you want to build a specific commit or branch, or set environment variables for a single build. The commit must already be available in the remote repository.
To start a build from the Buildkite interface:
- Select Pipelines in the global navigation, and then select your pipeline.
- Select New Build.
- In the New Build dialog, complete the following fields:
- Message: A description of the build. If you leave this field blank, the commit message is used once the build starts.
-
Commit: The commit to build. The default value is
HEAD, which is the latest commit on the branch. - Branch: The branch to build. The default value is your pipeline's default branch.
- Optionally, select Options to set Environment Variables for this build only (one
KEY=valuepair per line), or select Clean checkout to force the agent to remove any existing build directory and check out the repository again. - If your pipeline's steps begin with a block step or input step that has fields, complete these fields in the Build inputs section of the dialog. Fields marked as Required must be completed.
- Select Create Build. The build page opens. Select a job to follow its progress and view its logs.
The following example includes custom Build inputs for a city and activities. Your pipeline might have different input fields or none at all.
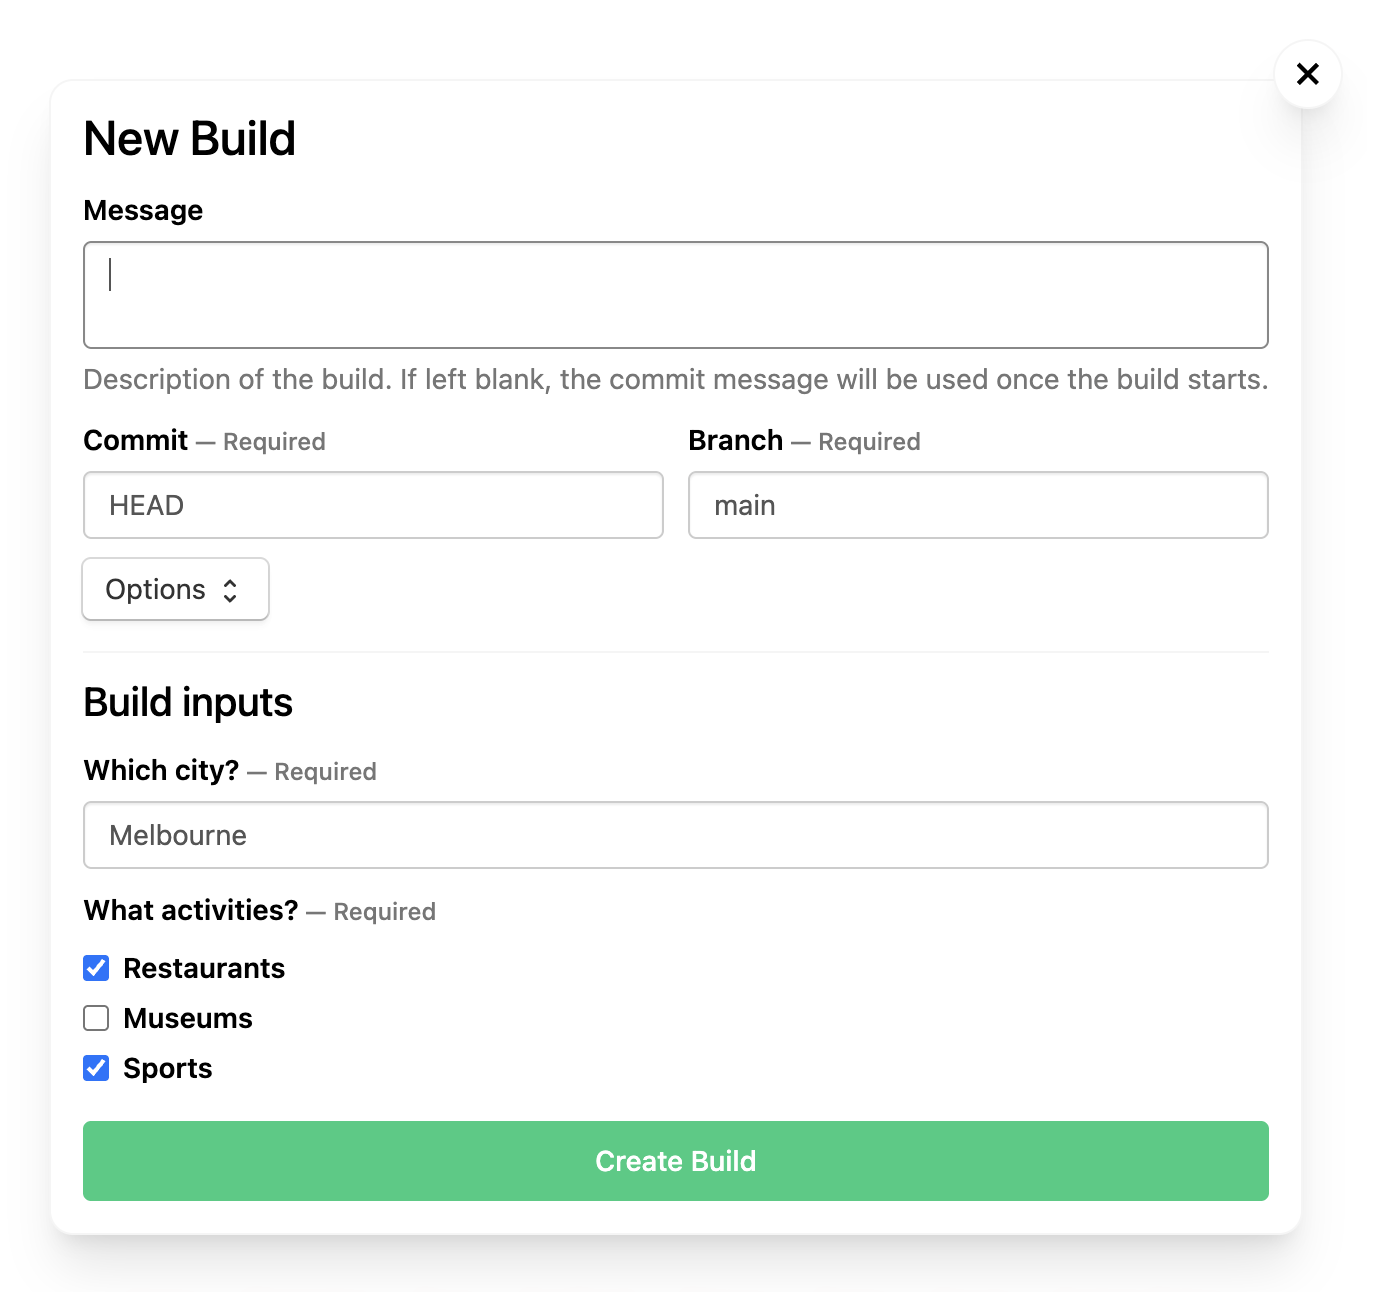
To pre-populate the dialog's message and build input fields using a URL that you can bookmark, see Using build input parameters.
To run a build again with the same commit, branch, message, and environment variables, open the build and select Rebuild. A rebuild doesn't fetch new changes from your source control provider. Learn more in Rebuilding a build.
Start a build using the Buildkite CLI
The Buildkite CLI (bk) lets you start builds from your terminal, which is useful for scripting and for working without leaving the command line.
To start a build using the Buildkite CLI:
- Install the Buildkite CLI.
-
Authenticate the Buildkite CLI with your Buildkite organization:
bk auth login -
Create a build, replacing
my-pipelinewith your pipeline's slug. The slug is the pipeline name in its URL:https://buildkite.com/your-organization/my-pipeline.bk build create --pipeline my-pipeline --message "Build started from the CLI" --web Confirm the build when prompted. The
--webflag opens the new build in your browser.
By default, the build uses the HEAD commit of your pipeline's default branch. Use --branch and --commit to build a different branch or commit, and --env to set environment variables. For scripts, add --yes to skip the confirmation prompt.
For all available flags, see the bk build create reference.
Start a build using the Buildkite APIs
To start builds from scripts, other tools, or your own services, use the Buildkite APIs. To use the REST API, you need an API access token with the write_builds scope. To use the GraphQL API, you need an API access token with GraphQL API access enabled.
REST API
Send a POST request to the create a build endpoint:
- Set the
TOKENenvironment variable to your API access token. -
In the following command, replace
YOUR_ORGANIZATION_SLUGandYOUR_PIPELINE_SLUGwith the slugs from your pipeline's URL:https://buildkite.com/YOUR_ORGANIZATION_SLUG/YOUR_PIPELINE_SLUG. Replacemainif you want to build a different branch. The requiredcommitvalue ofHEADbuilds the latest commit on that branch.curl --fail-with-body -H "Authorization: Bearer $TOKEN" \ -X POST "https://api.buildkite.com/v2/organizations/YOUR_ORGANIZATION_SLUG/pipelines/YOUR_PIPELINE_SLUG/builds" \ -H "Content-Type: application/json" \ -d '{ "commit": "HEAD", "branch": "main", "message": "Build started from the REST API" }' Open the
web_urlfrom the JSON response to view the new build.
GraphQL API
Use the buildCreate mutation. For a complete example, see Create a build on a pipeline in the GraphQL cookbook.
Other ways to start a build
Buildkite Pipelines can also start builds in the following ways:
- Schedules: Start builds at regular intervals, such as nightly. See Scheduled builds.
- Trigger steps: Start a build of another pipeline from a step in the current build. See Trigger step.
- Pipeline triggers: Start builds from incoming webhooks sent by external systems, such as monitoring or deployment tools. See Pipeline triggers.
- Git hooks: Start builds from Git servers that Buildkite Pipelines doesn't integrate with directly. See Other Git servers.
-
AI tools: Start builds from AI coding tools using the
create_buildtool of the Buildkite MCP server. - Visual Studio Code: Start builds from your editor using the Buildkite VS Code extension.
Troubleshooting
This section covers common reasons why a build doesn't start, or starts but doesn't run any jobs. If you still have trouble, contact support at support@buildkite.com.
You can't create a build manually
If New Build is unavailable, check your pipeline permissions. When your organization uses teams, you need Build & Read or Full Access permission on the pipeline. Ask your Buildkite organization administrator or someone with Full Access to check your team's access.
For API requests, also check that your token grants access to the correct organization and has the required API scope or GraphQL API access enabled.
Pushing code doesn't start a build
If a push to your repository doesn't create a new build, check the following:
- Webhook setup: Make sure the webhook from your source control provider to Buildkite Pipelines exists and is delivering events. Your provider's webhook settings usually list recent deliveries and any errors. See the setup page for your provider in Source control.
- Build triggers: Make sure the pipeline's source control settings allow builds for the event, such as pushes to branches. Select your pipeline's Settings > your source control provider.
- Branch filters: If the pipeline has a branch filter pattern, pushes to branches that don't match the pattern don't create builds. See Branch configuration.
-
Skipped commits: A commit message that contains
[skip ci],[ci skip],[skip-ci], or[ci-skip]doesn't create a build. See Ignore a commit.
To confirm that the pipeline itself works, start a build from the Buildkite interface.
The build starts but its jobs don't run
If a build is created but its jobs don't start, check the following:
- Agent availability: Each command job needs an agent connected to the queue that the job targets. If no agent is available on that queue, the job waits until one becomes available. Check that your agents are running and connected to the correct queue, or use Buildkite hosted agents.
- Block steps: If the build reaches a block step, the build pauses until someone unblocks it. Select the block step on the build page to unblock it and continue the build.