Ruby collectors
To use Buildkite Test Engine with your Ruby projects, use the 
test-collectors-ruby gem with RSpec or minitest.
The recommended way to set up a new test suite is to add the Tests Buildkite plugin to the step that runs your tests. It works with every runner that bktec supports, and the entire setup is configuration-only — you can get a test suite running through changes to pipeline.yml alone, with no modifications to your application code.
Use the language-specific test collector documented on this page when you want deeper framework integration — such as custom execution tags, span annotations, or richer per-framework data. Language-specific collectors still pair well with the Tests Buildkite plugin, but adding one requires changes to your application code.
You can also upload test results by importing JSON or JUnit XML.
Tests Buildkite plugin example for RSpec
The following step uses the Tests Buildkite plugin to run an RSpec suite through bktec. The plugin downloads bktec, requests an OIDC token, ensures the test suite exists, and exports the environment variables that bktec expects, so the step's command only needs to invoke bktec run:
steps:
  - label: "RSpec"
    command: bktec run
    plugins:
      - tests#v1.0.0:
          test-runner: rspec
          result-path: tmp/rspec-result.json
    parallelism: 2
See the Tests Buildkite plugin page for the full plugin reference, including all supported options and dynamic parallelism with bktec plan.
RSpec collector
RSpec is a behavior-driven development library for Ruby.
If you're already using RSpec for your tests, add the buildkite-test_collector gem to your code to collect your test results into your Test Engine dashboard.
Before you start, make sure RSpec runs with access to CI environment variables.
-
Create a new branch:
git checkout -b install-buildkite-test-engine -
Add
buildkite-test_collectorto yourGemfilein the:testgroup:group :test do gem "buildkite-test_collector" end -
Run
bundleto install the gem and update yourGemfile.lock:bundle -
Add the Test Engine code to your application in
spec/spec_helper.rb, and set the BUILDKITE_ANALYTICS_TOKEN securely on your agent or agents. Please ensure gems that patchNet::HTTP, like httplog and sniffer, are required beforebuildkite/test_collectorto avoid conflicts.require "buildkite/test_collector" Buildkite::TestCollector.configure(hook: :rspec) -
Commit and push your changes:
$ git add .
$ git commit -m "Install and set up Buildkite Test Engine"
$ git push
Once you're done, in your Test Engine dashboard, you'll see analytics of test executions on all branches that include this code.
If you don't see branch names, build numbers, or commit hashes in the Test Engine UI, then see CI environments to learn more about exporting your environment to the collector.
Test Engine identifies tests using their descriptions and example group descriptions. To avoid test identity conflicts, ensure all test descriptions are unique. You can enforce uniqueness by using the RuboCop cops RSpec/RepeatedDescription and RSpec/RepeatedExampleGroupDescription, where RuboCop is a static code analyzer for Ruby.
Troubleshooting allow_any_instance_of errors
If you're using RSpec and seeing errors related to allow_any_instance_of that look like this:
Failure/Error: allow_any_instance_of(Object).to receive(:sleep)
       Using `any_instance` to stub a method (sleep) that has been defined on a prepended module (Buildkite::TestCollector::Object::CustomObjectSleep) is not supported.
You can fix them by being more specific in your stubbing by replacing allow_any_instance_of(Object).to receive(:sleep) with allow_any_instance_of(TheClassUnderTest).to receive(:sleep).
Troubleshooting test grouping issues
RSpec supports anonymous test cases—tests which are automatically named based on the subject and/or inputs to the expectations within the test. However, this can lead to unstable test names across different test runs, incorporating elements such as object IDs, database IDs, timestamps, and more.
As a consequence, each test is assigned a new identity per run within Test Engine. This poses a challenge for using Test Engine effectively, as historical data across tests becomes difficult to track and analyze.
To mitigate this issue and ensure the reliability of Test Engine, it's advisable to provide explicit and stable descriptions for each test case within your RSpec test suite. By doing so, you can maintain consistency in test identification across multiple runs, enabling better tracking and analysis of test performance over time.
minitest collector
minitest provides a complete suite of testing facilities supporting TDD, BDD, mocking, and benchmarking.
If you're already using minitest for your tests, add the buildkite-test_collector gem to your code to collect your test results into your Test Engine dashboard.
-
Create a new branch:
git checkout -b install-buildkite-collector -
Add
buildkite-test_collectorto yourGemfilein the:testgroup:group :test do gem "buildkite-test_collector" end -
Run
bundleto install the gem and update yourGemfile.lock:bundle -
Add the Test Engine code to your application in
test/test_helper.rb, and set the BUILDKITE_ANALYTICS_TOKEN securely on your agent or agents. Please ensure gems that patchNet::HTTP, like httplog and sniffer, are required beforebuildkite/test_collectorto avoid conflicts.require "buildkite/test_collector" Buildkite::TestCollector.configure(hook: :minitest) -
Commit and push your changes:
git add .
git commit -m "Install and set up Buildkite Test Engine"
git push
Once you're done, in your Test Engine dashboard, you'll see analytics of test executions on all branches that include this code.
If you don't see branch names, build numbers, or commit hashes in the Test Engine UI, then see CI environments to learn more about exporting your environment to the minitest collector.
Adding annotation spans
This gem allows adding custom annotations to the span data sent to Buildkite using the .annotate method. For example:
Buildkite::TestCollector.annotate("Visiting login")
This would appear like so:
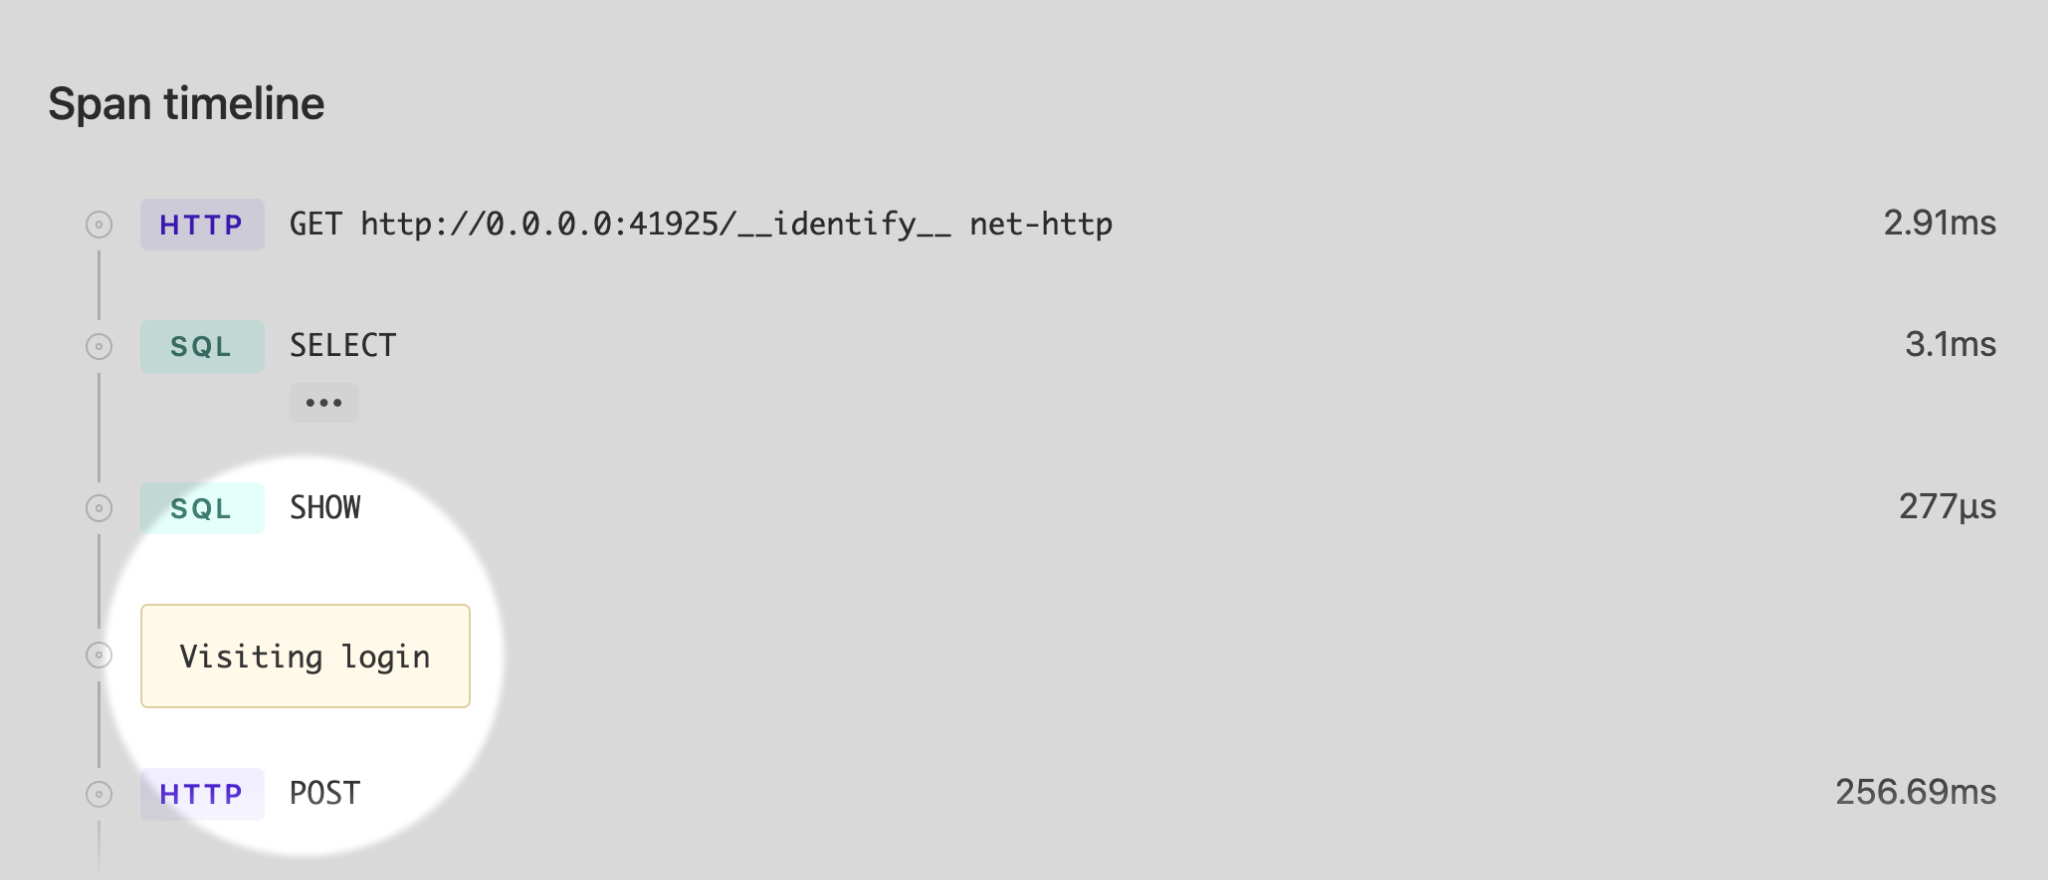
This is particularly useful for tests that generate a lot of span data such as system/feature tests. You can find all annotations under Span timeline at the bottom of every test execution page.
VCR
If your test suites use VCR to stub network requests, you'll need to modify the config to allow actual network requests to Test Engine.
VCR.configure do |c|
  c.ignore_hosts "analytics-api.buildkite.com"
end