
GitLab
You can use Buildkite to run builds on GitLab commits.
Accessing private repositories
Connecting GitLab to Buildkite configures webhooks and commit statuses. To give your agents access to clone private repositories, you need to configure code access separately. The recommended approach is to store an SSH key as a Buildkite secret and reference it with checkout.ssh_secret in your pipeline YAML. For full setup instructions, see self-hosted agent code access or Buildkite hosted agent code access.
GitLab repositories
If you host your repositories on gitlab.com enter your gitlab.com repository URL when you create your pipeline in Buildkite (for example, git@gitlab.com:your/repo.git) and follow the instructions provided on that page to set up webhooks.
GitLab Self-Managed repositories
You can also use repositories from your own self-managed GitLab service but you'll need to connect it to Buildkite first.
The earliest supported version of GitLab is 7.4.
- Open your Buildkite organization's Settings and choose Repository Providers.
- Select GitLab Self-Managed.
- Enter the URL to your GitLab installation (for example,
https://git.example.org). -
You can optionally specify a list of IP addresses to restrict where builds can be triggered from. This field accepts a space separated list of networks in CIDR notation.
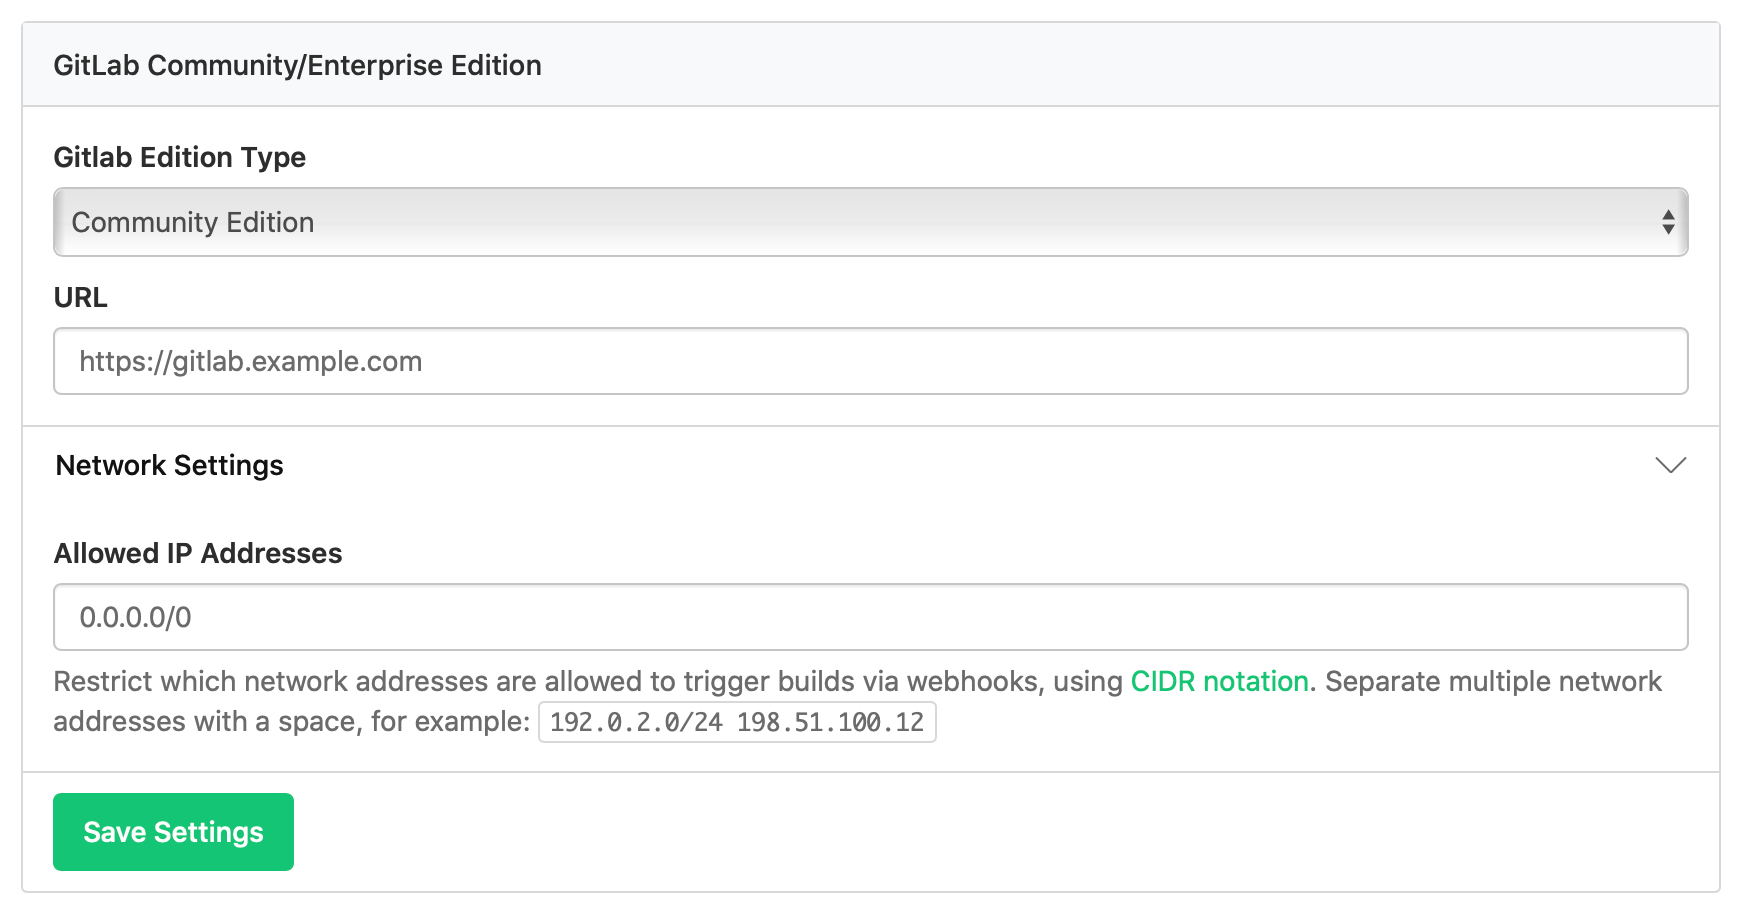
Select Save Settings before leaving this page.
Create a new pipeline on Buildkite using your GitLab repository's URL (for example,
git@git.mycompany.com:your/repo.git) and follow the instructions on the pipeline creation page.
To ensure that the commit author from GitLab is a verified Buildkite account user, a public email must be specified in the user's GitLab account. This public email must match their Buildkite user account email.
Branch configuration and settings
You can edit the version control provider settings for each pipeline from the pipeline's settings page. Go to Pipelines > your specific pipeline > Settings > your Git service provider.
If you need more control over your pipeline configuration, add a pipeline.yml to your repository. Then you can use conditionals and branch filtering to configure your pipeline.
Pull request and merge request builds ignore branch filters
Branch filters (branch limiting) apply to branch builds only. Builds created for pull requests or merge requests ignore pipeline-level branch filters. Some source control providers support additional branch filtering for pull request builds. For more information, see Additional branch filtering for pull request builds.
Running builds on merge requests
To run builds for GitLab merge requests, edit the GitLab settings for your Buildkite pipeline and select Build merge requests. When enabled, Buildkite Pipelines creates a build when a merge request is opened or new commits are pushed to its source branch.
Building merged results
You can configure Buildkite Pipelines to build the merged result of a merge request rather than the head commit of the source branch. This builds against GitLab's merge ref (refs/merge-requests/<iid>/merge), which reflects the result of merging the source branch into the target branch.
To enable this, select Build merged results commit in your pipeline's GitLab settings.
What is a merged result build?
A merged result build checks the combined state of the source and target branches, catching integration issues before you merge. This is especially useful for pipelines that run tests or checks that depend on the full merged codebase.
Rebuilding when the target branch updates
When Build merged results commit is enabled, Buildkite Pipelines can automatically rebuild open merge requests when the target branch receives new commits. This keeps your merged result builds up to date, even when the target branch moves forward.
To enable this, select Rebuild when target branch changes in your pipeline's GitLab settings.
When a push is made to a branch targeted by open merge requests, Buildkite Pipelines creates new merged results builds for up to 20 affected merge requests, prioritizing the most recently created. Merge requests that already have an active merged results build are skipped.
Using one repository in multiple pipelines and organizations
If you want to use the same repository in multiple pipelines (including pipelines in different Buildkite organizations), you need to configure a separate webhook for each pipeline. Follow the webhook setup instructions in the Buildkite UI. Buildkite shows you these instructions when you create the pipeline, but you can also find them in Pipeline > your specific pipeline > Settings > your Git service provider > your Git service provider's Setup Instructions.
Build skipping
You may not always want to rebuild on every commit, or branch. You can configure Buildkite to ignore individual commits or branches, or to skip builds under certain conditions.
Commit statuses
Buildkite Pipelines can update commit statuses in GitLab. You can then see the status of your builds from your GitLab.com commits and merge requests with direct links back to your Buildkite Pipelines build.
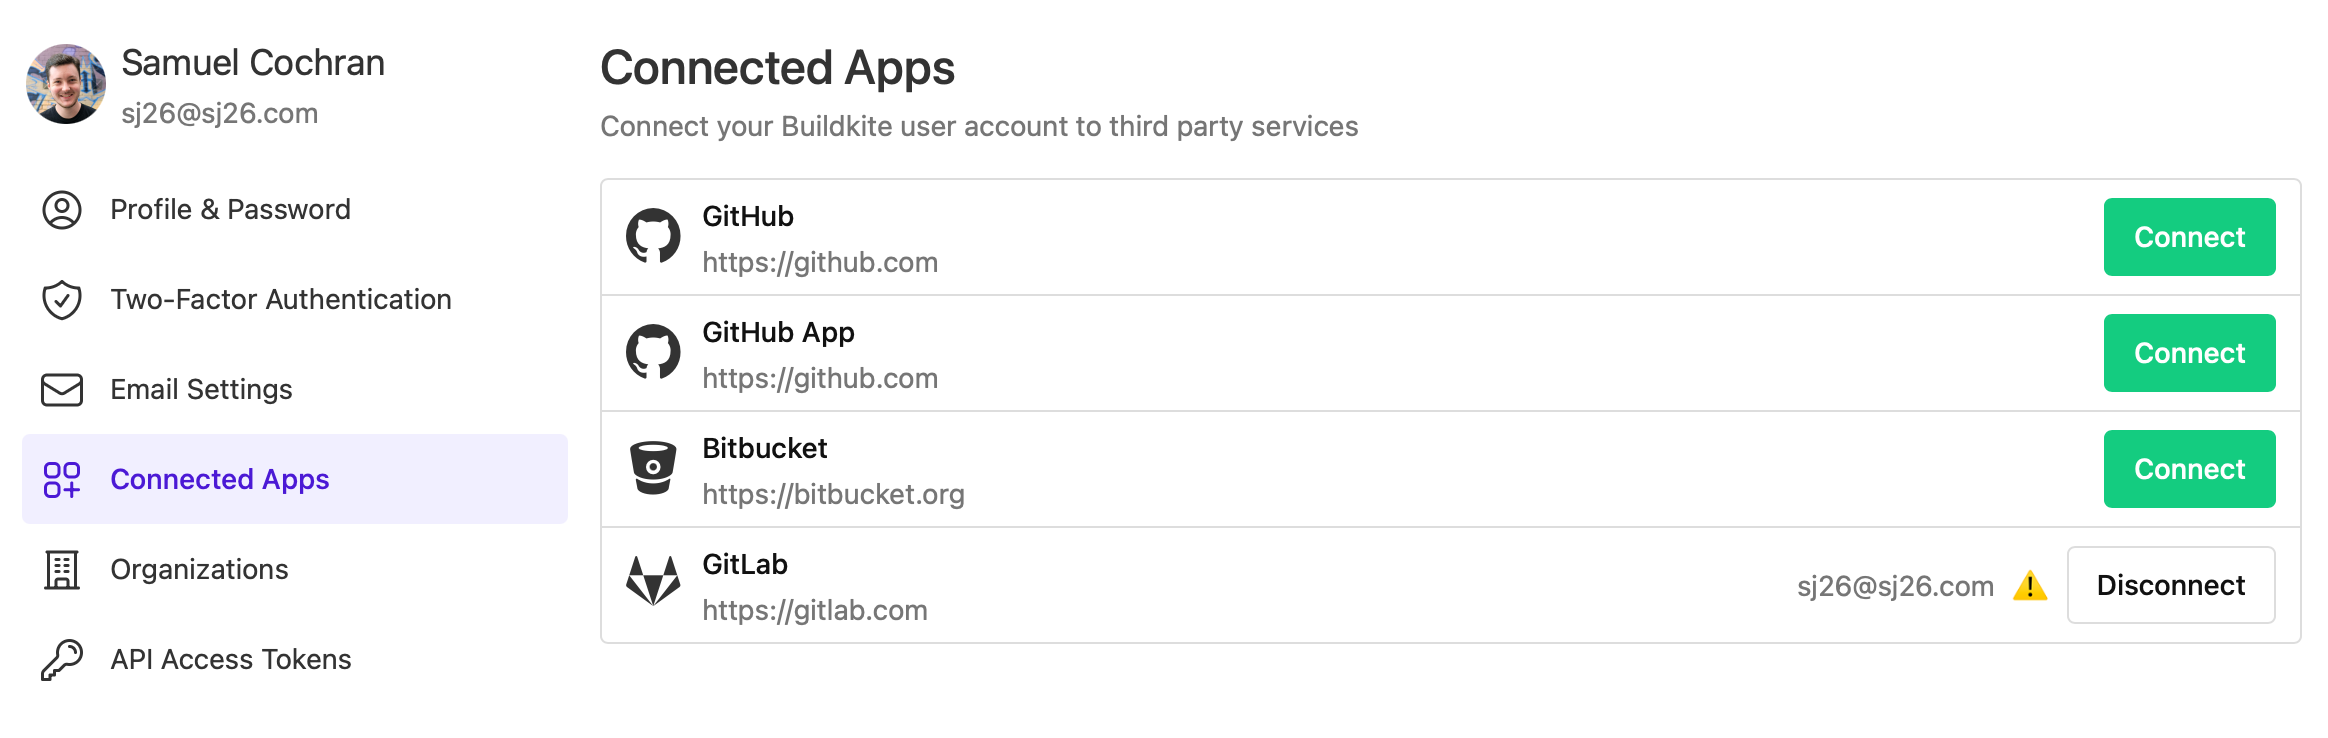
For GitLab.com, connect your Buildkite and GitLab user accounts by going to your Buildkite user account's Personal Settings from the global navigation > Connected Apps page:
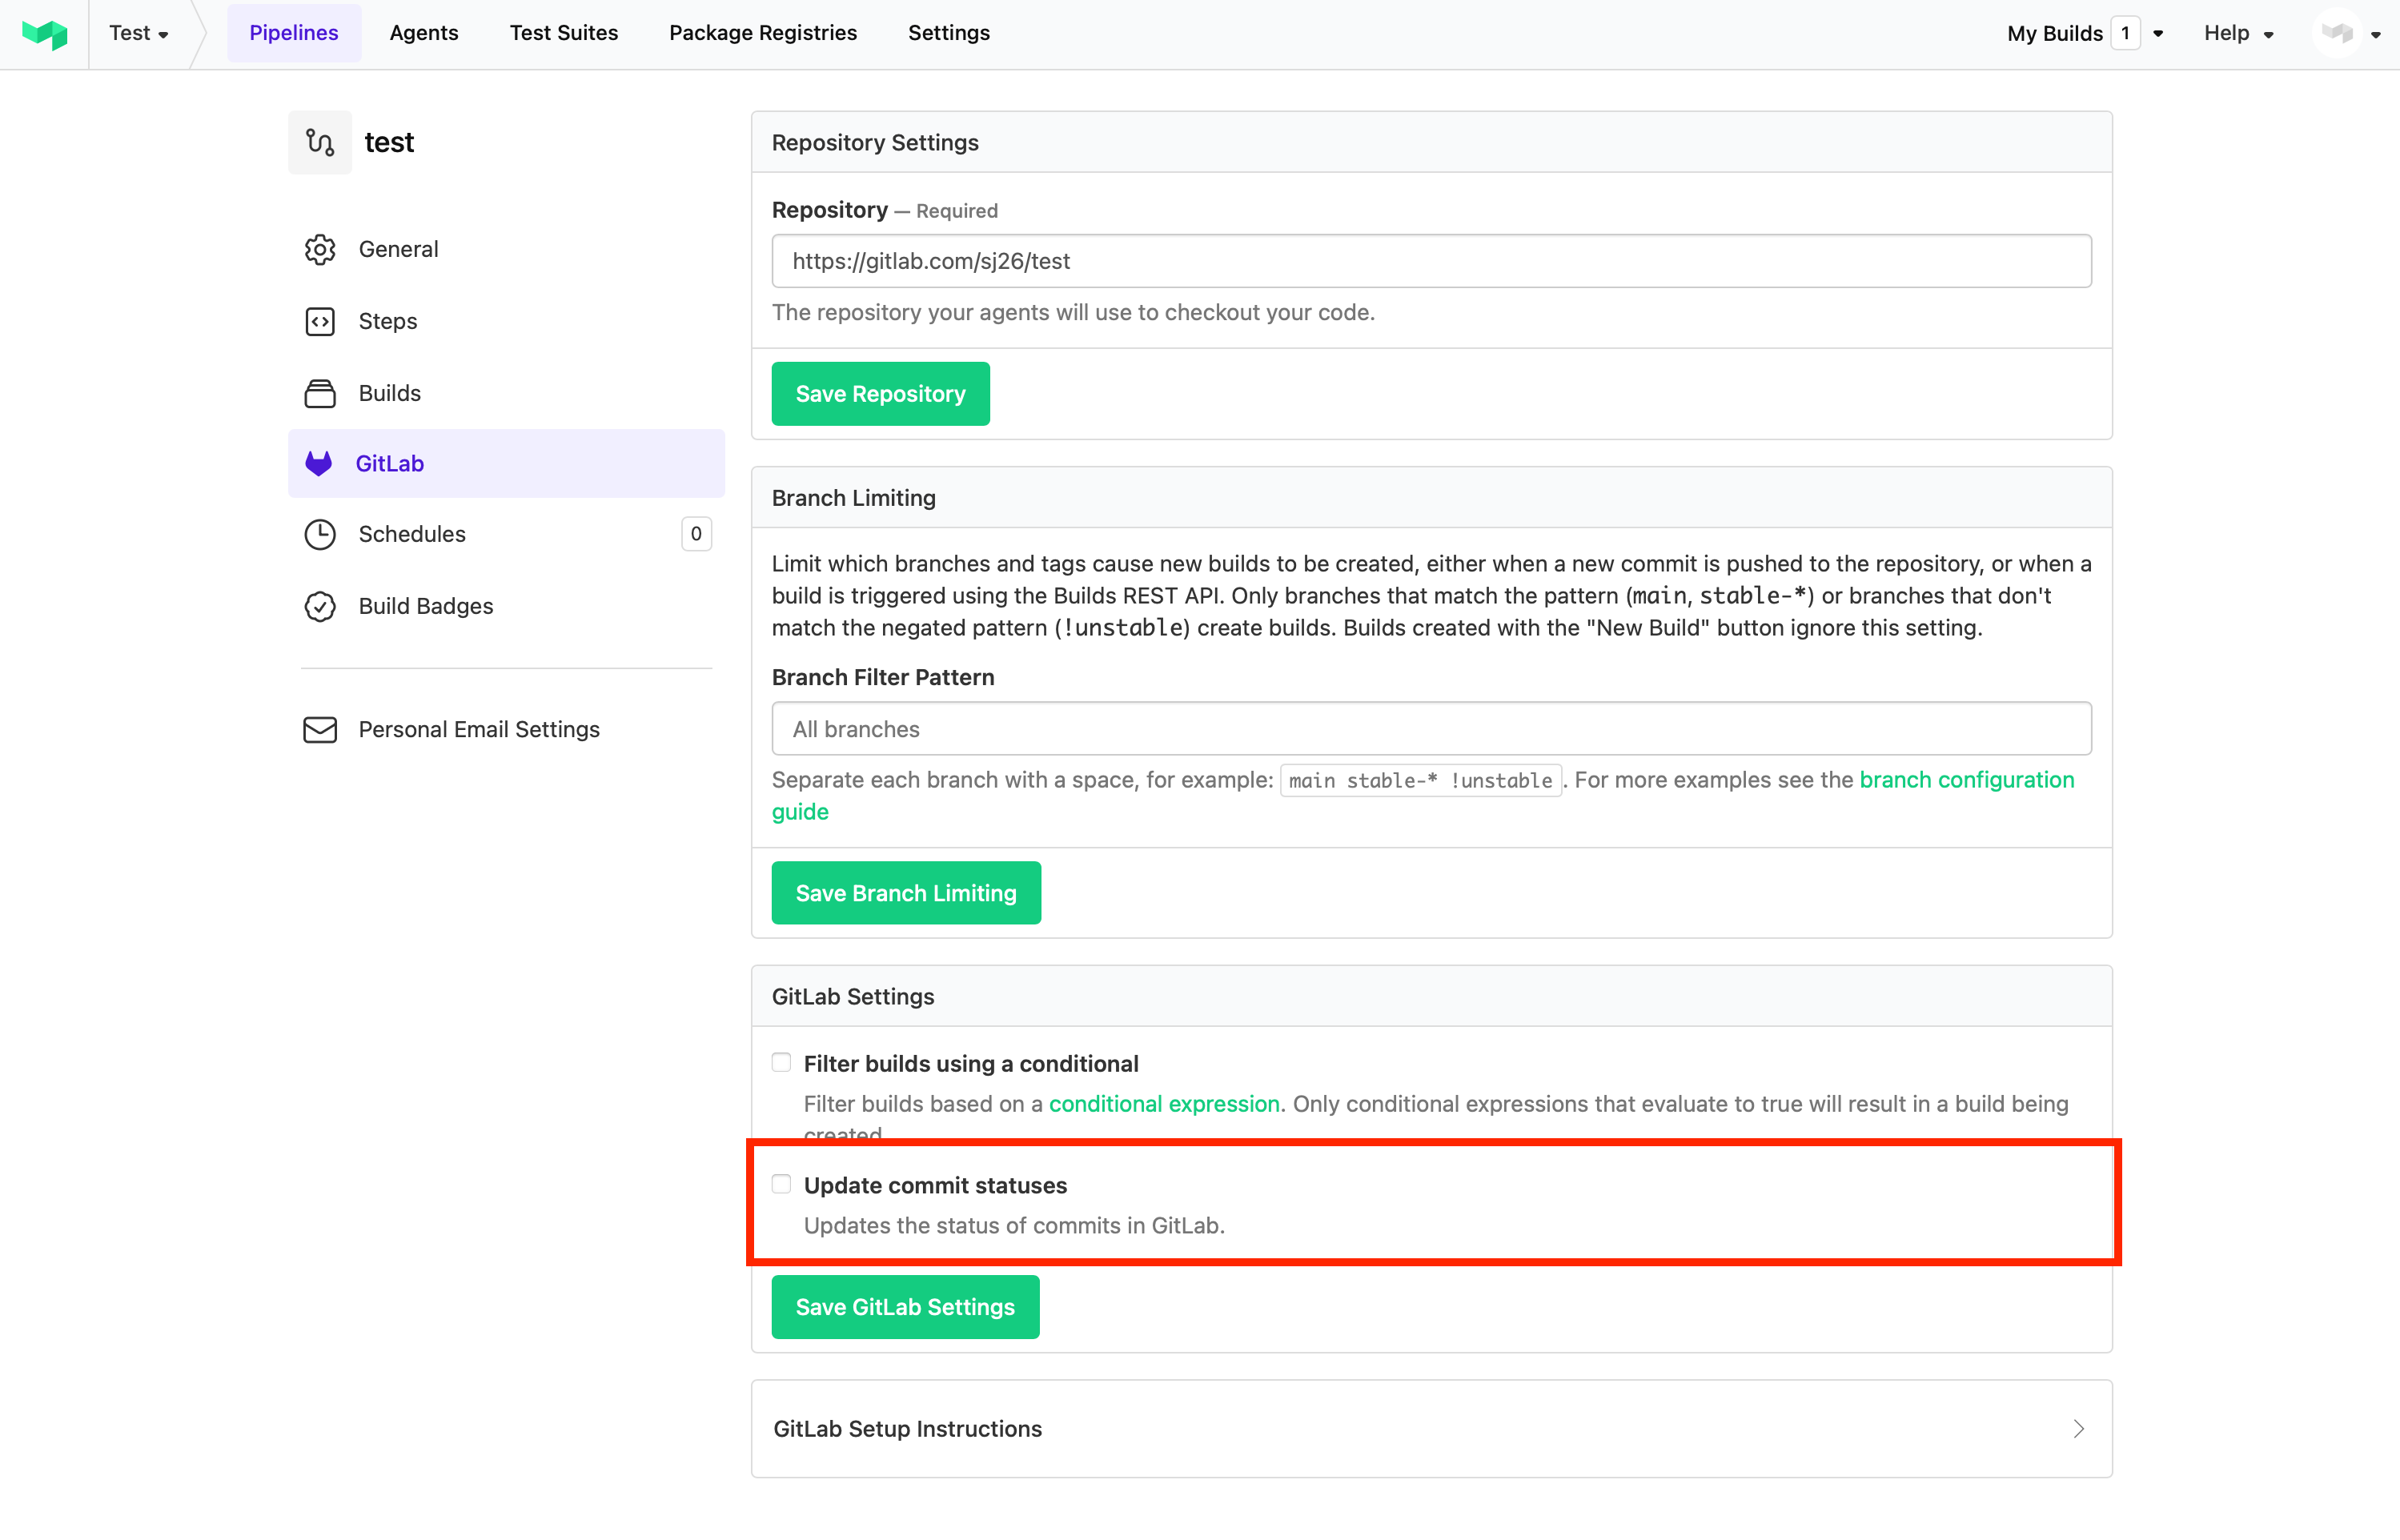
Next, in your Buildkite organization, go to Pipelines > your specific pipeline > Settings > GitLab, and make sure the Update commit statuses checkbox is selected:
For a self-managed GitLab service, ensure you have configured API authentication for your Buildkite organization's GitLab repository provider. To do this, select Settings from the global navigation > Repository Providers > GitLab Self-Managed page:
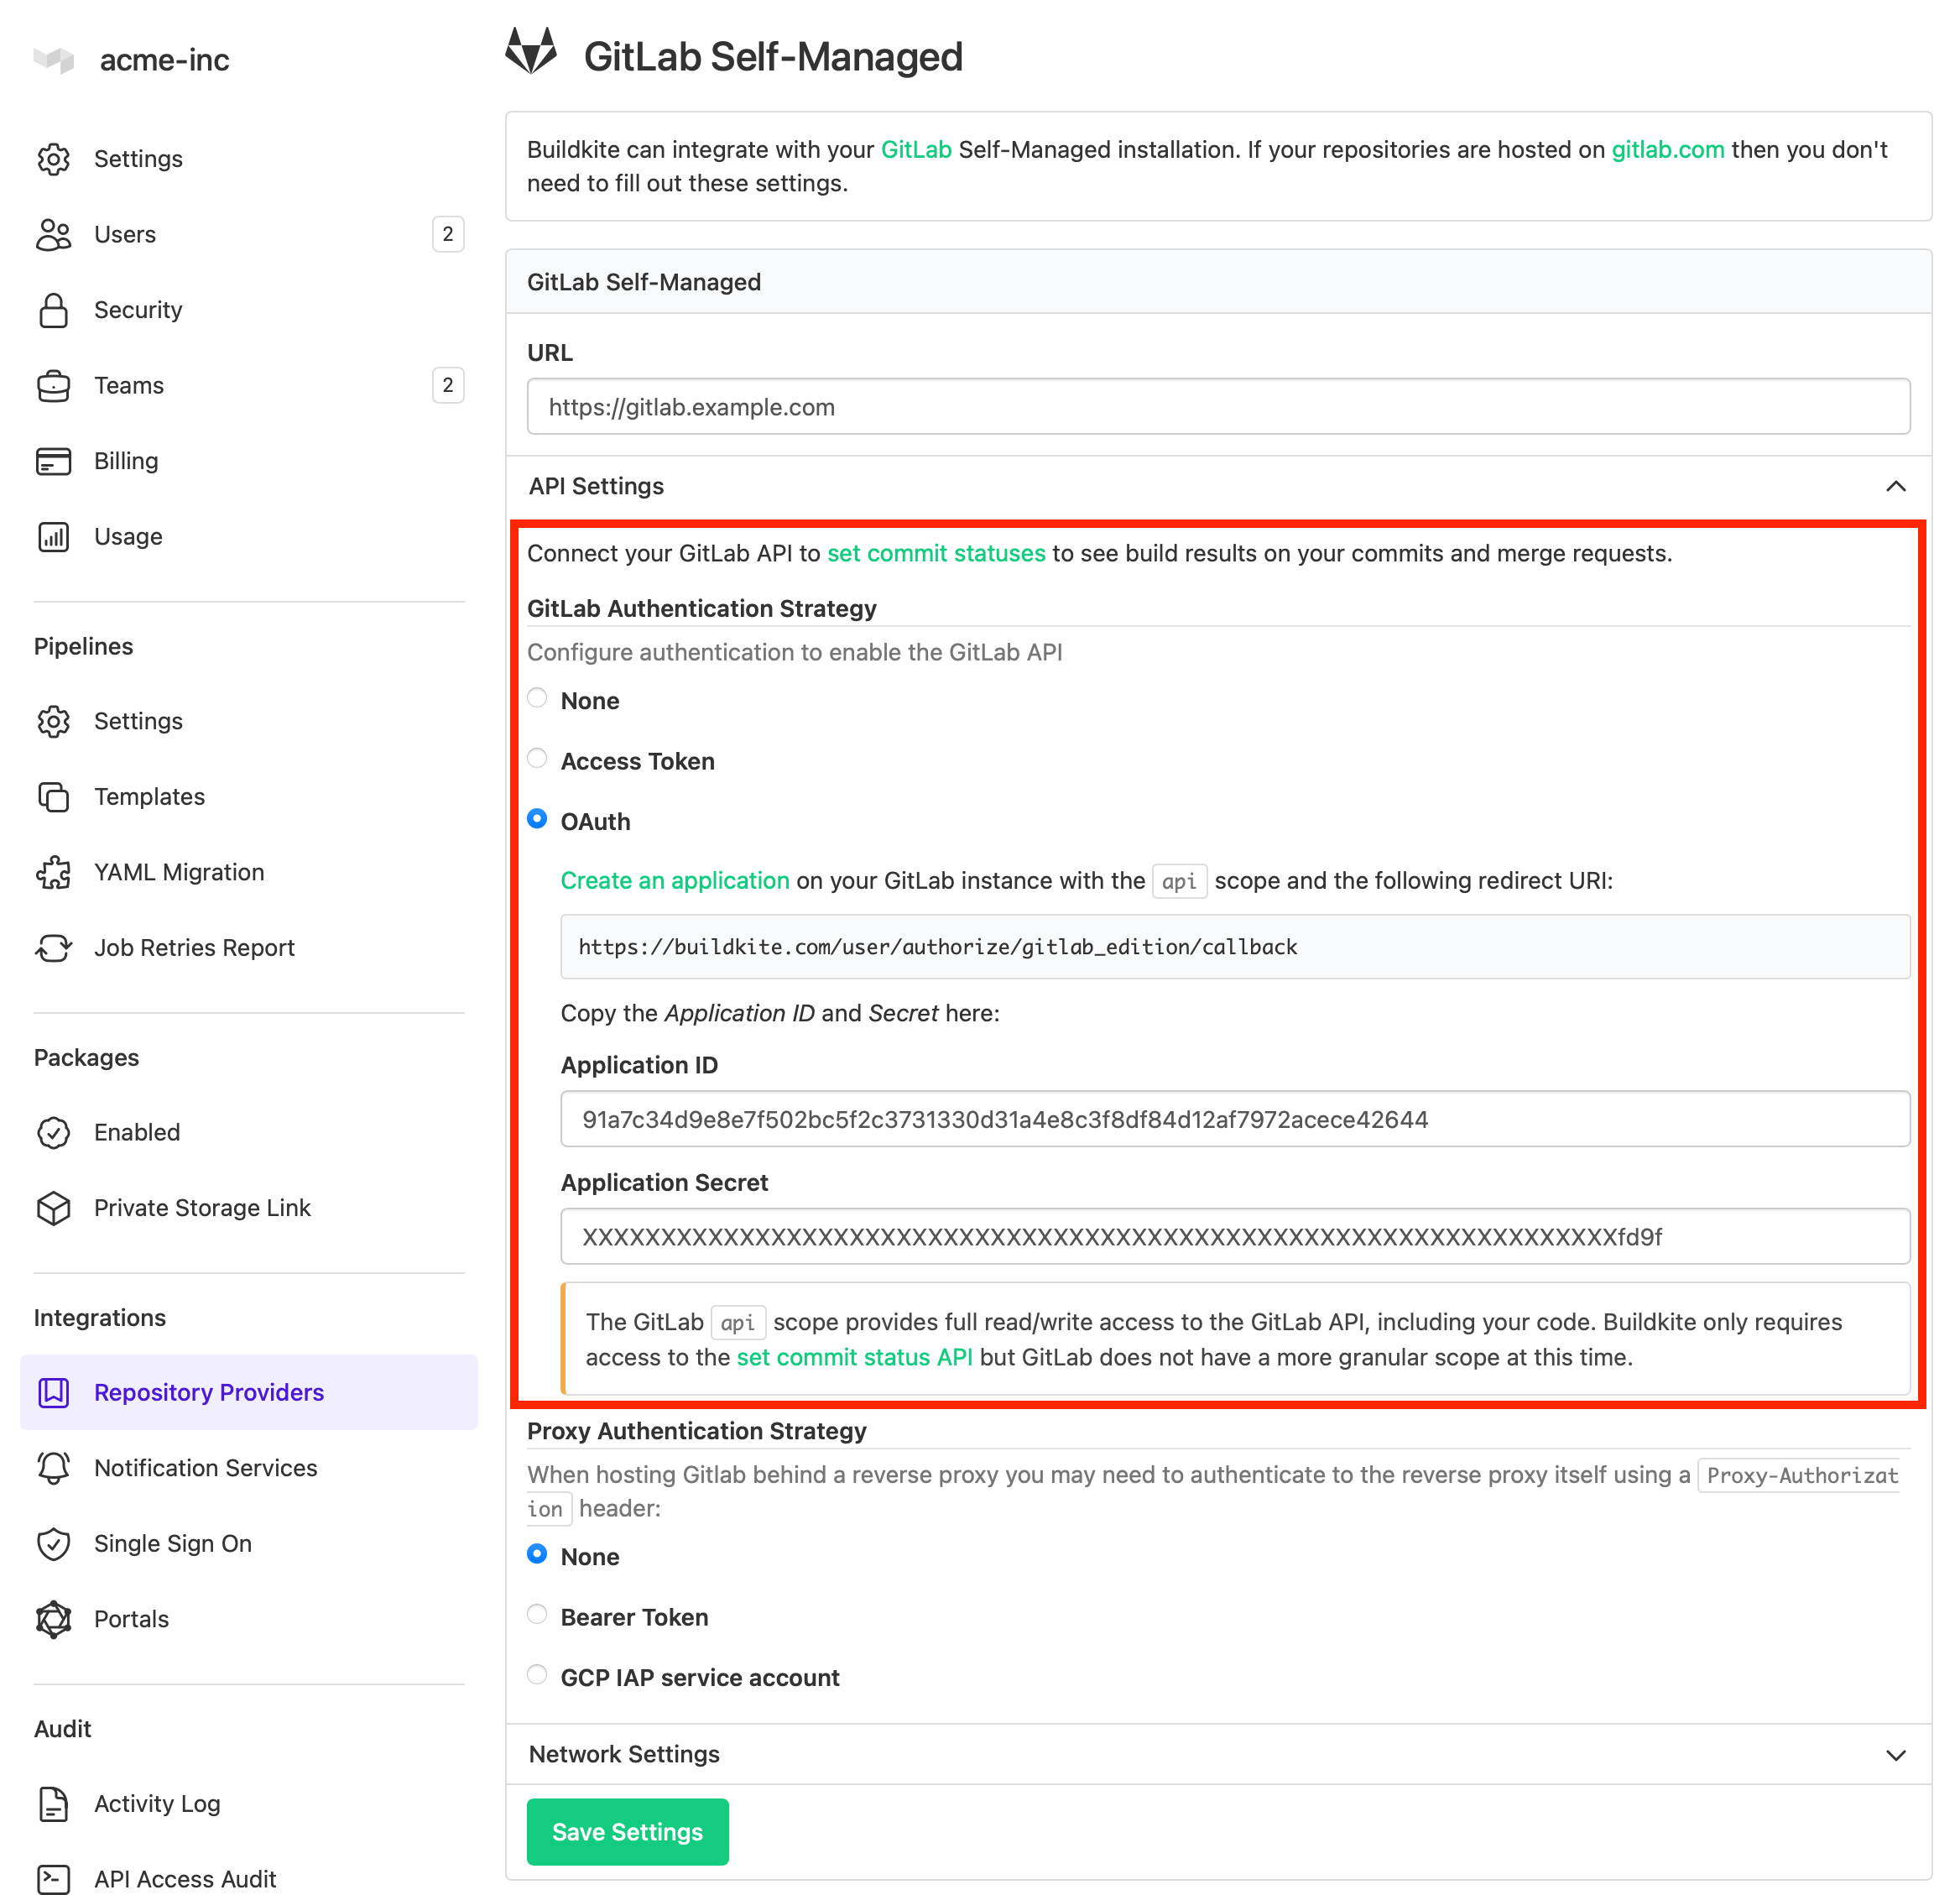
Then update your pipeline's repository settings as above.