CI/CD or Continuous Integration and Continuous Delivery (or Continuous Deployment) is not new, it's been evolving for more than 20 years now and is foundational in the practice of DevOps. CI/CD is a set of practices that are part of the software delivery lifecycle, that focus on automating and streamlining the building, testing, and deployment software. It improves the development and delivery of software, making things more efficient, reliable, and scalable.
CI/CD pipelines are busy superhighways to production, and that traffic needs to keep flowing. As our needs change, as teams scale, and contributions ramp up we may need more than a static, one-size-fits-all approach. Dynamic pipelines offer the ultimate flexibility.
This article explains what dynamic pipelines are, and guides you through how you can create them.
What is a CI/CD pipeline?
A Continuous Integration and Continuous Deployment (CI/CD) pipeline accomplishes two major goals:
-
Validates that the latest changes to your application code build and execute correctly
-
Ships your changes to one or more environments for acceptance testing and release
To achieve these goals, a CI/CD pipeline needs to fulfill certain requirements. First, the pipeline should be reliable and repeatable. Assuming your source code changes are syntactically and functionally correct, the pipeline should build and deploy your application without errors.
The pipeline should be almost entirely automated. Ideally, your pipeline will kick off automatically whenever you or another team member checks code into a buildable branch in your source control repository. The pipeline should not only deploy source code but also accompanying resources, such as the cloud infrastructure, that it requires to run.
You may have some stages of your pipeline that require manual approval before these changes can proceed (i.e., code review). Outside of these approvals, your pipeline should proceed without manual intervention.
Lastly, your CI/CD pipeline should work for all environments. The pipeline should be able to generate your development and any intermediate test environments that your software engineering lifecycle requires, including your production environment.
Stages of CI/CD pipelines
A CI/CD pipeline is generally broken down into a series of stages. These stages are repeated for each environment to which you are deploying.
-
Build: The pipeline verifies that the changes are syntactically correct and that it can build a new version of the application. This usually involves compiling any source code (for compiled languages such as Java, C#, and Rust) and also bundling the application into a deployment package (such as a Docker container).
-
Validate: The pipeline ensures that the changes are functionally correct. Often this involves running a series of unit tests against the changed code to ensure it runs as you expect without introducing regressions.
Your pipeline may also run a series of other static and dynamic tests to ensure the application meets various functionality and security requirements. This can include scanning binary files for known vulnerabilities, scanning for embedded credentials, and signing binaries or script files prior to deployment.
-
Deploy: The pipeline creates your application’s runtime stack, installs the application in its target environment, and performs any configuration (i.e., data import and data migration) required for your app to run.
-
Verify: The pipeline ensures that the application runs as expected in its target environment. Typically, this means executing integration tests that verify your changes work end-to-end and in isolation. The pipeline may also monitor a set of metrics (i.e., CPU load, successful HTTP invocations, runtime errors, etc.) to verify over time that the environment continues to operate within expected parameters.
Why dynamic CI/CD pipelines?
Your first pipelines will most likely be static pipelines, built by defining a YAML file or similar on-disk configuration. Static pipelines however, have some limitations. As the complexity of your application and the number of environments you support grows, building everything from static config becomes timeconsuming, and cumbersome, if not impossible.
To build CI/CD pipelines that are automated, reliable, resilient, and can deploy to multiple environments, you need dynamic pipelines. Dynamic pipelines use a combination of static configuration and code to customize the process for each branch and environment of your build.
With dynamic pipelines, you can replace status configuration with code. Hasura used Buildkite’s dynamic pipelines capability to replace over 2,000 lines of YAML with a Go program. The new system can generate a rich environment with complex flow and branching ,- and without unwieldy YAML configs.
Building CI/CD pipelines dynamically
Many CI/CD pipeline tools, like CircleCI, only support defining a pipeline using declarative syntax. By contrast, Buildkite’s CI/CD pipeline orchestrator supports dynamically built pipelines out of the box. You can create pipelines that optionally execute certain steps on specific branches and deployment environments. You might perform code signing, or data migration tasks against a production deployment, or opt to reduce resource consumption by running certain tests based on what code has changed.
It’s simple to get started with dynamic pipelines in Buildkite. Let’s work through this getting started tutorial, it provides us with a basic example of how to add dynamic steps to a pipeline.
Requirements:
- A Buildkite account–sign up for the free plan here
- Somewhere to run the build agent. In this tutorial we'll explain how to run it:
- On MacOS, and
- On AWS (to do this you'll need access to your account, preferably in a sandbox environment).
Choose what works best for you!
Create a new pipeline
- The first step is to create a new pipeline in Buildkite.
- Choose one of the following sample projects to get started:
- Click Create pipeline.
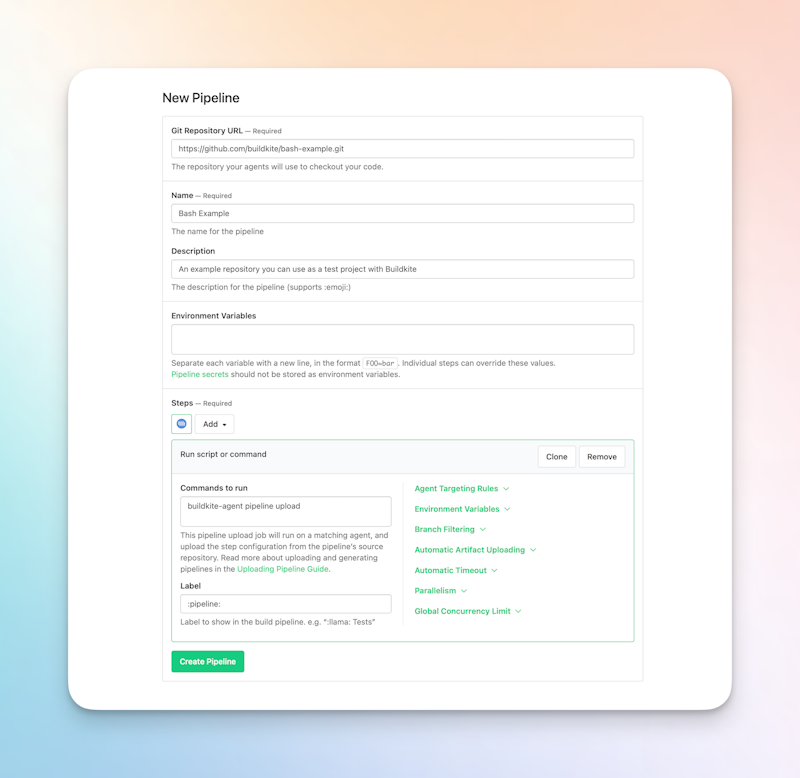
It’s worth noting that these sample pipelines don’t contain any code in a repository to build by default; they simply provide the framework necessary for a dynamic pipeline within Buildkite.
This template.yml defines the build.
name: "Bash Example"
description: "An example repository you can use as a test project with Buildkite"
emoji: ":bash:"
steps:
  - command: "buildkite-agent pipeline upload"
    label: ":pipeline:"
And the pipeline.yml defines the initial steps to execute in the pipeline.
steps:
  - label: ":hammer: Example Script"
    command: "script.sh"
    artifact_paths: "artifacts/*"
    agents:
      queue: "${BUILDKITE_AGENT_META_DATA_QUEUE:-default}"
Pipeline steps can execute scripts in any language supported by your build container. For this example, pipeline.yml executes a simple Bash shell script (script.sh) that echoes some output to the Buildkite console.
Start a build agent
The Buildkite Agent is a small binary that is installed and run to perform build jobs. The agent can be run locally, or on virtual machines or containers in any cloud provider, and on almost any operating system. You might know agents as runners or workers, if you’ve used other CI/CD tools.
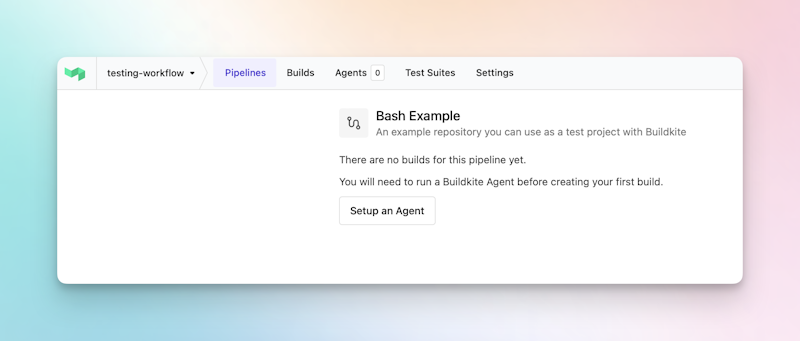
Let's install an agent to run this new build. Click the Setup an agent button.
You’ll now see a list of options and a link to the docs for installing and configuring build agents, let's look at a couple of options.
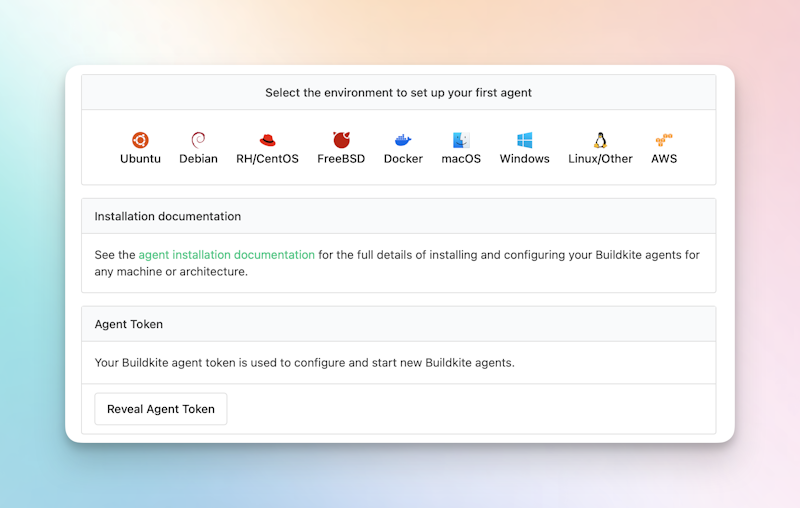
Running the agent locally (MacOS)
Requirements:
To run the agent on your Mac:
- Click on macOS
- Install the agent with homebrew. In your terminal run:
brew install buildkite/buildkite/buildkite-agent- Configure your local agent. Replacing
INCLUDE_YOUR_AGENT_TOKEN_HEREwith your actual agent token (found on the Agents page). In your terminal run:
sed -i '' "s/xxx/INCLUDE_YOUR_AGENT_TOKEN_HERE/g" "$(brew --prefix)"/etc/buildkite-agent/buildkite-agent.cfg- Run
buildkite-agent startin your terminal.
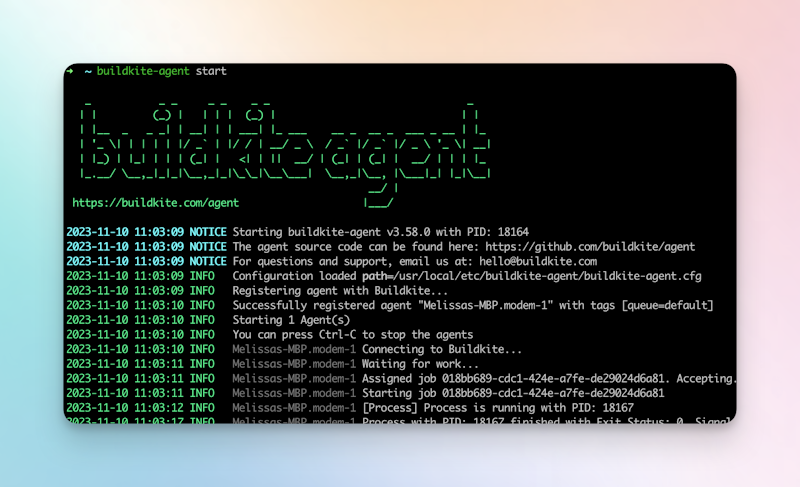
You will now have the Buildkite agent up and running locally, ready to perform build work. You can verify this on the Agents page in your Buildkite organization. There'll be a list of agents, and you can click into each agent listed to get more granular detail.
Running the agent on AWS
If you’d like to run the agent in your AWS environment instead, using Buildkite’s Elastic Stack for AWS is the easiest way to get started. The Elastic Stack is an AWS CloudFormation template that will spin up an auto-scaling group of Elastic Compute Cloud (EC2) agents to execute your build jobs.
- Copy your buildkite agent token
- Click AWS
- Click Launch stack
- On the AWS CloudFormation page:
- Click Next.
- Paste your agent token (copied from the agents page) into the
BuildkiteTokenfield.
- Continue clicking through the rest of the AWS CloudFormation prompts until you get to the Submit button.
- Click this button to create your Auto Scaling group.
By default, the number of instances started is set to 0, so you will need to set the desired number of instances for your Auto Scaling group. Once the stack is created:
- Navigate to EC2 in the AWS Management Console
- Under Auto Scaling on the left hand navigation menu, click Auto Scaling Groups.
- Find and click on your auto scaling group (it starts with the name of the CloudFormation stack you just created)
- Under Group details, click Edit.
- Set the Desired capacity and Minimum capacity fields to
1to create a single build agent instance. - Your first agent will start and appear on your Agents page. This may take a few minutes.
🙋♀️ Note: We use the BuildkiteToken field to store the value for simplicity in this example. It’s best practice to use the BuildkiteAgentTokenParameterStorePath and BuildkiteAgentTokenParameterStoreKMSKey properties to retrieve your Buildkite token securely from the SSM Parameter Store.
Run the build and examine the output
Now that you have an agent running, you can run your first build.
On the Pipelines page, click New Build.
Specify:
- A message for the build
- The commit to use. We’ll use the default–HEAD.
- The branch to build against. We’ll use the default–main.
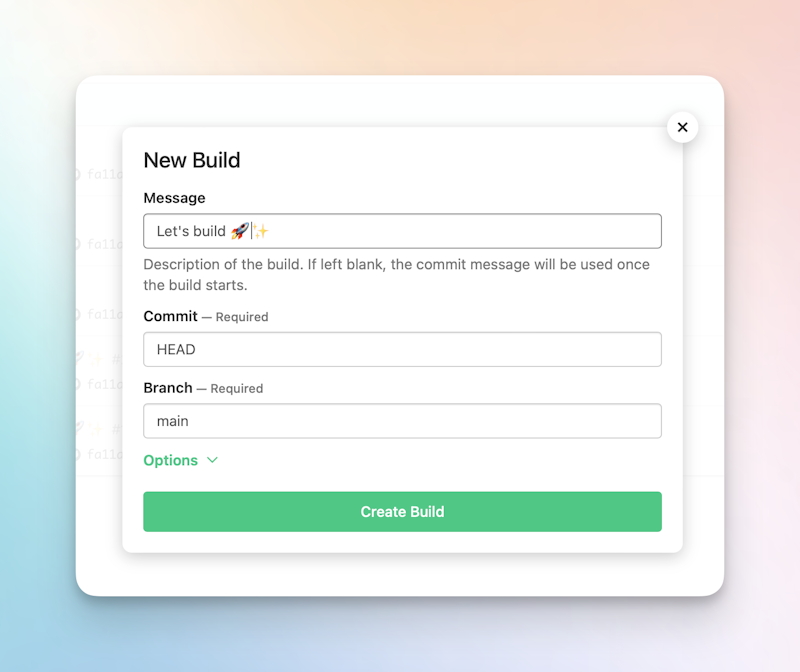
Click Create Build.
Your agent has been polling buildkite.com for work in the background, Buildkite now allocates your build jobs to available build agents.
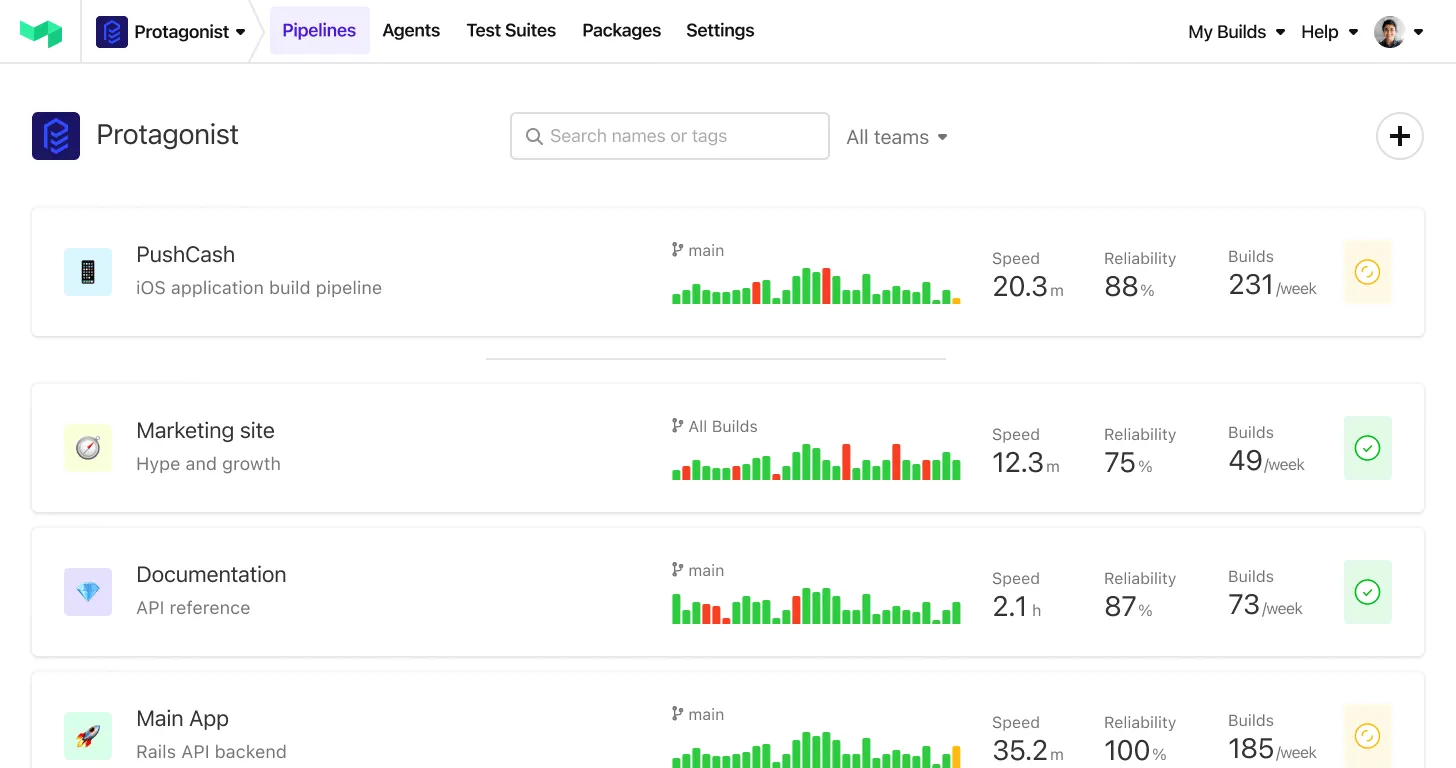
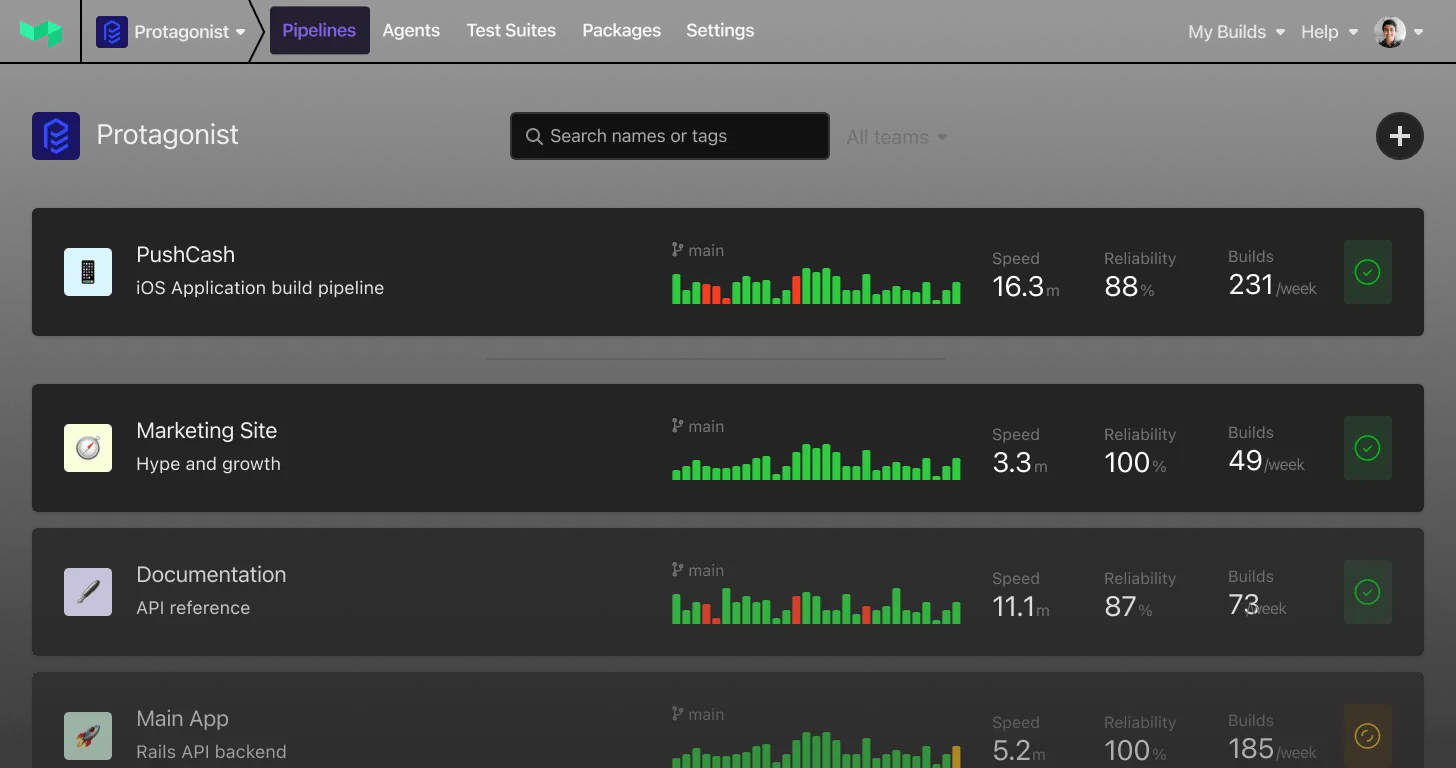
When the work is done, the build results are displayed in an easy-to-read format, with easy to follow logs in the Buildkite web console.
name: "Bash Example"
description: "An example repository you can use as a test project with Buildkite"
emoji: ":bash:"
steps:
  - command: "buildkite-agent pipeline upload"
    label: ":pipeline:"
Here’s what happened in our first build:
- The first command
buildkite-agent pipeline uploadwas run from thetemplate.ymlfile.- This configured the environment, ran pre-command and post-command hooks, and loaded the pipeline definition.
- The second command is a build step from the pipeline file (
pipeline.yml).- This executes the shell script. In this example, the script gives us an ASCII thumbs up, and congratulations on a job well done.
Now that we’ve verified we can run the base project as is, let's look at how to add custom steps, to create a dynamic pipeline.
Including custom steps
We don’t yet have a “dynamic” build pipeline, or a pipeline that runs a script. The key to generating a dynamic pipeline is to move from a static pipeline definition (contained above in the pipeline.yml) to one that’s generated from code. You’ll then be able to change the default build step to accept the output of a script as input to the buildkite-agent pipeline upload command.
Buildkite helps make this script dynamic with a few simple code changes.
First you would change what's in the repo’s .buildkite directory. You would alter the existing shell script, or create some new logic that generates the CI/CD pipeline in the YAML format that Buildkite requires. You don’t need to use a shell script; you can invoke an executable script at runtime in any language that your build agent supports–it could be Go, Ruby, Python, the options are endless!
#!/bin/bash

set -eu

echo "steps:"

# A step for each dir in specs/

find specs/* -type d | while read -r D; do
  echo "  - command: \"$D/test.sh\""
  echo "    label: \"$(basename "$D")\""
done

# A deploy step only if it's the master branch

if [[ "$BUILDKITE_BRANCH" == "main" ]]; then
  echo "  - wait"
  echo "  - command: \"echo Deploy!\""
  echo "    label: \":rocket:\""
fi
The above example script leverages the environment variables that the Buildkite agent injects into the environment to:
- Iterates the
specsdirectory to find which tests should be run prior to a deployment, and echoes these tests out as Buildkite commands inpipeline.yml. - Adds a command to deploy the project, but only if we’re building the
mainbranch. Now that you have apipeline.shfile in your.buildkitedirectory, you can now remove thepipeline.yml. And in thetemplate.yml, you can change thecommandline from:
- command: "buildkite-agent pipeline upload"to:
- command: “.buildkite/script.sh | buildkite-agent pipeline upload”The output of this script is a pipeline YAML file. This file is piped into the Buildkite agent, which will receive and execute the commands generated. You now have a dynamic pipeline. 🎉
Challenges building dynamic CI/CD pipelines
Generating a CI/CD pipeline spec on the fly can be a challenge in systems that require a valid definition before the build begins. Most developers have to implement workarounds, such as creating pre-build hooks to overwrite the existing configuration.
Many development teams often achieve dynamic pipelines by running their entire build process as a set of deployment scripts. Unopinionated systems like Jenkins make this easy. The downside is that you end up needing to handle concurrency, logging, monitoring, pipeline security, artifact storage, and more, in code. This leads to large, unwieldy, and hard to maintain build scripts.
Teams with large, complex software ecosystems can find it difficult to manage concurrency and complexity within highly dynamic pipelines. Wix ran into this problem with its own CI/CD system, which handles 9,000 backend builds a day. Without a way to prioritize builds and offload different build types to different agent pools, it fell victim to “build storms” where low-priority feature tests were blocking high-priority hotfixes from shipping to production.
How can Buildkite help?
Buildkite’s first-class support for dynamic pipelines makes it the easiest, most scalable tool for building CI/CD pipelines.
Buildkite offers a number of features that make building CI/CD pipelines easier, including integrated artifact support, CloudWatch integration for monitoring, concurrency control, and near-unlimited scalability. Plus, you can monitor and control build activity across all of your projects through a single view.
To see it in action, check out our on-demand webinars.