Last month, we shared our excitement around the early performance reports of Apple’s new line of M1 Macs, as well as a larger trend of on-demand infrastructure powered by ARM processors. Today, I want to spend some time talking more specifically about the practical implications of running ARM-based workloads with Buildkite.
If you’re thinking about running the Buildkite agent on an M1 Mac or on one of Amazon’s new ARM-based Graviton EC2 instances, the most important thing to know is… it works exactly the same as in x86_64 environments!
We’ve been hard at work to make sure running Buildkite in your ARM environments is as uneventful as possible. We started laying the groundwork for Apple Silicon support last July and began publishing M1 binaries starting with Buildkite agent 3.26.0 in December. Homebrew users can run brew install buildkite/buildkite/buildkite-agent, and the appropriate binary for your CPU will be installed automatically.
We’ve had arm64 linux binaries for years, and recently added support for a variety of AWS Graviton instance types with the release of the Elastic CI Stack for AWS v5.1.0.
Elastic CI Stack Revisited
The Elastic CI Stack for AWS is a template that allows you to create a private, autoscaling cluster of Buildkite agents on Amazon EC2 instances with the click of a button. Literally!
When you log into your Buildkite account, navigate to the “Agents” tab, and select “AWS” from the list of options, you’ll find a friendly “Launch Stack” button waiting for you:
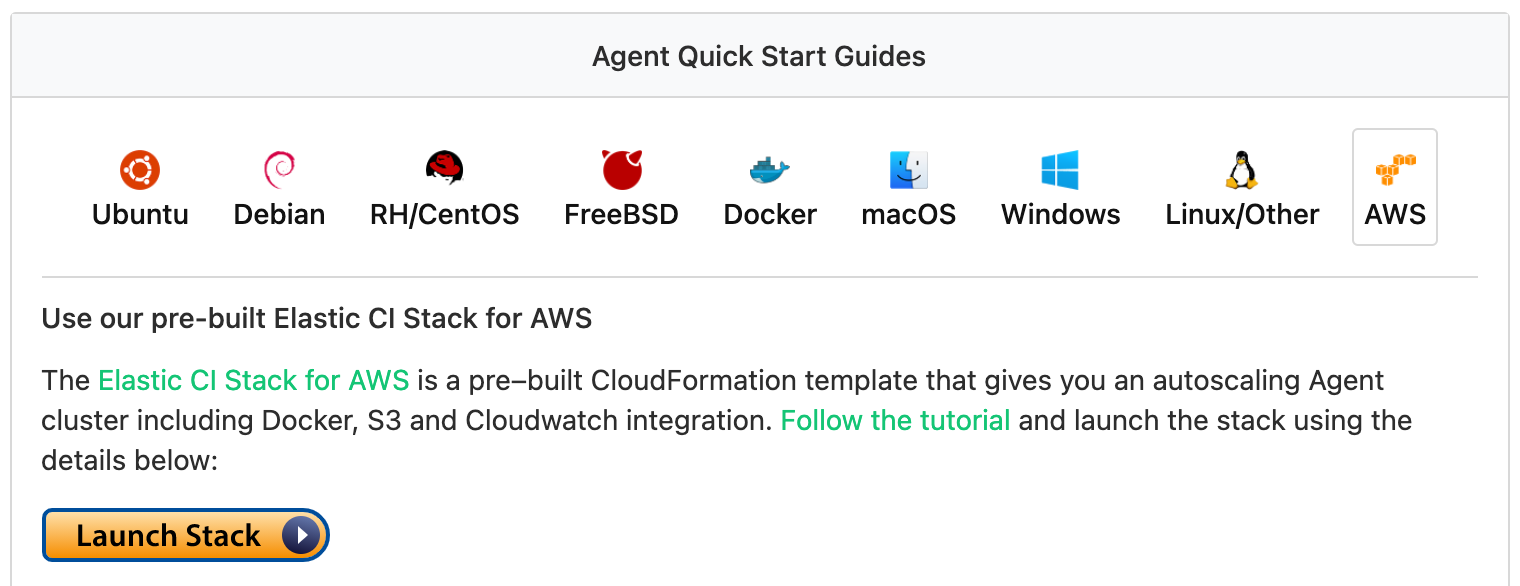
Clicking the button will bring you to the AWS Cloudformation dashboard with our template ready to import. By default, the stack provides prescriptive guidance on AWS best practices, and will create a new VPC, an S3 bucket per pipeline to manage secrets, and CloudWatch metrics for your builds in addition to the autoscaling group for your agents. These elements are parameterized in the template, allowing experienced users to use their own resources instead of generating new ones.
You’ll also be able to tune the autoscaling specifics, including the minimum and maximum number of agents to run, and how long they can be idle before scaling down. This is also where you’ll be able to select which instance type(s) should be used when creating new agents. Need to run your build in an ARM environment? The only parameter that should require changing is InstanceType, where you can specify 1-4 AWS Graviton instance types as your preferred target(s).
For a quick demonstration, give our Elastic CI Stack tutorial a runthrough. I did it on a t4g.small instance myself, but any of the ones on the list should work just as well! With the Elastic CI Stack, you can maximize the cost efficiency of your cloud environment by automatically adjusting your build capacity to match your current needs.
Targeting Your ARM Agents
Unless you’re brand new to Buildkite, chances are good that you already have some agents running. When you start spinning up newfangled ARM instances, or really any architecture or OS-specific build environment, it’s important that you be able to control which pipelines target which agents. This can be easily accomplished by applying tags to your agents.
When you spin up an Elastic CI Stack, as above, some tags are automatically set for you based on instance metadata like so:
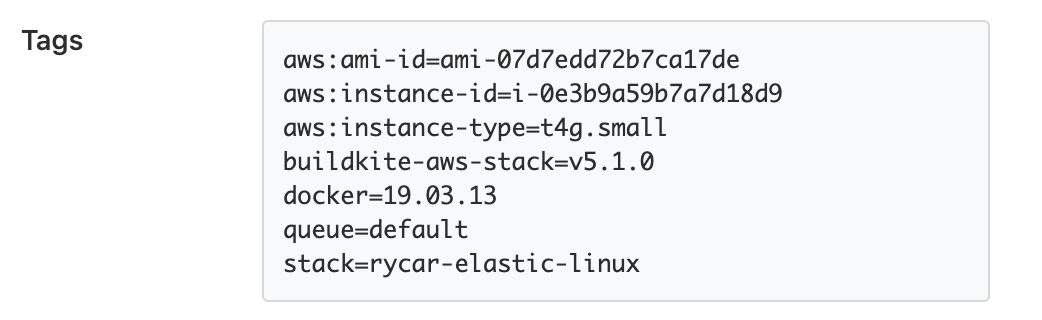
In my pipelines, I can use any of these tags to control where my jobs are run. For example, my pipeline.yml could look like:
steps:
  - command: "script.sh"
    agents:
      stack: "rycar-elastic-linux"
Instead of relying on metadata, you can also explicitly define queues to assign to your agent. The “default” queue is defined by default, and each agent can belong to multiple queues. In the above example, I might want my stack’s instances to belong in an “arm64” queue, so I might adjust my cloudformation template like so:
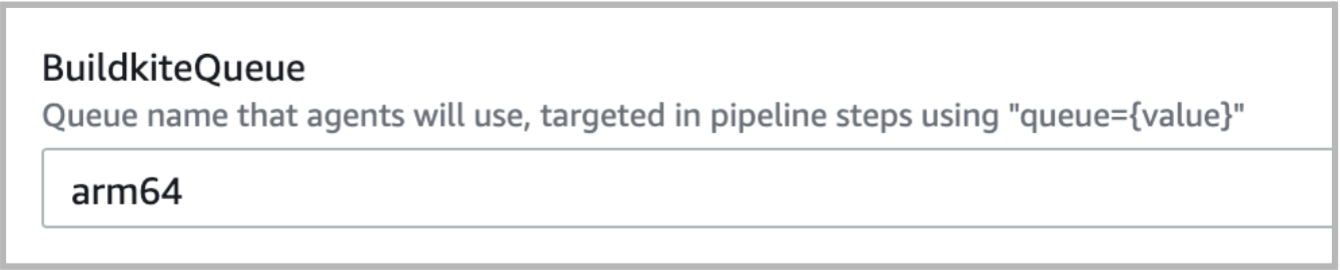
Then I can update my stack and modify my pipeline.yml with a more relevant tag:
steps:
  - command: "script.sh"
    agents:
      queue: “arm64”
Now I can be confident my builds will happen in the right environment!
Next Steps
If this overview has piqued your interest, feel free to follow along with your own account or start a free trial.
Once you get set up, you’ll be building on x86_64 and/or arm64 in no time flat!
For easy reference, here are some more of the resources covered in this blog.