
Getting started
👋 Welcome to Buildkite Pipelines! You can use Pipelines to build your dream CI/CD workflows on a secure, scalable, and flexible platform. This tutorial takes you through creating a basic pipeline from an example.
Before you start
To complete this tutorial, you'll need:
-
A Buildkite account. If you don't have one already, create a free account.
When you create a new organization as part of sign-up, you'll be guided through a flow to create and run a starter pipeline. Complete that before continuing, and keep your agent running to continue using it in this tutorial.
-
To enable the YAML steps editor in Buildkite:
- Select Settings > YAML Migration to open the YAML migration settings.
- Select Use YAML Steps for New Pipelines, then confirm the action in the modal.
Git. This tutorial uses GitHub, but Buildkite can work with any version control system.
Understand the architecture
Before creating a pipeline, take a moment to understand Buildkite's architectures and the advantages they provide. Buildkite provides both a hosted (known as a managed solution) and self-hosted architecture for its build environments. A self-hosted architecture (also known as a hybrid architecture) separates the following aspects of Buildkite's core functionality:
- The control plane
- The build environment
In this type of hybrid architecture, Buildkite runs the control plane (the main product interface) as a SaaS product, and you run the build environment on your own infrastructure. In other words, Buildkite handles the orchestration, and you bring the compute. That means you can fine-tune and secure the build environment to suit your particular use case and workflow.
Compared to fully self-hosted solutions, where you run both the control plane and build environment on your own infrastructure, a hybrid architecture reduces the maintenance burden on your team. Unlike managed solutions, a hybrid architecture gives you full control over security within your build environment. See Hybrid architecture to learn more.
Buildkite also provides a managed solution, offered by the Buildkite hosted agents feature, where both the control plane and build environment are provided and handled by Buildkite. This solution is useful when you need to get a build environment up and running quickly or you have limited resources to implement a hybrid architecture, or both.
Set up an agent
The program that executes work is called an agent in Buildkite. An agent is a small, reliable, and cross-platform build runner that connects your infrastructure to Buildkite. The agent polls Buildkite for work, runs jobs, and reports results. You can install agents on local machines, cloud servers, or other remote machines, as well as part of Buildkite hosted agents.
Buildkite agents connect to Buildkite through a cluster. Clusters provide a mechanism to organize your pipelines and agents together, such that the pipelines associated with a given cluster can only be built by the agents (defined within queues) in the same cluster.
By default, Buildkite organizations have one cluster, named Default cluster with a single queue, named default-queue, noting that a cluster maintainer or Buildkite organization administrator can customize these default names.
You need at least one agent configured within its own queue and cluster to run builds.
If you're already running an agent, skip to the next step.
Create a Buildkite hosted agent
You can create the first Buildkite hosted agent within a Buildkite organization for a two-week free trial, after which a usage cost (based on the agent's capacity) is charged per minute.
To create a hosted agent:
- Navigate to the cluster you want to run your pipeline in. To do this, select Agents in the global navigation to access the Clusters page.
- Select the cluster (for example, Default cluster) to which the hosted agent will be added.
-
Follow the Create a queue > Using the Buildkite interface instructions to begin creating your hosted agent within its own queue.
As part of this process:
- In the Select your compute section, choose Hosted.
- Follow the relevant sub-steps for configuring your hosted agent.
-
Make your pipelines use this hosted agent by default, by ensuring its queue is the default queue. This should be indicated by (default) after the queue's key on the cluster's Queues page. If this is not the case and another queue is marked (default):
- On the cluster's Queues page, select the queue with the hosted agent you just created.
- On the queue's Overview page, select the Settings tab to open this page.
- In the Queue Management section, select Set as Default Queue.
Your Buildkite hosted agent, as the new default queue, is now ready to use.
Install and run a self-hosted agent
Before installing and running a self-hosted agent, ensure you have:
- a cluster (for example, Default cluster) you can connect this agent to, and
-
the value of an agent token (for example, Initial agent token), which you can configure for the agent.
Be aware that since hosted agents are managed by Buildkite, there is no need to create agent tokens for these types of agents.
To install and run an agent in your own self-hosted infrastructure (including your own computer):
-
Decide where you want to run the agent.
Most engineers start by running an agent on their local machine while playing around with pipeline definitions before setting up a long-term solution.
-
Follow the instructions for where you want to install the agent.
To install locally, see:
Or see all installation options.
Ensure you configure the agent token, which connects the agent to your Buildkite account.
To confirm that your agent is running, and configured correctly with your credentials, go to Agents. You should see a list of all agents linked to the account and their status.
Create a pipeline
Pipelines are how Buildkite represents a CI/CD workflow. You define each pipeline with a series of steps to run. When you trigger a pipeline, you create a build, and steps are dispatched as jobs to run on agents. Jobs are independent of each other and can run on different agents.
Next, you'll create a new pipeline based on one of the following example pipelines:
Both result in the same behavior: the pipeline definition is uploaded from the repository (.buildkite/pipeline.yml), then a script runs that prints output to the logs.
To create a pipeline:
-
Select Add to Buildkite for the appropriate example based on where your agent is running.
For Bash:

For PowerShell:
On the New Pipeline page, leave all fields with their pre-filled default values and select Create Pipeline. This associates the example repository with your new pipeline, and adds a step to upload the full pipeline definition from the repository.
-
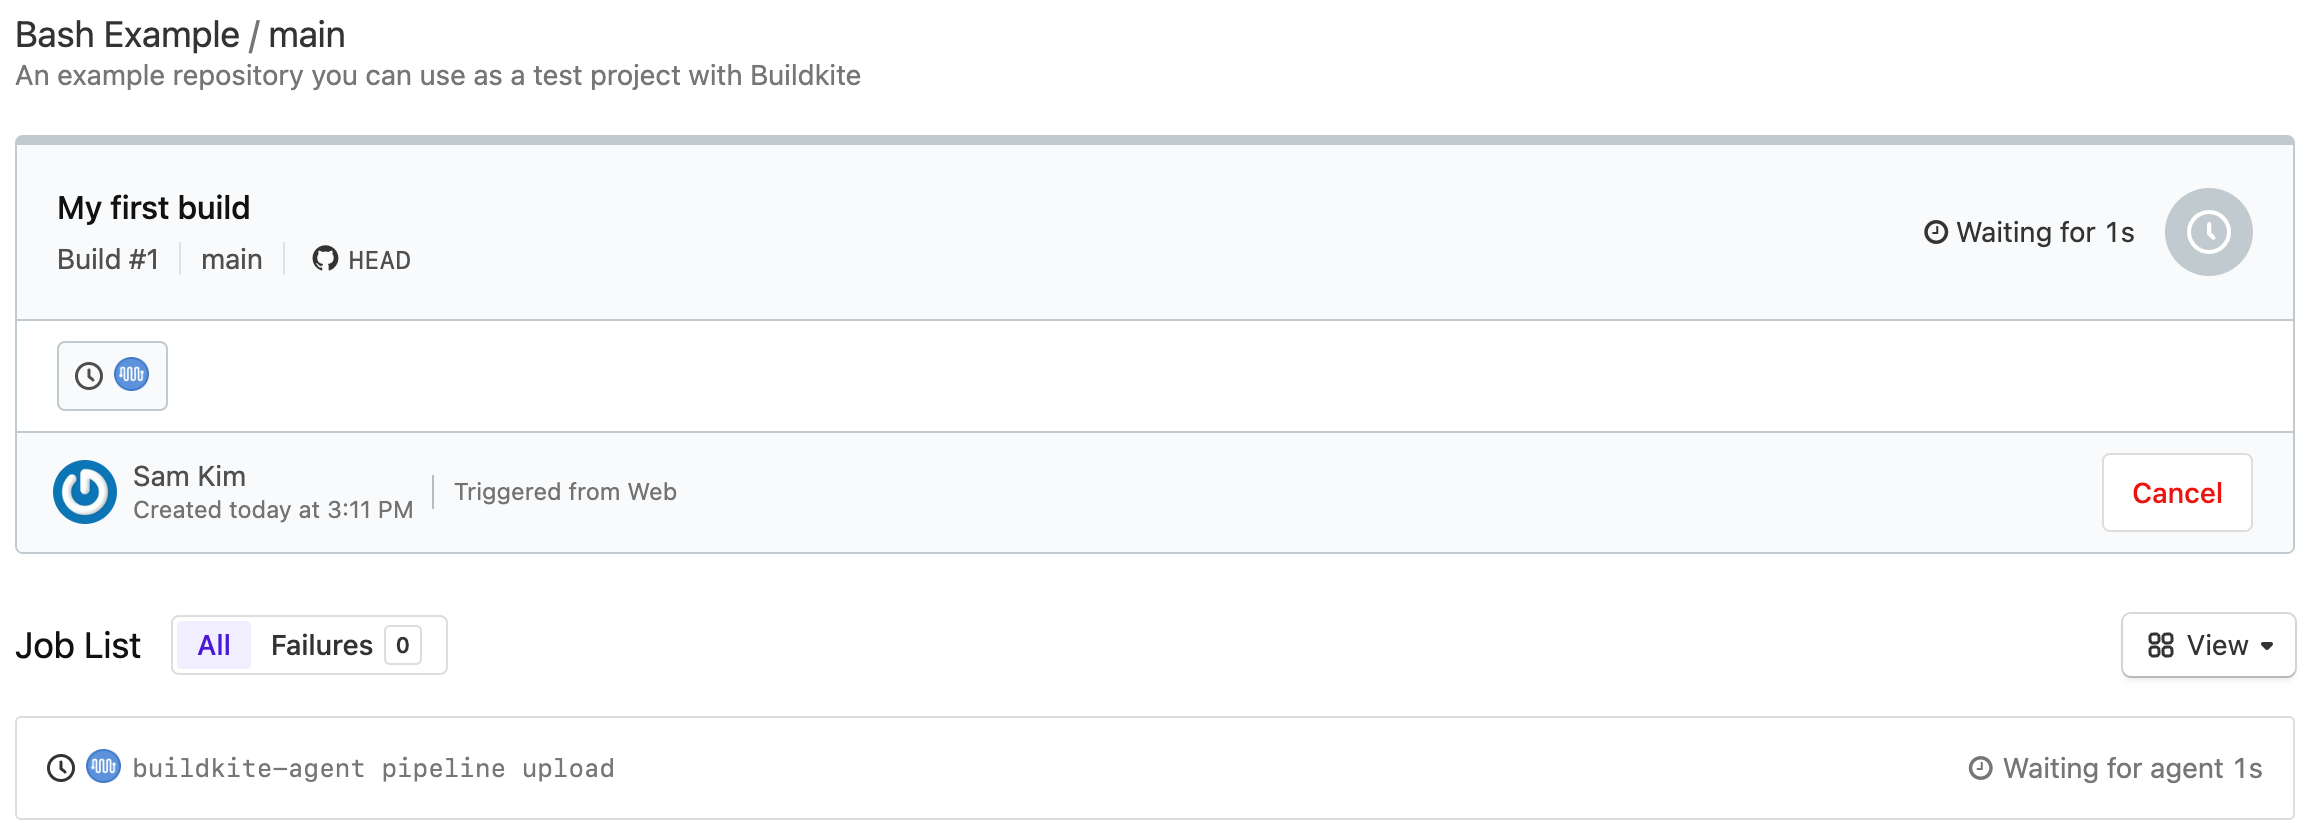
On the next page showing your pipeline name, click New Build. In the modal that opens, create a build using the pre-filled details.
- In the Message field, enter a short description for the build. For example, My first build.
- Select Create Build.
The page for the build then opens and begins running:
Check the output
After triggering the build, you can view the output as it runs and the full results when complete. The output for each step shows in the job list.
Expand the row in the job list to view the output for a step. For example, selecting Example Script shows the following:
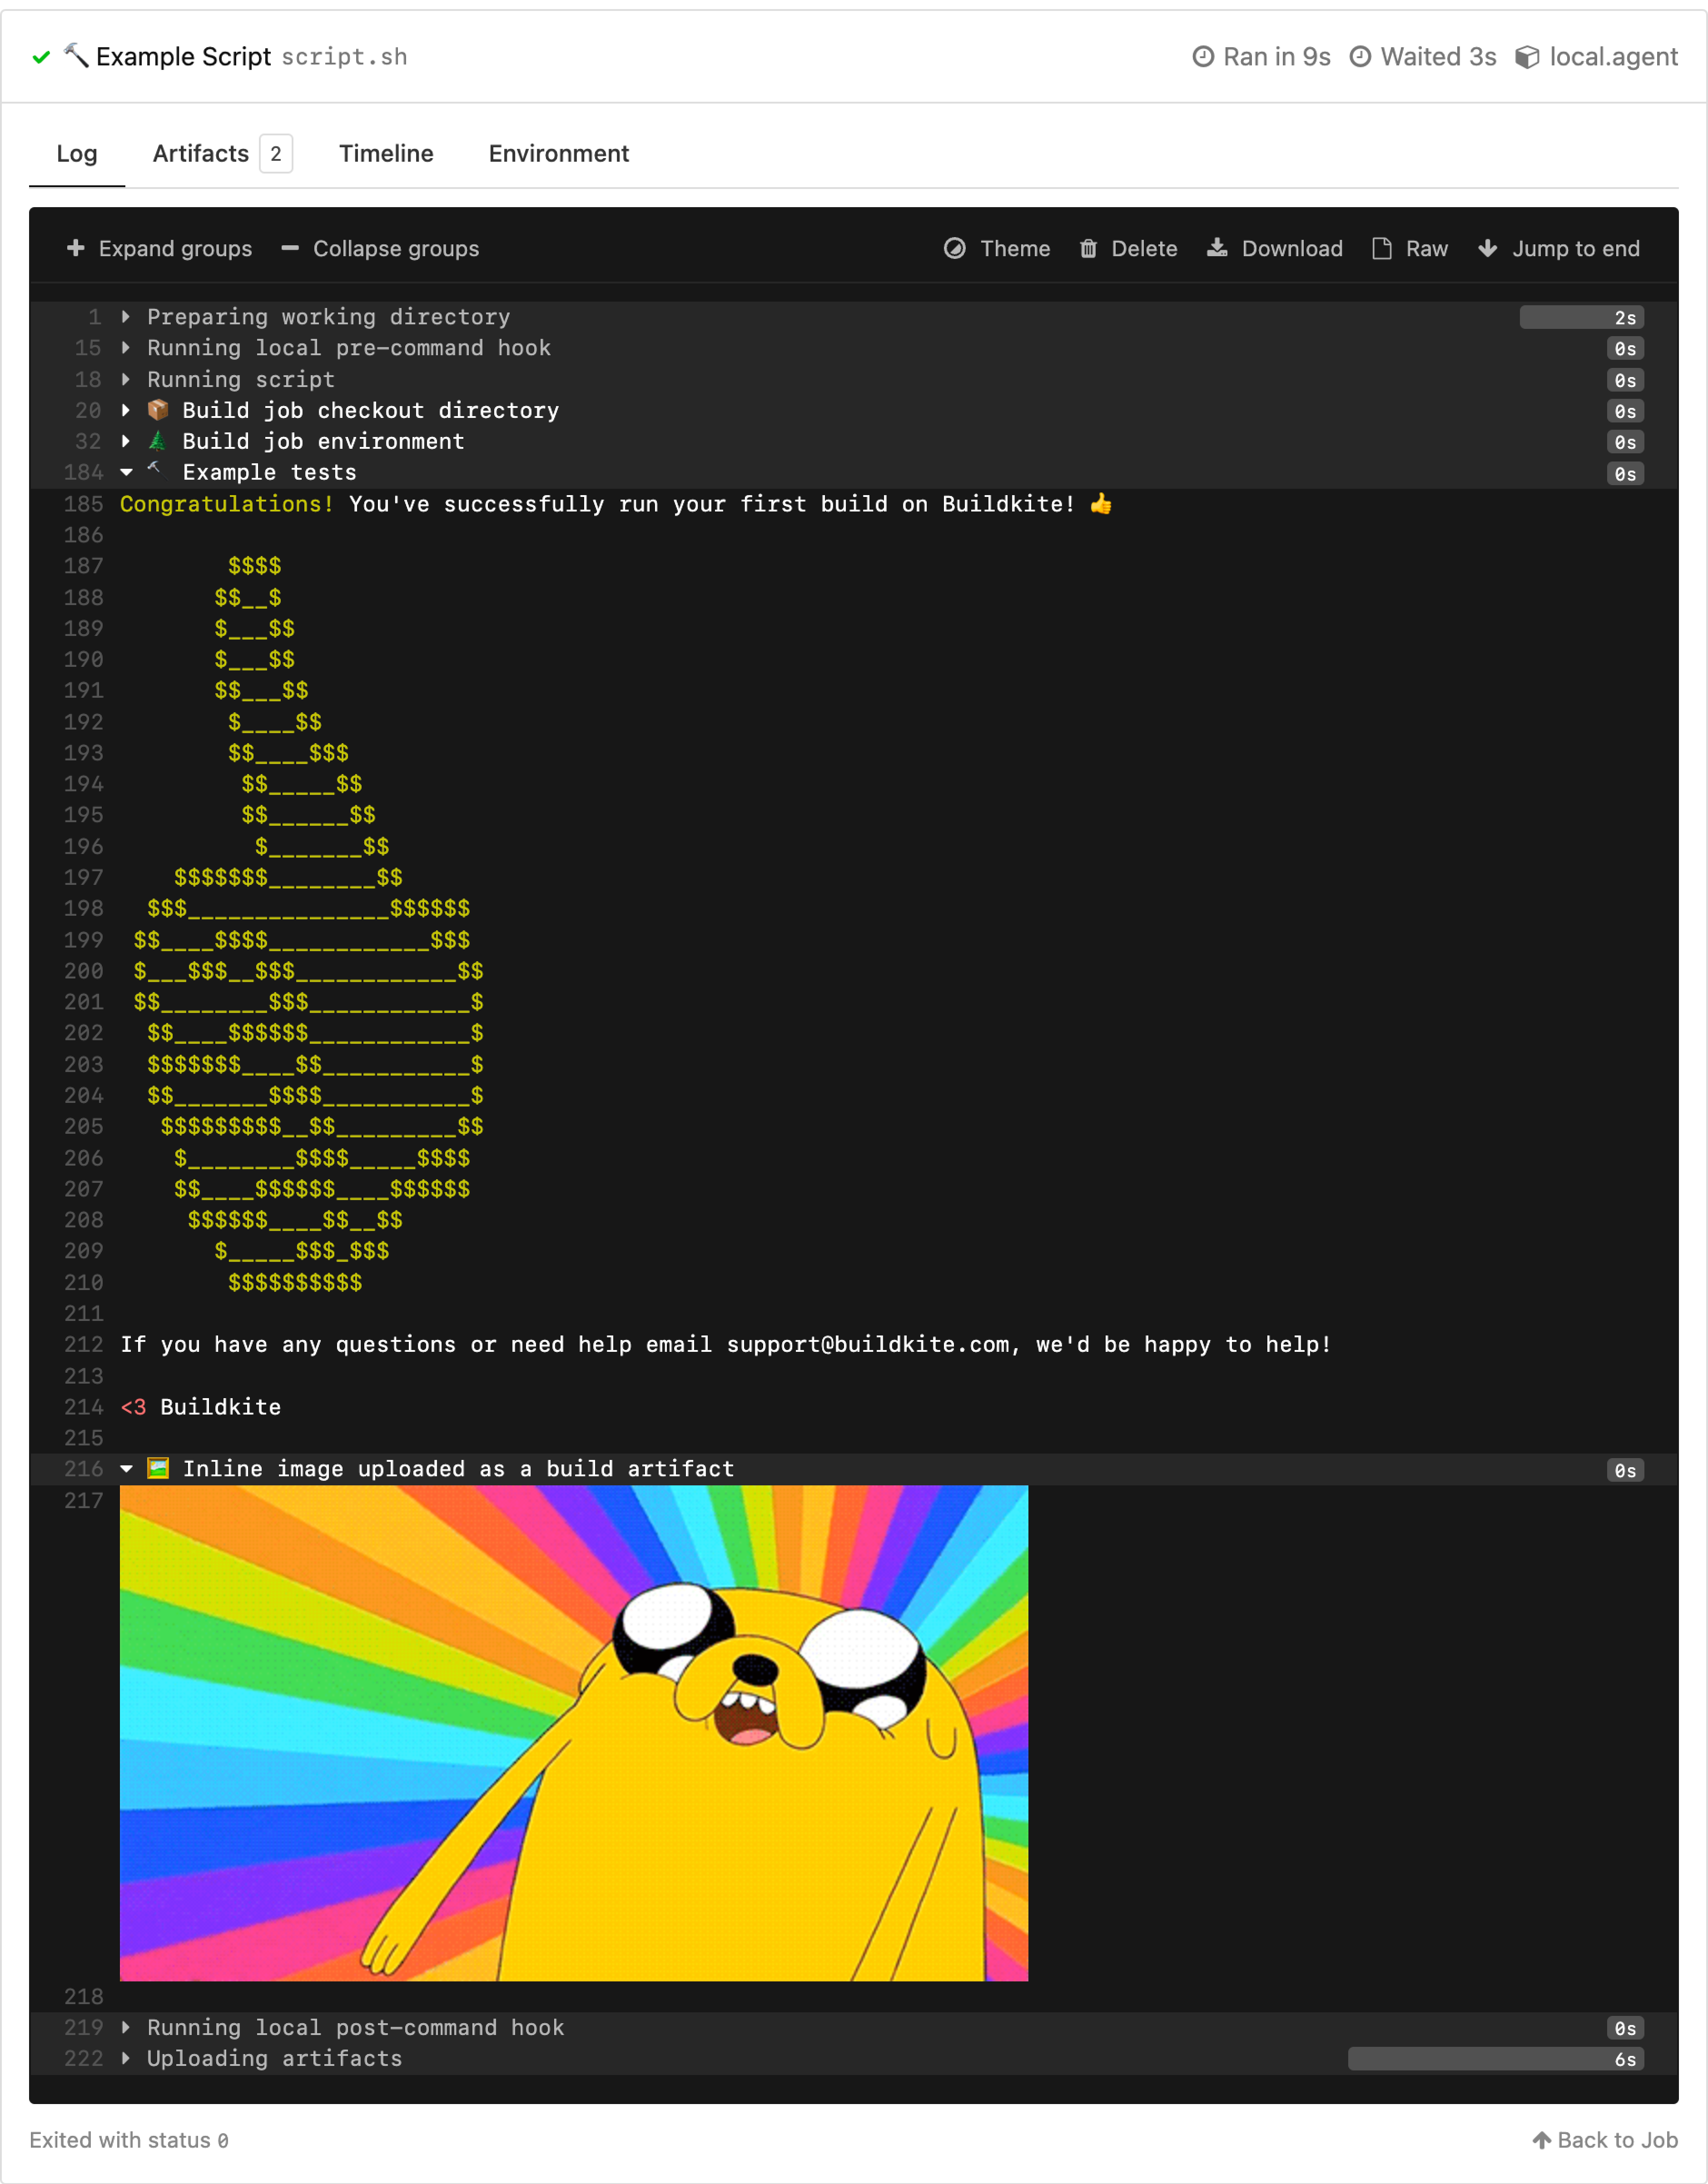
In the output, you'll see:
- A pre-command hook ran and printed some text in the logs.
- The agent checked out the repository.
- The agent accessed different environment variables shown in the job environment.
- The script ran and printed text to the logs and uploaded an image as an artifact of the build.
Beyond the log, select one of the other tabs to see the artifacts, a timeline breakdown, and the environment variables.
Next steps
That's it! You've installed an agent, run a build, and checked the output. 🎉
Now try creating your own pipeline.