Migrating to YAML steps
This guide explains the differences between the web-based editor and the YAML Steps editor, and shows how to migrate your organization's pipelines to YAML Steps.
There are two parts to migrating:
- Opt-in to using YAML Steps for any new pipelines created by your organization
- Migrate all existing pipelines, either one at a time or using bulk migration
After migrating to YAML Steps, you will no longer be able to access the web-based step editor.
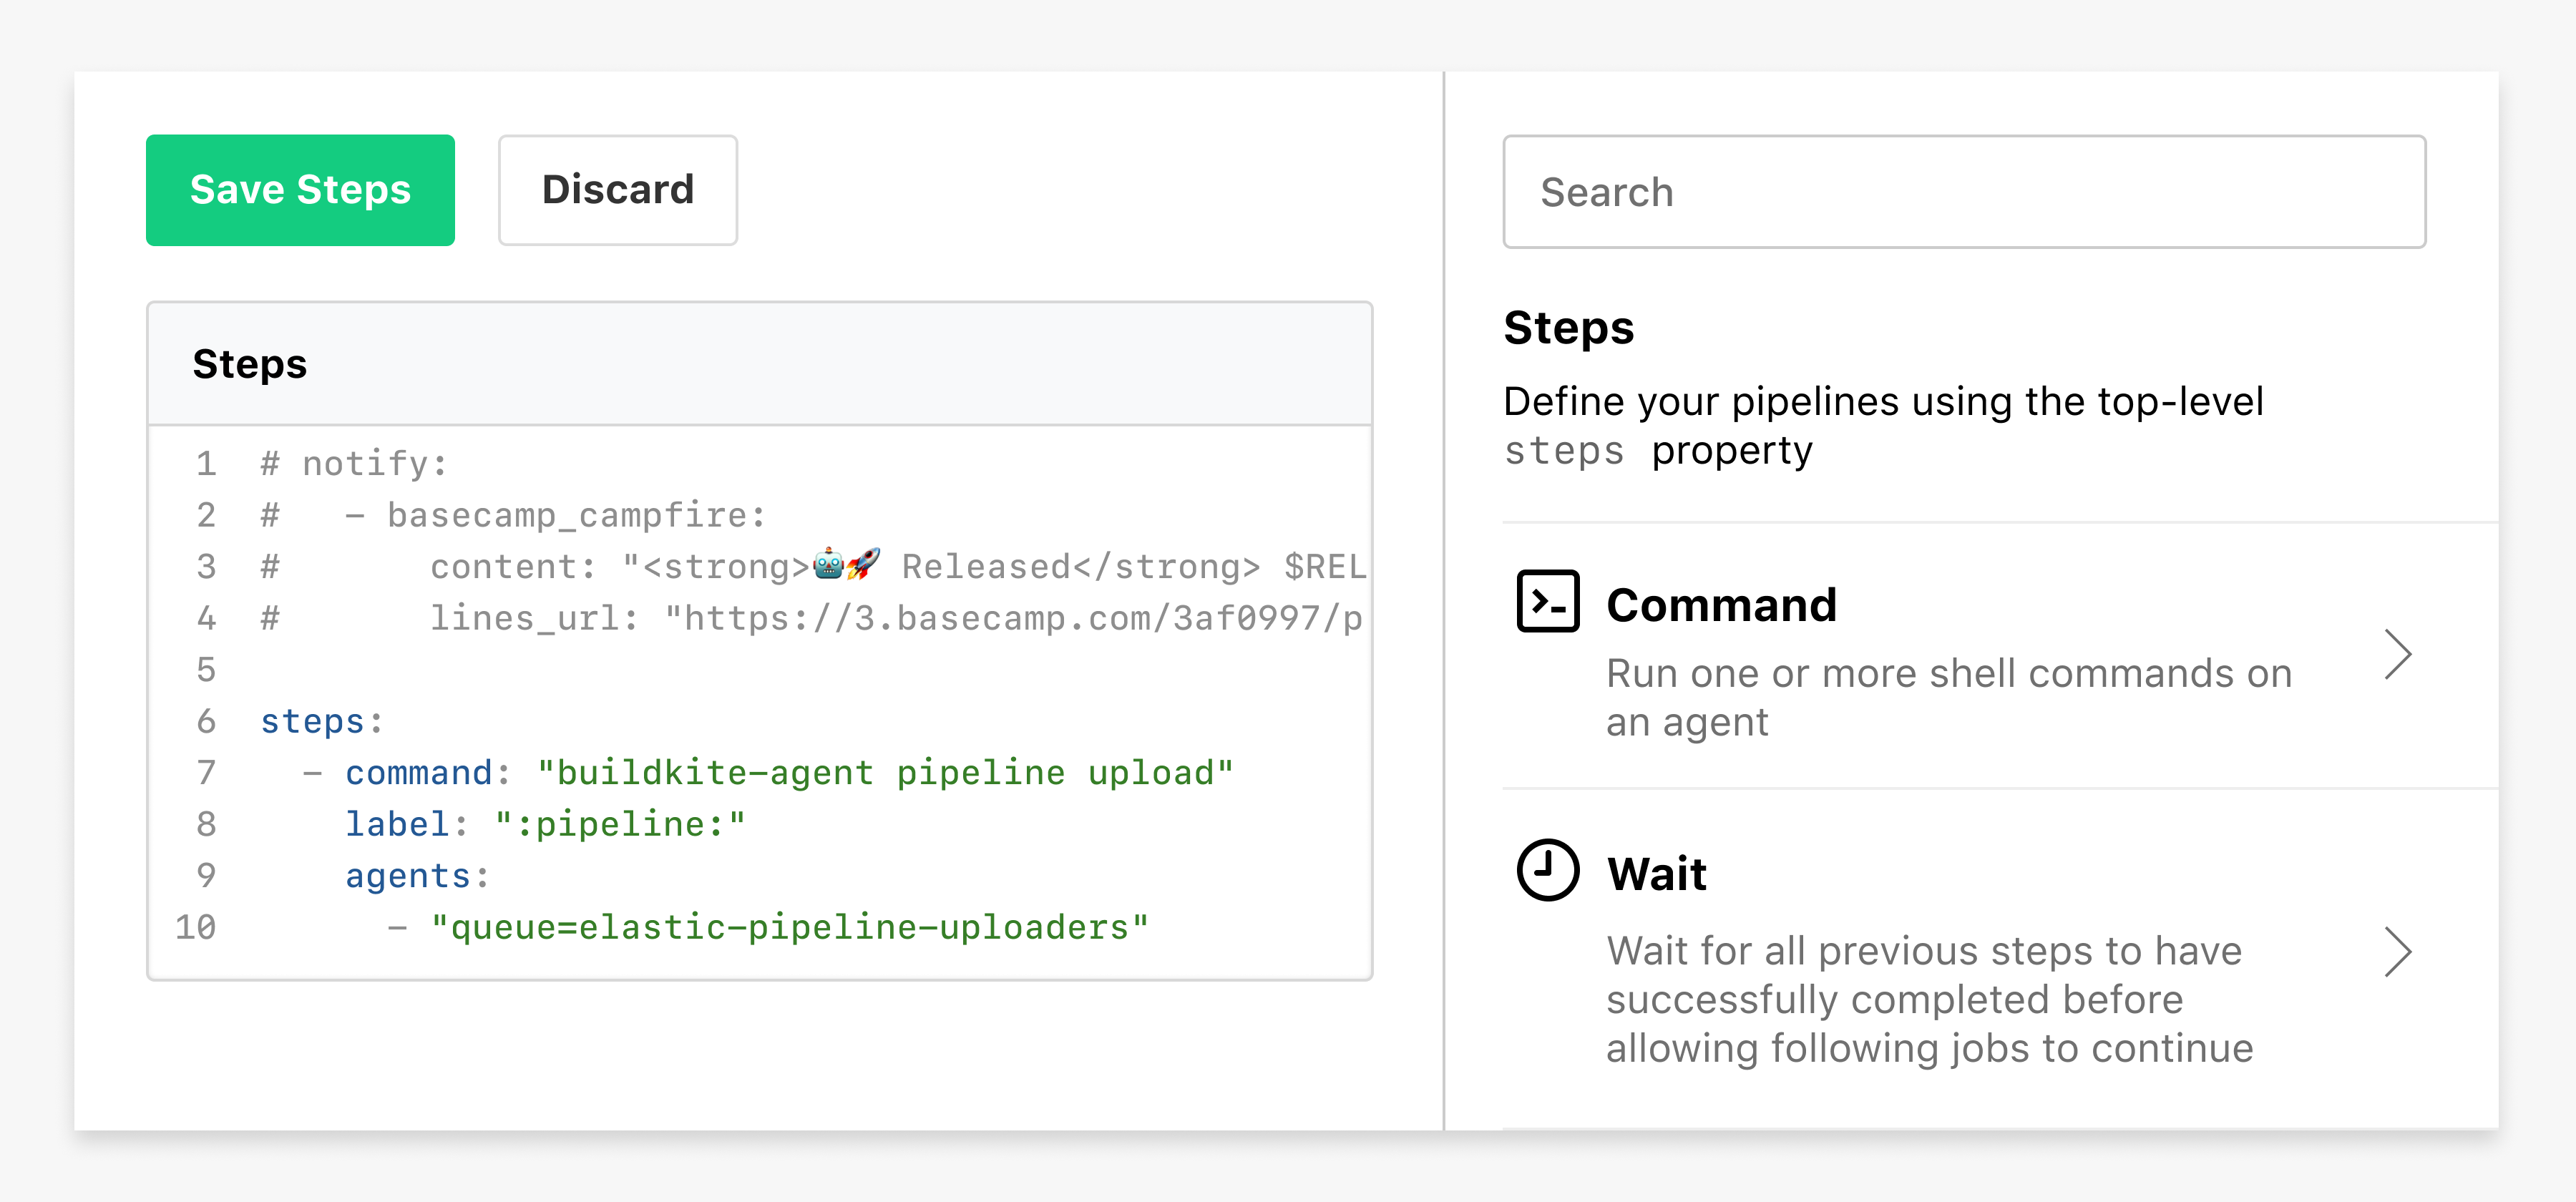
What is the YAML Steps editor?
Instead of creating and managing pipeline steps with the GUI-like step editor, pipelines will be managed in YAML in the YAML Steps editor.
A new reference sidebar is available alongside the YAML editor. Each step type lists the available top level attributes with short descriptions, for more detailed information on each you can click through to the relevant documentation page.
If you've been using the YAML steps editor during its beta, then your pipelines have already been migrated and will not require any changes.
Compatibility issues
Using YAML Steps changes the order in which environment variables are interpolated.
There are two precedence changes:
- Step-level environment variables will now take precedence over build-level variables (variables set when creating a new build)
- Top level
envblocks in YAML no longer override step-level environment variables
For example, in the pipeline.yml below, the command will echo step after you have migrated to using YAML Steps:
env:
  LEVEL: "pipeline"

steps:
  command: "echo $LEVEL"
  env:
    LEVEL: "step"
Prior to migrating to YAML Steps, the command will echo pipeline.
Using YAML Steps for new pipelines
To use the YAML Steps editor for new pipelines created in your organization, you'll need to opt-in on the Pipeline YAML Migration page in Organization Settings.
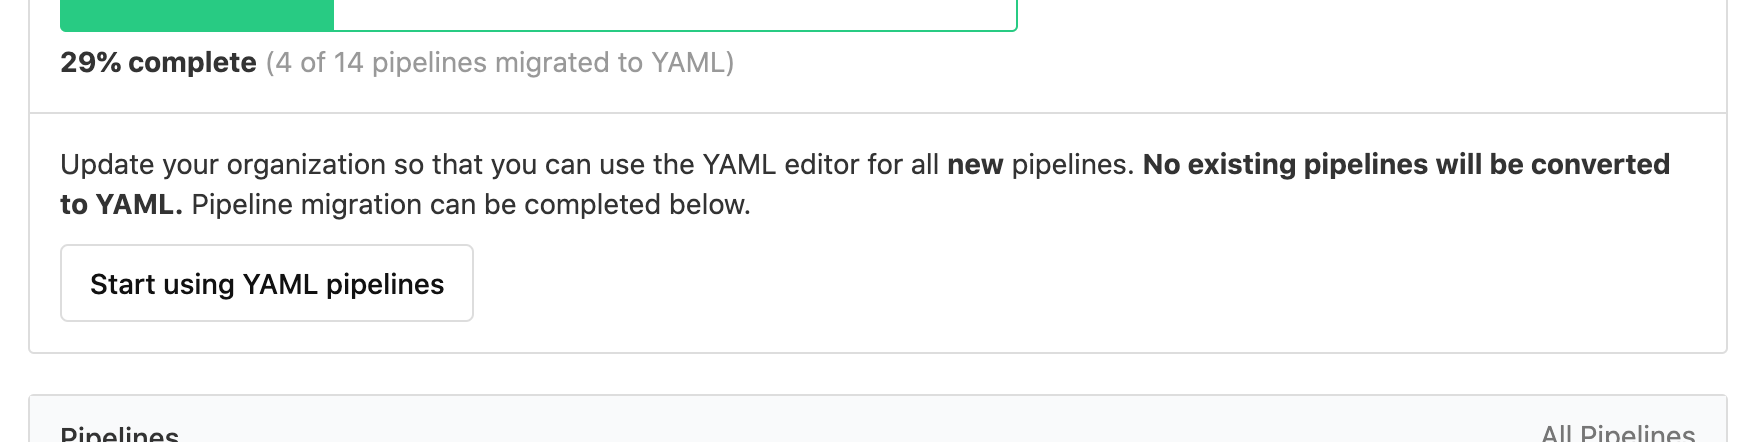
Clicking the button to start using YAML pipelines won't change anything for any existing pipelines in your organization. Migration of existing pipelines will need to be completed either individually or using the bulk migration tool. See Steps to migrate existing pipelines below for further information.
Migrating existing pipelines
The migration page can be accessed by organization administrators from the organization Settings page. On this page you can see which pipelines have already been migrated and which are yet to migrate.
Individual migration
You can migrate each pipeline individually from the Pipeline Settings page. The new YAML steps version of your pipeline will be auto-saved during migration, and will replace the web-based steps.
Under the web-based Steps editor is a button to Convert to YAML Steps:
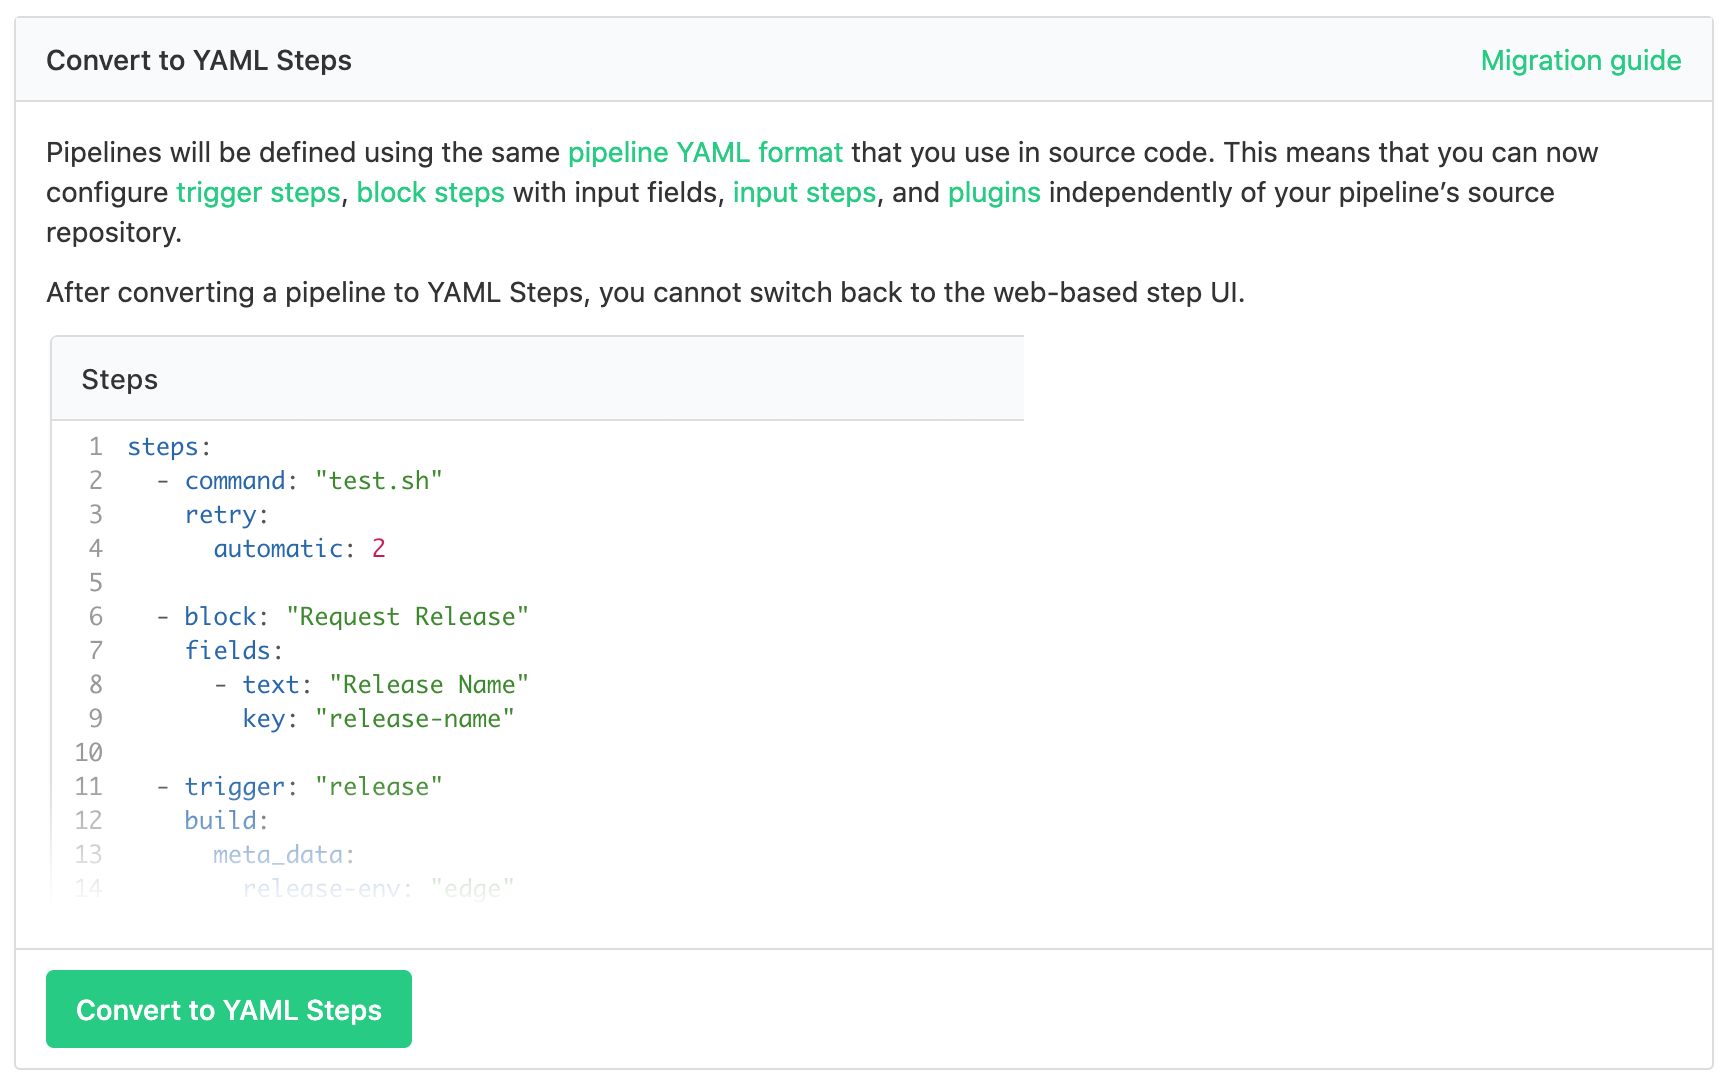
Click this button to convert your pipeline steps into YAML.
If you expect to have compatibility issues with your environment variables, individual migration is recommended.
Bulk migration
You can migrate all of the pipelines in your organization at the same time using the Replace web steps for all pipelines with YAML button on the migration page. The new YAML steps version of your pipeline will be auto-saved during migration, and will replace the web-based steps.
If you expect to have compatibility issues with your environment variables, migrate your pipelines individually.
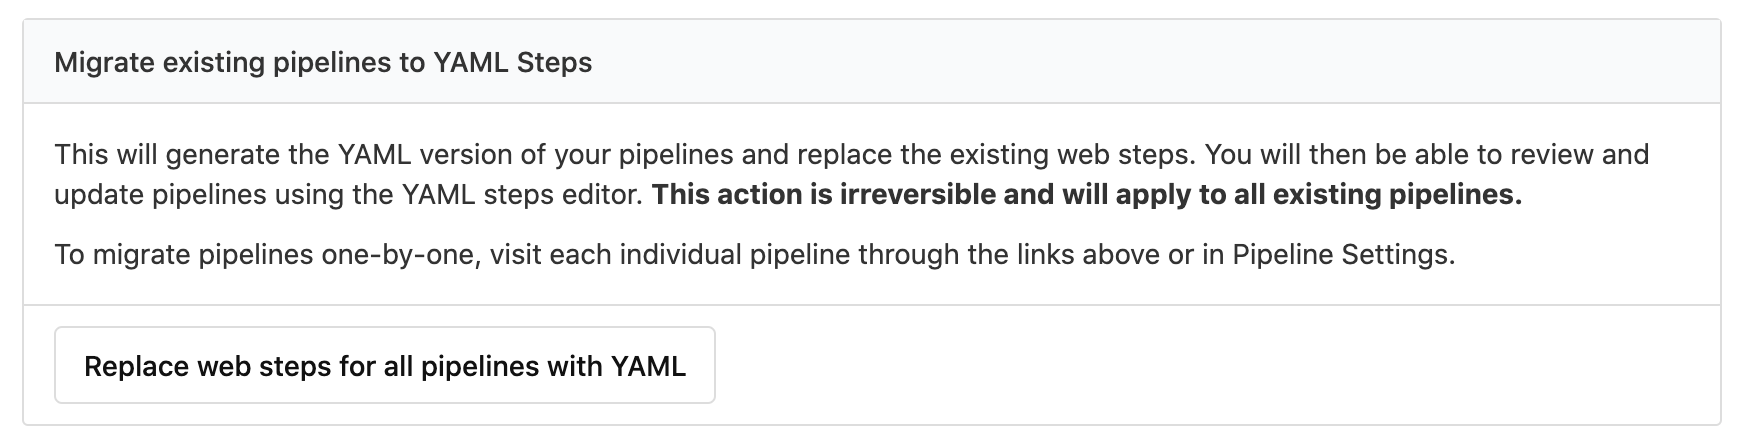
Click the migrate button to convert the steps of every in your organization into YAML. The new YAML steps version of your pipeline will be auto-saved during migration, and will replace the web-based steps.
After migrating, please manually check each pipeline, ensuring that they have completed successfully.