Block step
A block step is used to pause the execution of a build and wait on a team member to unblock it using the web or the API.
A block step is functionally identical to an input step, however a block step creates implicit dependencies to the steps before and after it. Note that explicit dependencies specified by depends_on take precedence over implicit dependencies; subsequent steps will run when the step they depend on passes, without waiting for block or wait steps, unless those are also explicit dependencies.
A block step can be defined in your pipeline settings, or in your pipeline.yml file.
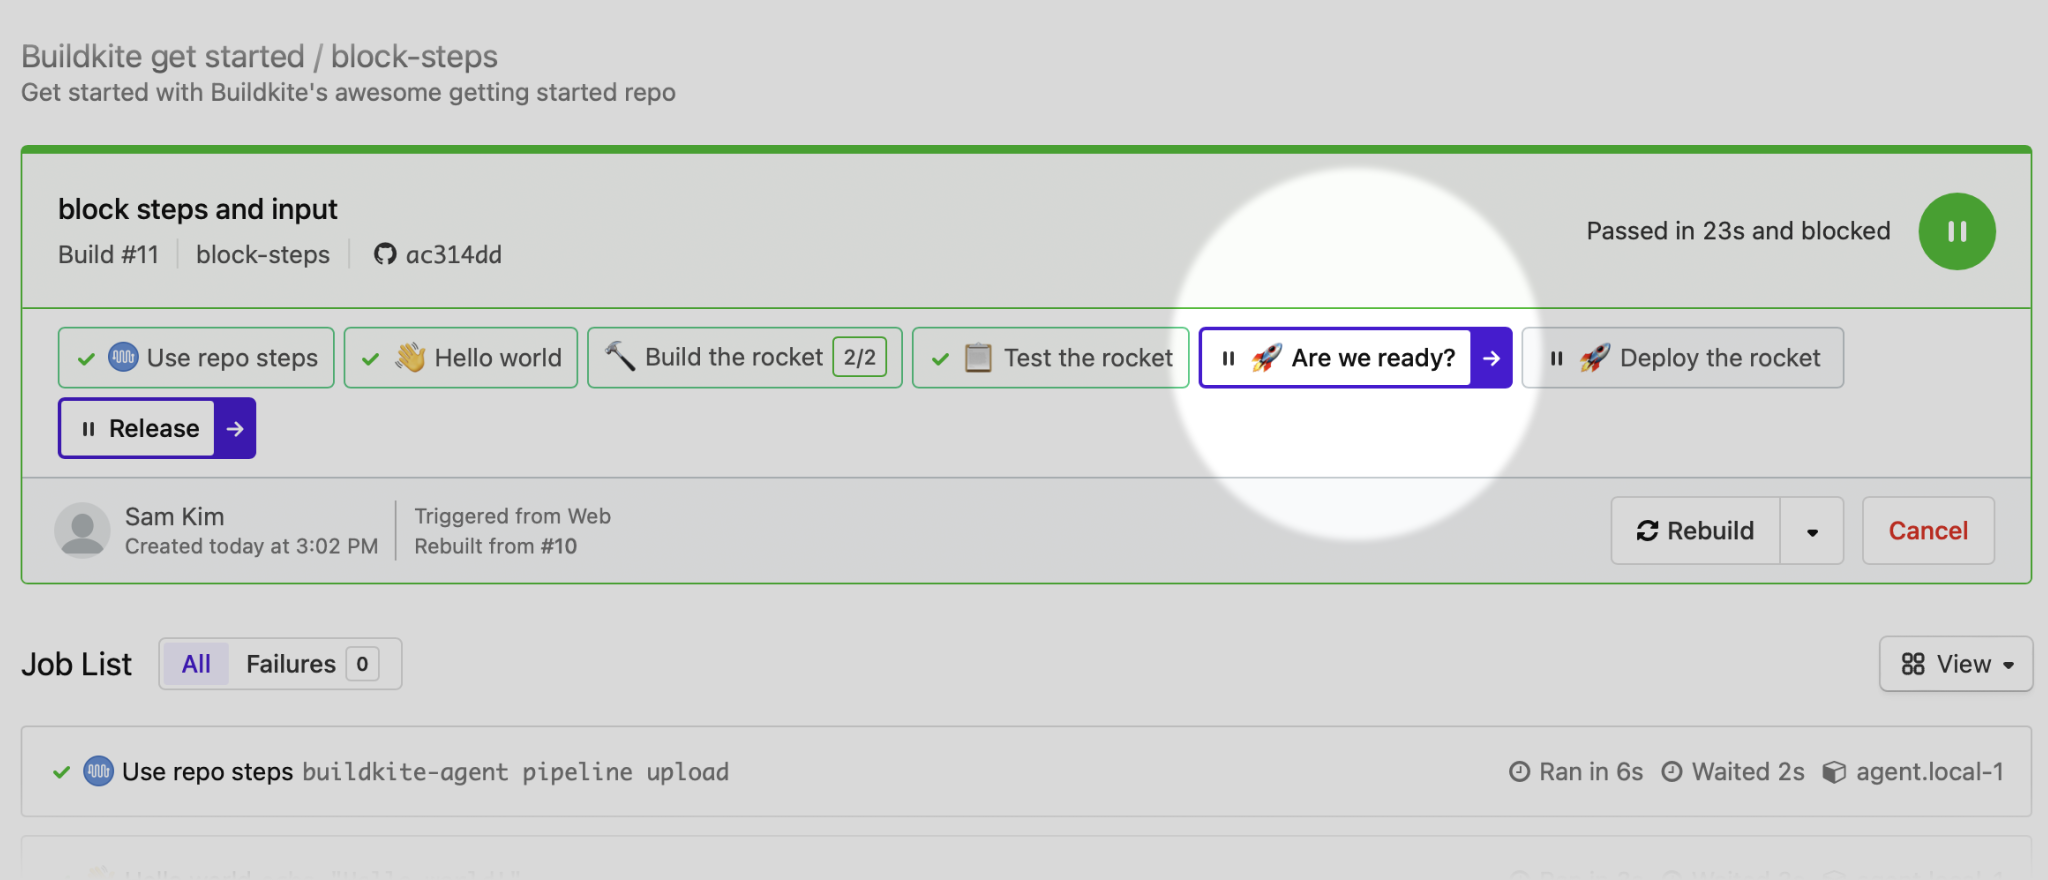
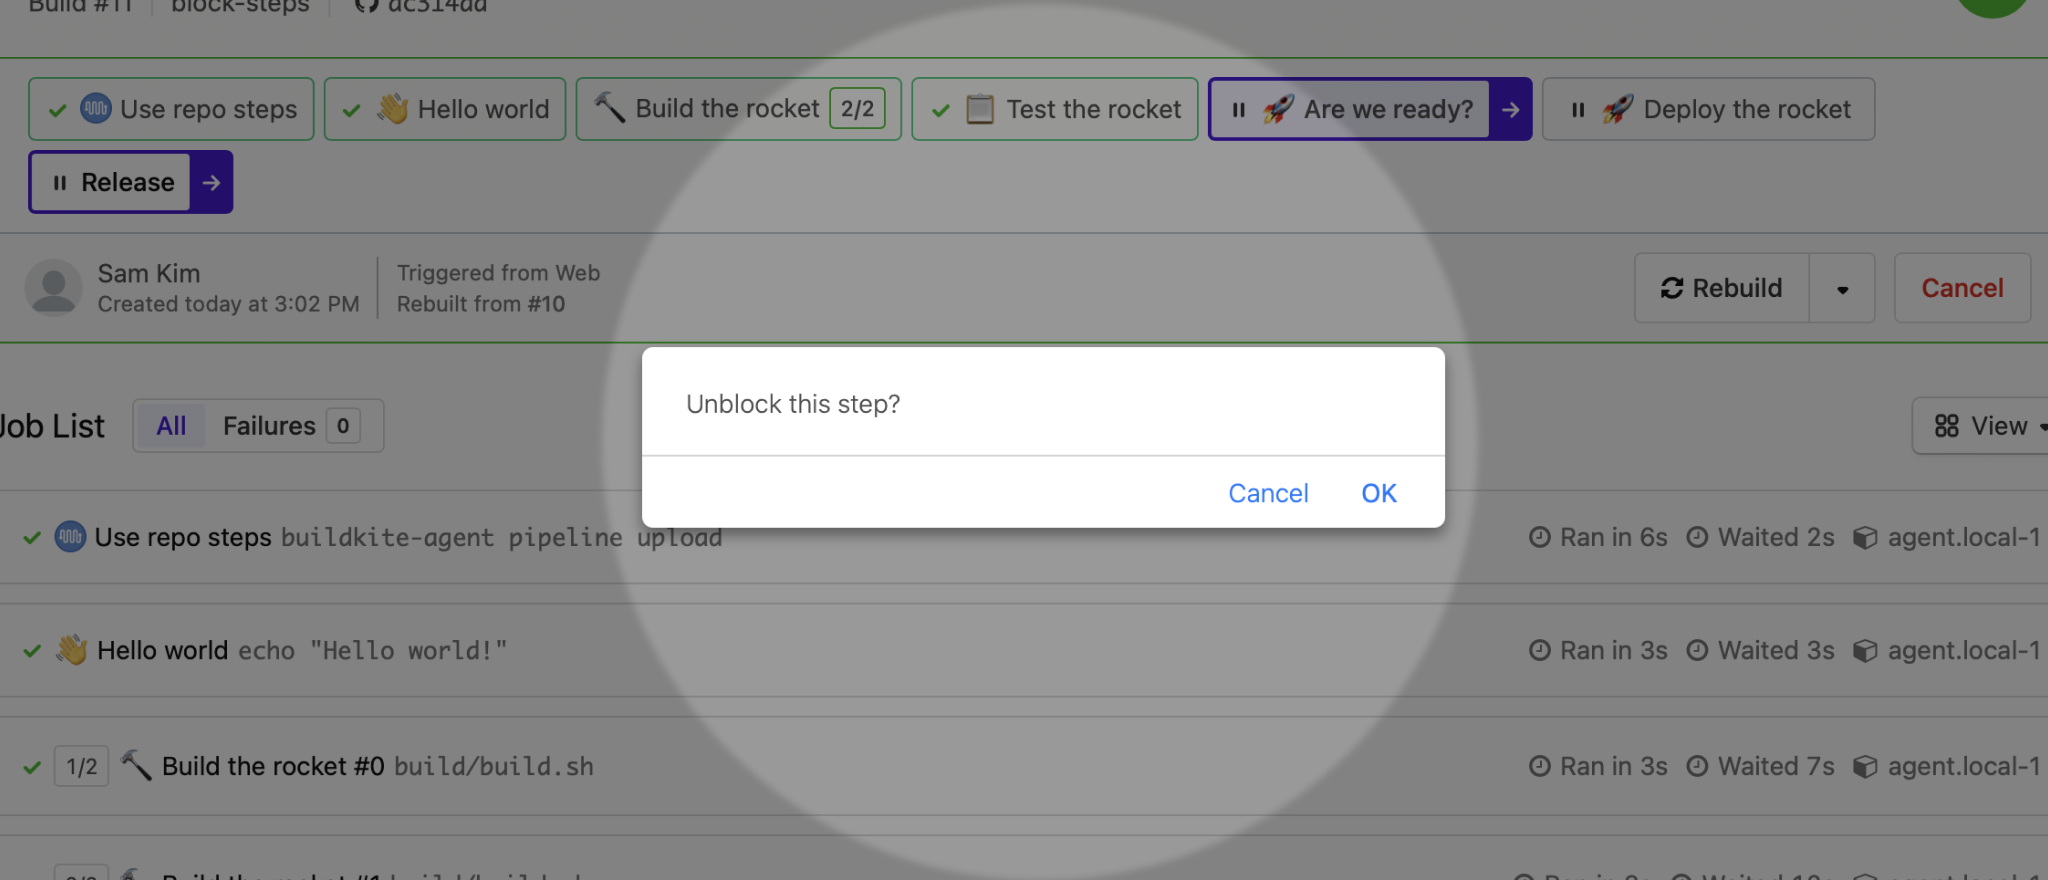
Once all steps before the block have completed, the pipeline will pause and wait for a team member to unblock it. Clicking on a block step in the Buildkite web UI opens a dialog box asking if you'd like to continue.
steps:
  - block: ":rocket: Are we ready?"
You can add form fields to block steps by adding a fields attribute. Block steps with input fields can only be defined using a pipeline.yml. There are two field types available: text or select. The select input type displays differently depending on how you configure the options. If you allow people to select multiple options, they display as checkboxes. If you are required to select only one option from six or fewer, they display as radio buttons. Otherwise, the options display in a dropdown menu.
The data you collect from these fields is then available to subsequent steps in the pipeline in the build meta-data.
In this example, the pipeline.yml defines an input step with the key release-name. The Bash script then accesses the value of the step using the meta-data command.
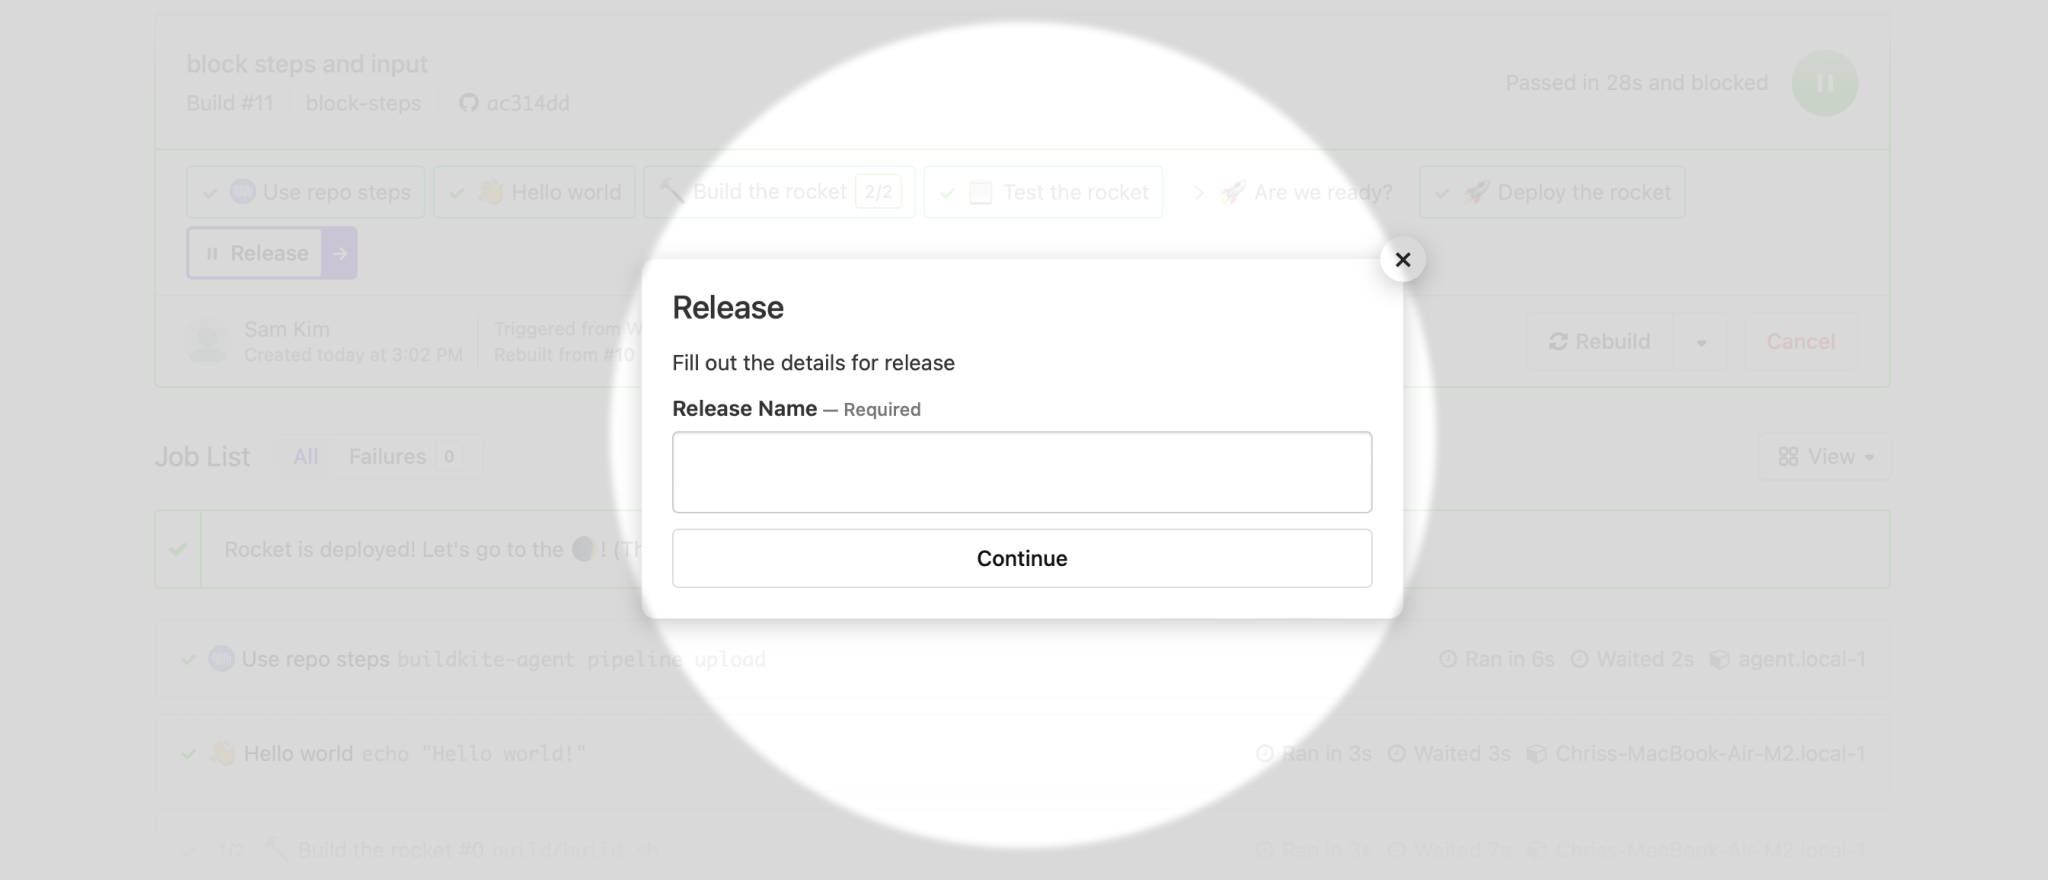
- block: "Release"
  prompt: "Fill out the details for release"
  fields:
    - text: "Release Name"
      key: "release-name"
RELEASE_NAME=$(buildkite-agent meta-data get release-name)
For a complete example pipeline, including dynamically generated input fields, see the Block step example pipeline on GitHub:
 Block Step Example Pipeline github.com/buildkite/block-step-example
Block step attributes
Input and block steps have the same attributes available for use.
Optional attributes:
prompt |
The instructional message displayed in the dialog box when the unblock step is activated.
Example:
|
fields |
A list of input fields required to be filled out before unblocking the step.
Available input field types: text, select
|
blocked_state |
The state that the build is set to when the build is blocked by this block step. The default is passed. When the blocked_state of a block step is set to failed, the step that triggered it will be stuck in the running state until it is manually unblocked.
Default: passed
Values: passed, failed, running
If you're using GitHub, you can also configure which GitHub status to use for blocked builds on a per-pipeline basis.
|
branches |
The branch pattern defining which branches will include this block step in their builds.
Example: "main stable/*"
|
if |
A boolean expression that omits the step when false. See Using conditionals for supported expressions.
Example: build.message != "skip me"
|
depends_on |
A list of step keys that this step depends on. This step will only proceed after the named steps have completed. See managing step dependencies for more information.
Example: "test-suite"
|
key |
A unique string to identify the block step. Keys can not have the same pattern as a UUID ( xxxxxxxx-xxxx-xxxx-xxxx-xxxxxxxxxxxx).
Example: "test-suite"
Alias: identifier
|
allow_dependency_failure |
Whether to continue to proceed past this step if any of the steps named in the depends_on attribute fail.
Default: false
|
steps:
  - block: ":rocket: Release!"
Text input attributes
A text field normalizes line endings to Unix format (\n).
Required attributes:
key |
The meta-data key that stores the field's input (using the buildkite-agent meta-data command) The key may only contain alphanumeric characters, slashes, dashes, or underscores. Example: "release-name"
|
steps:
  - block: "Request Release"
    fields:
      - text: "Code Name"
        key: "release-name"
Optional attributes:
hint |
The explanatory text that is shown after the label.
Example: "What's the code name for this release? :name_badge:"
|
required |
A boolean value that defines whether the field is required for form submission.
Default value: true
|
default |
The value that is pre-filled in the text field.
Example: "Flying Dolphin"
|
steps:
  - block: "Request Release"
    fields:
      - text: "Code Name"
        key: "release-name"
        hint: "What's the code name for this release? :name_badge:"
        required: false
        default: "Release #"
Select input attributes
Required attributes:
key |
The meta-data key that stores the field's input (using the buildkite-agent meta-data command) The key may only contain alphanumeric characters, slashes, dashes, or underscores. Example: "release-stream"
|
options |
The list of select field options. For 6 or less options they'll be displayed as radio buttons, otherwise they'll be displayed in a dropdown box. If selecting multiple options is permitted the options will be displayed as checkboxes. |
Each select option has the following required attributes:
label |
The text displayed for the option. Example: "Stable"
|
value |
The value to be stored as meta-data (to be later retrieved using the buildkite-agent meta-data command) Example: "stable"
|
steps:
  - block: "Request Release"
    fields:
      - select: "Stream"
        key: "release-stream"
        options:
          - label: "Beta"
            value: "beta"
          - label: "Stable"
            value: "stable"
Optional attributes:
hint |
The text displayed directly under the select field's label. Example: "Which release stream does this belong in? :fork:"
|
required |
A boolean value that defines whether the field is required for form submission. When this value is set to false and users can only select one option, the options display in a dropdown menu, regardless of how many options there are.Default: true
|
multiple |
A boolean value that defines whether multiple options may be selected. When multiple options are selected, they are delimited in the meta-data field by a line break ( \n)Default: false
|
default |
The value of the option or options that will be pre-selected. When multiple is enabled, this can be an array of values to select by default.Example: "beta"
|
steps:
  - block: "Request Release"
    fields:
      - select: "Stream"
        key: "release-stream"
        hint: "Which release stream does this belong in? :fork:"
        required: false
        default: "beta"
        options:
          - label: "Beta"
            value: "beta"
          - label: "Stable"
            value: "stable"
steps:
  - block: "Deploy To"
    fields:
      - select: "Regions"
        key: "deploy-regions"
        hint: "Which regions should we deploy this to? :earth_asia:"
        multiple: true
        default:
          - "na"
          - "eur"
          - "asia"
          - "aunz"
        options:
          - label: "North America"
            value: "na"
          - label: "Europe"
            value: "eur"
          - label: "Asia"
            value: "asia"
          - label: "Oceania"
            value: "aunz"
Passing block step data to other steps
Before you can do anything with the values from a block step, you need to store the data using the Buildkite meta-data store.
Use the key attribute in your block step to store values from the text or select fields in meta-data:
steps:
  - block: "Request Release"
    fields:
      - text: "Code Name"
        key: "release-name"
You can access the stored meta-data after the block step has passed. Use the buildkite-agent meta-data get command to retrieve your data:
buildkite-agent meta-data get "release-name"
Meta-data cannot be interpolated directly from the pipeline.yml at runtime. The meta-data store can only be accessed from within a command step.
In the below example, the script uses the buildkite-agent meta-data command to retrieve the meta-data and print it to the log:
#!/bin/bash

RELEASE_NAME="$(buildkite-agent meta-data get "release-name")"
echo "Release name: $RELEASE_NAME"
Passing meta-data to trigger steps
When passing meta-data values to trigger steps you need to delay adding the trigger step to the pipeline until after the block step has completed; this can be done using dynamic pipelines, and works around the lack of runtime meta-data interpolation.
You can modify a trigger step to dynamically upload itself to a pipeline as follows:
-
Move your trigger step from your
pipeline.ymlfile into a script. The below example script is stored in a file named.buildkite/trigger-deploy.sh:#!/bin/bash set -euo pipefail # Set up a variable to hold the meta-data from your block step RELEASE_NAME="$(buildkite-agent meta-data get "release-name")" # Create a pipeline with your trigger step PIPELINE="steps: - trigger: \"deploy-pipeline\" label: \"Trigger deploy\" build: meta_data: release-name: $RELEASE_NAME " # Upload the new pipeline and add it to the current build echo "$PIPELINE" | buildkite-agent pipeline upload -
Replace the old trigger step in your
pipeline.ymlwith a dynamic pipeline upload:Before the
pipeline.ymlfile with the trigger step:steps: - block: ":shipit:" fields: - text: "Code Name" key: "release-name" - trigger: "deploy-pipeline" label: "Trigger Deploy"After the
pipeline.ymlfile dynamically uploading the trigger step:steps: - block: ":shipit:" fields: - text: "Code Name" key: "release-name" - command: ".buildkite/trigger-deploy.sh" label: "Prepare Deploy Trigger"
The command step added in the above example will upload the trigger step and add it to the end of our pipeline at runtime.
In the pipeline you're triggering, you will be able to use the meta-data that you have passed through as if it was set during the triggered build.
Block steps interacting with wait steps
If a block step follows or precedes a wait step in your build, the wait step will be ignored and only the block step will run, like in this example:
steps:
  - command: ".buildkite/steps/yarn"
  - wait: ~
  - block: "unblock me"
But let's consider a different example. Now the wait step (with continue_on_failure: true) will be ignored, but the block step will also not run, because the 'previous' command step failed.
steps:
  - command: "exit -1"
  - wait: ~
    continue_on_failure: true
  - block: "unblock me"
If you need to run a block step after a failed step, set soft_fail on the failing step:
steps:
  - command: "exit -1"
    soft_fail:
      - exit_status: "*"
  - block: "unblock me"
Alternatively, it is possible to use a wait step with a block step if conditionals are used. In these cases, the wait step must come before the block step:
steps:
  - command: ".buildkite/steps/yarn"
  - wait:
    if: build.source == "schedule"
  - block: "Deploy changes?"
    if: build.branch == pipeline.default_branch && build.source != "schedule"
  - command: ".buildkite/scripts/deploy"
    if: build.branch == pipeline.default_branch