Phabricator
Phabricator can trigger Buildkite builds on new revisions through Harbormaster.
Phabricator and Buildkite integrate using webhooks. Phabricator triggers builds in Buildkite with webhooks, then Buildkite reports the status back to Phabricator also using webhooks.
Before you start
Check that your repository is activated in your Phabricator instance and Harbormaster is installed. Configure a pipeline for that repository in Buildkite. You'll also need to create a Buildkite API access token.
Admin access in both Phabricator and your Buildkite organization will be required.
Step 1: New Phabricator build step
Create a new Build Plan in Harbormaster.
Inside Harbormaster open Manage Build Plans. Click Create Build Plan located in the upper right.
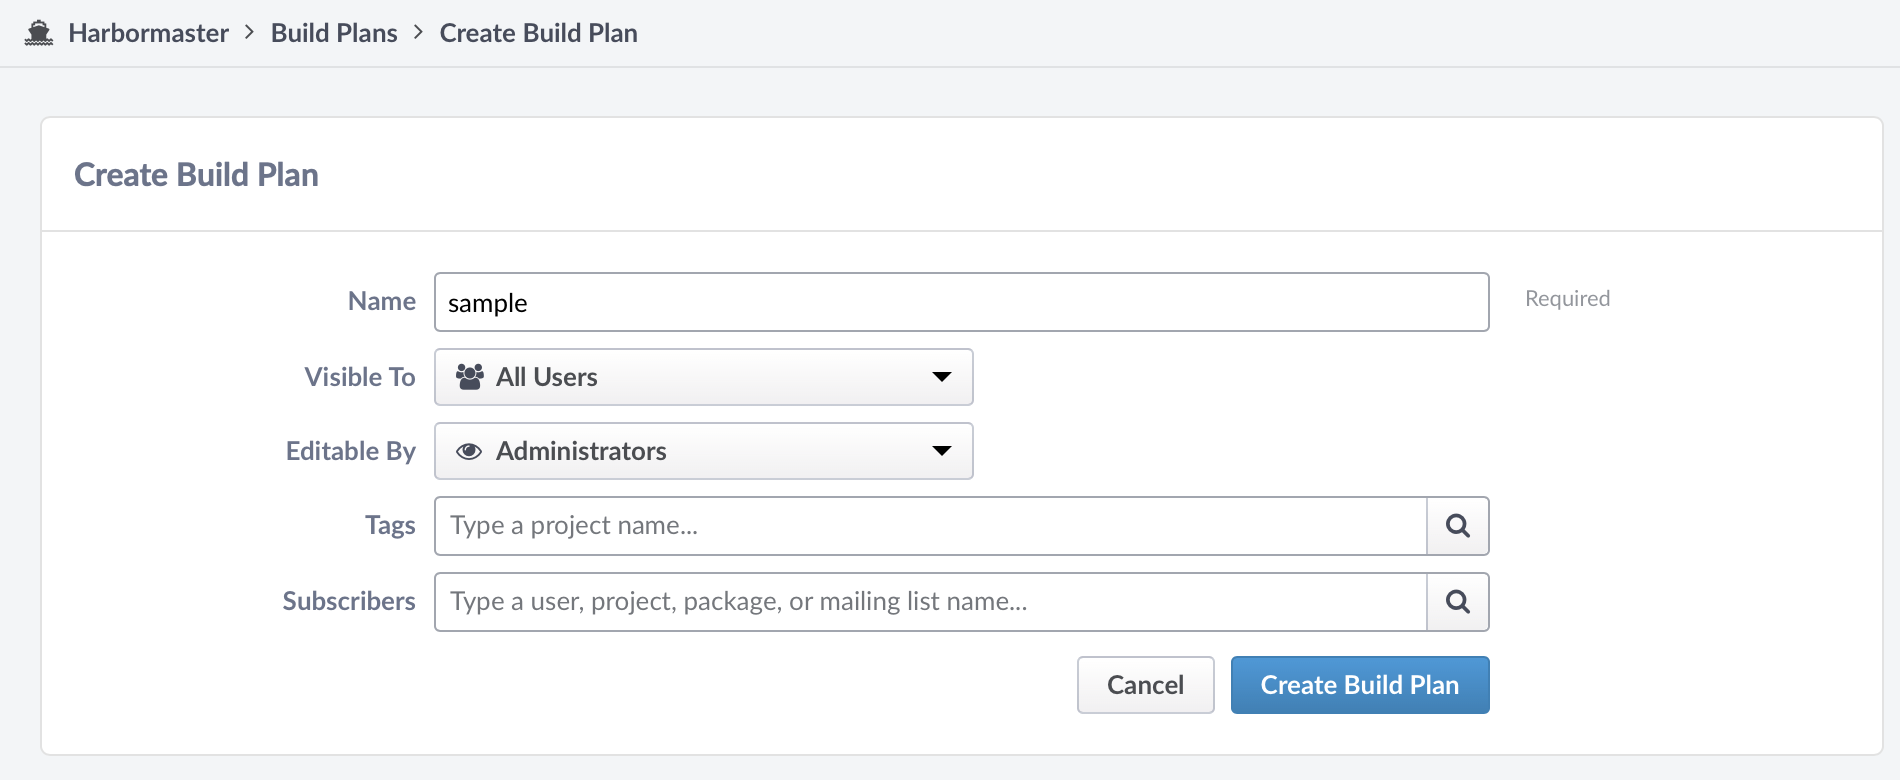
Provide a name then click Create Build Plan.
Next, add a step to the Build Plan. A Phabricator Build Step creates a build on one Buildkite pipeline. If you need to create builds on multiple pipelines, create multiple Build Steps.
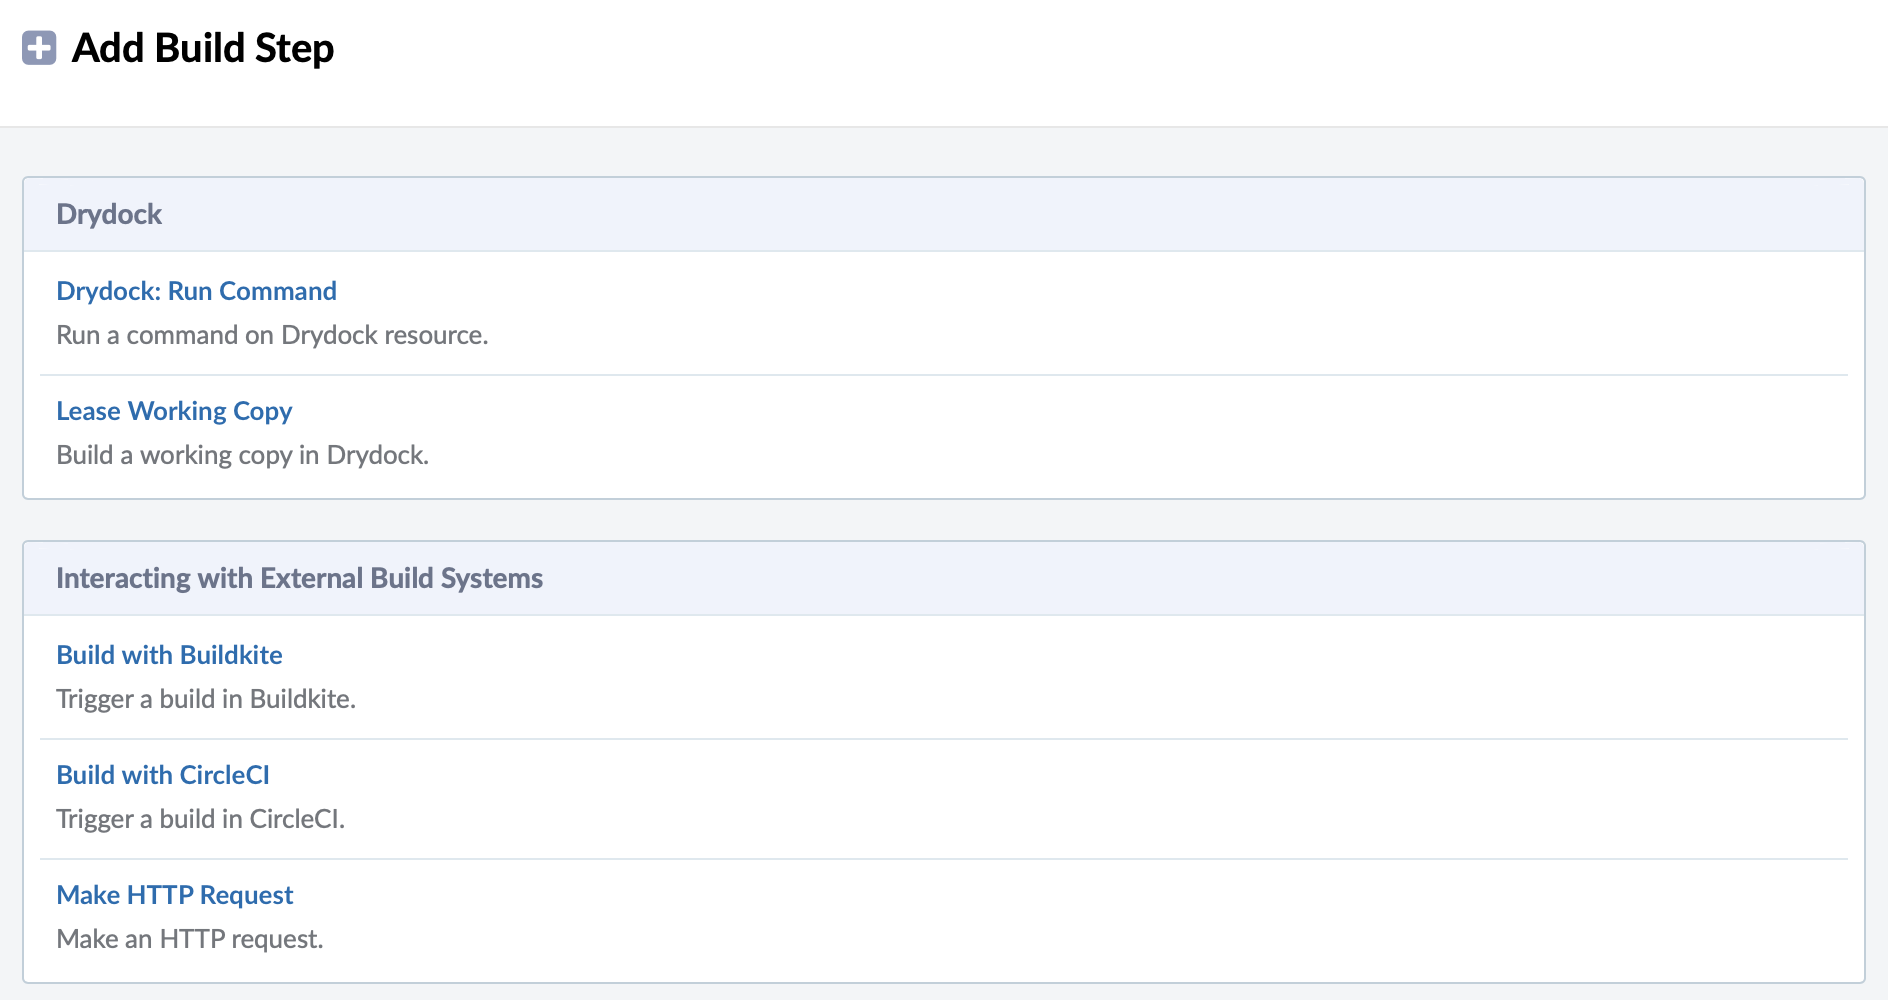
Click Add Build Step on the next screen. Then select Build with Buildkite.
Keep this screen open while you configure Buildkite.
Step 2: Configure Buildkite notification webhook
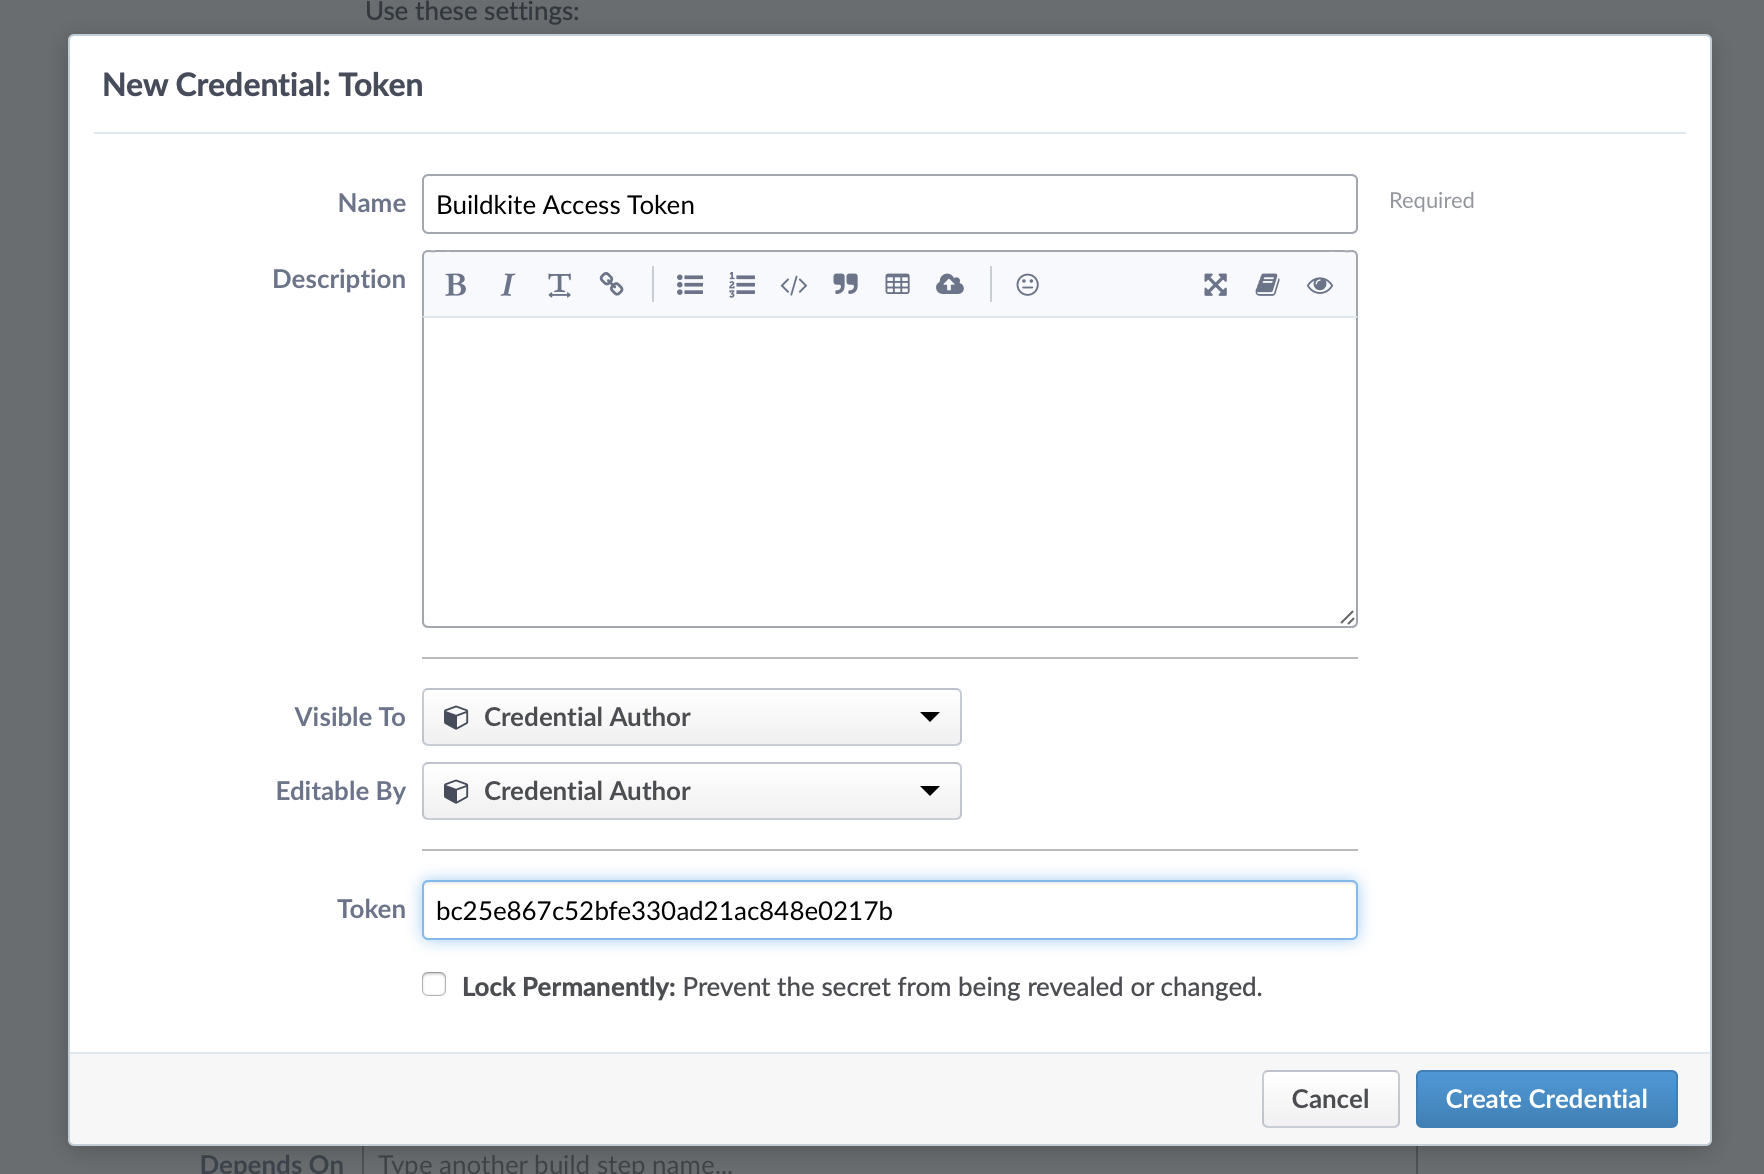
Create a new API access token in your Buildkite Personal Settings.
Provide a description, then select your organization. Select the read_builds and write_builds scopes. Create the token, then copy the token from the subsequent screen.

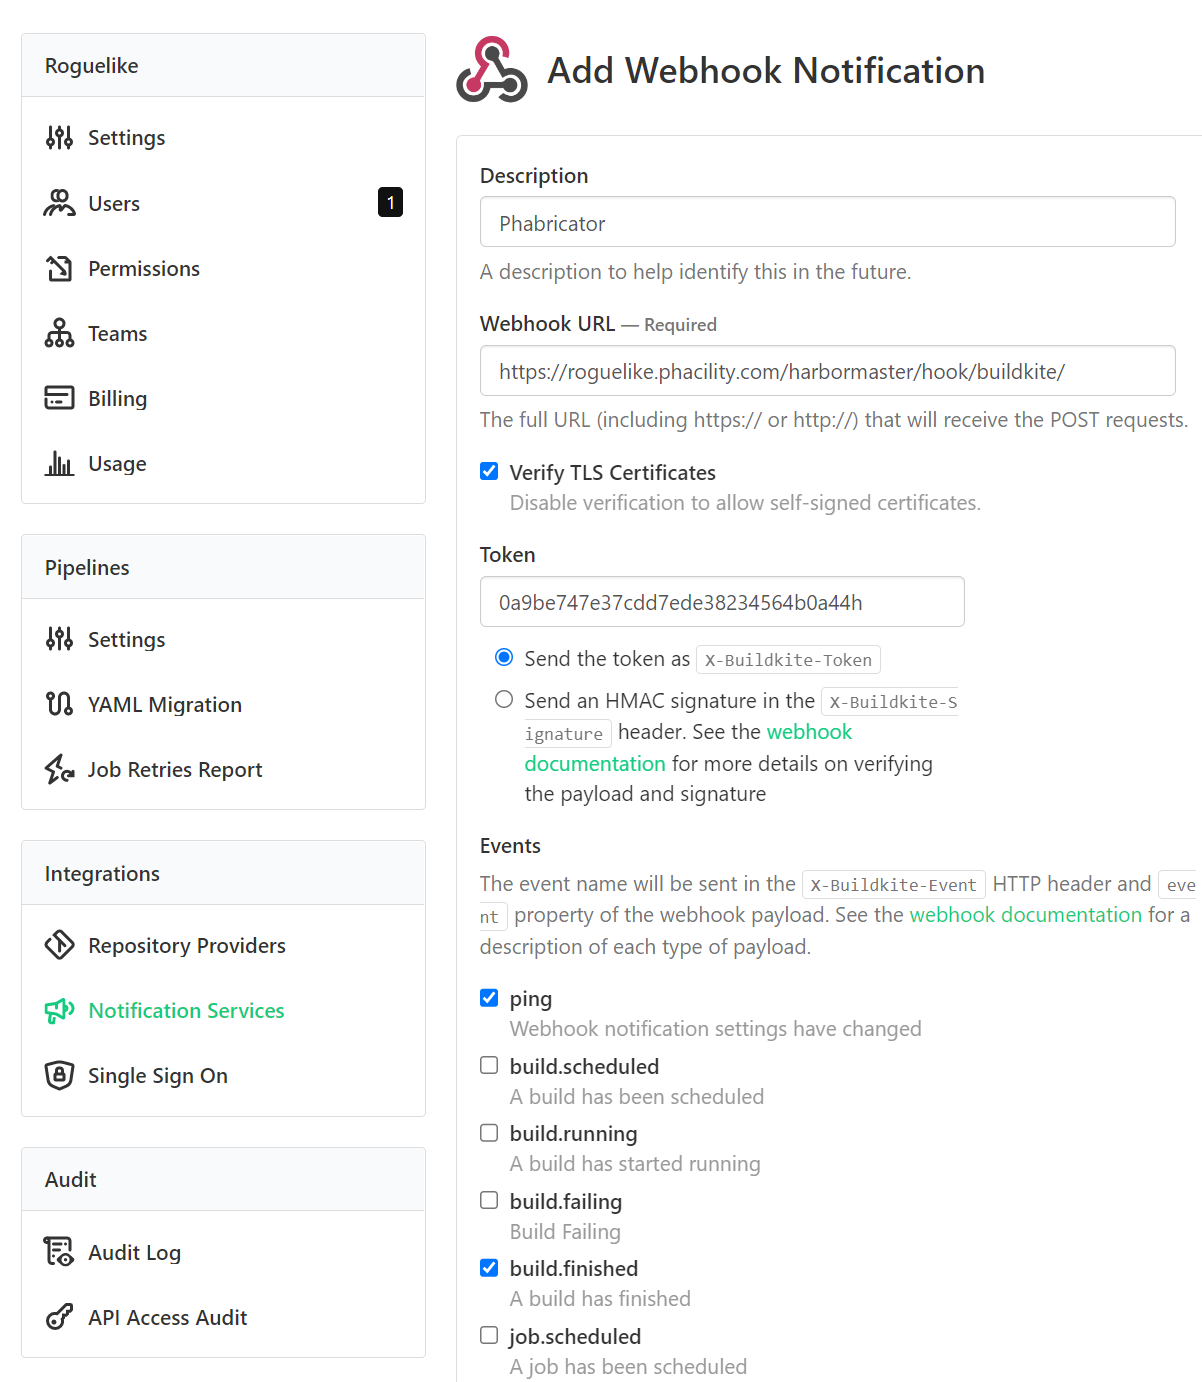
Next, add a Webhook Notification in your Buildkite organization's Notification Services.
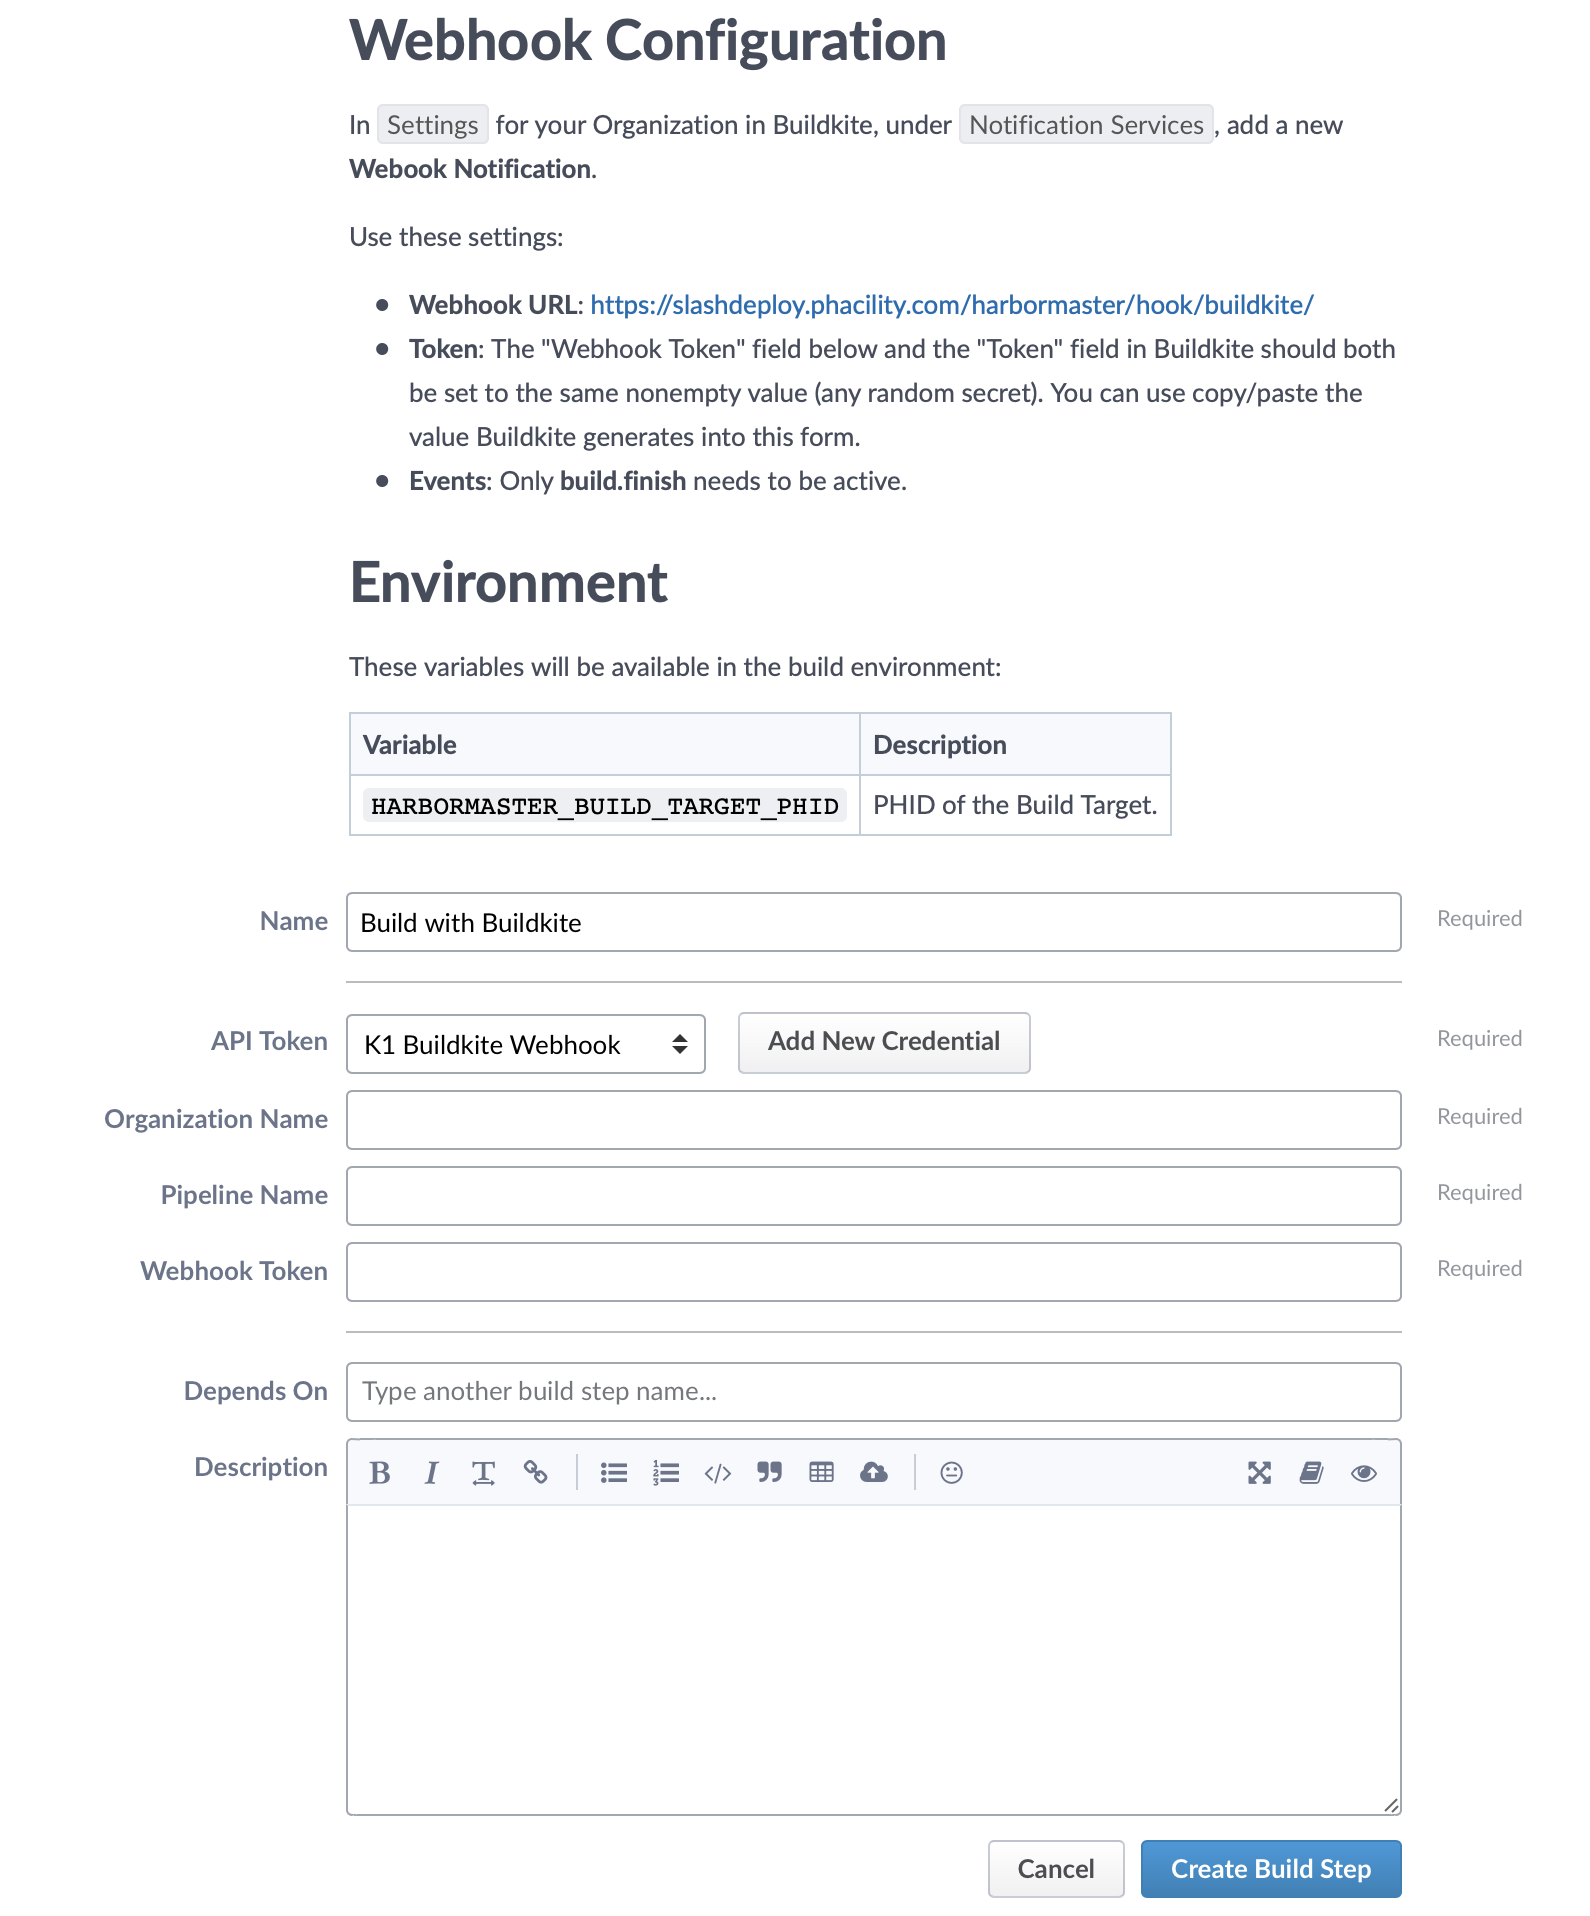
From Phabricator's Webhook Configuration, copy the Webhook URL (it should end in /harbormaster/hook/buildkite/) and paste it into the Webhook URL field in Buildkite. Take a copy of the autogenerated value in the Token field in Buildkite. Select the build.finished Event, then save the notification settings.
Step 3: Complete Phabricator build step
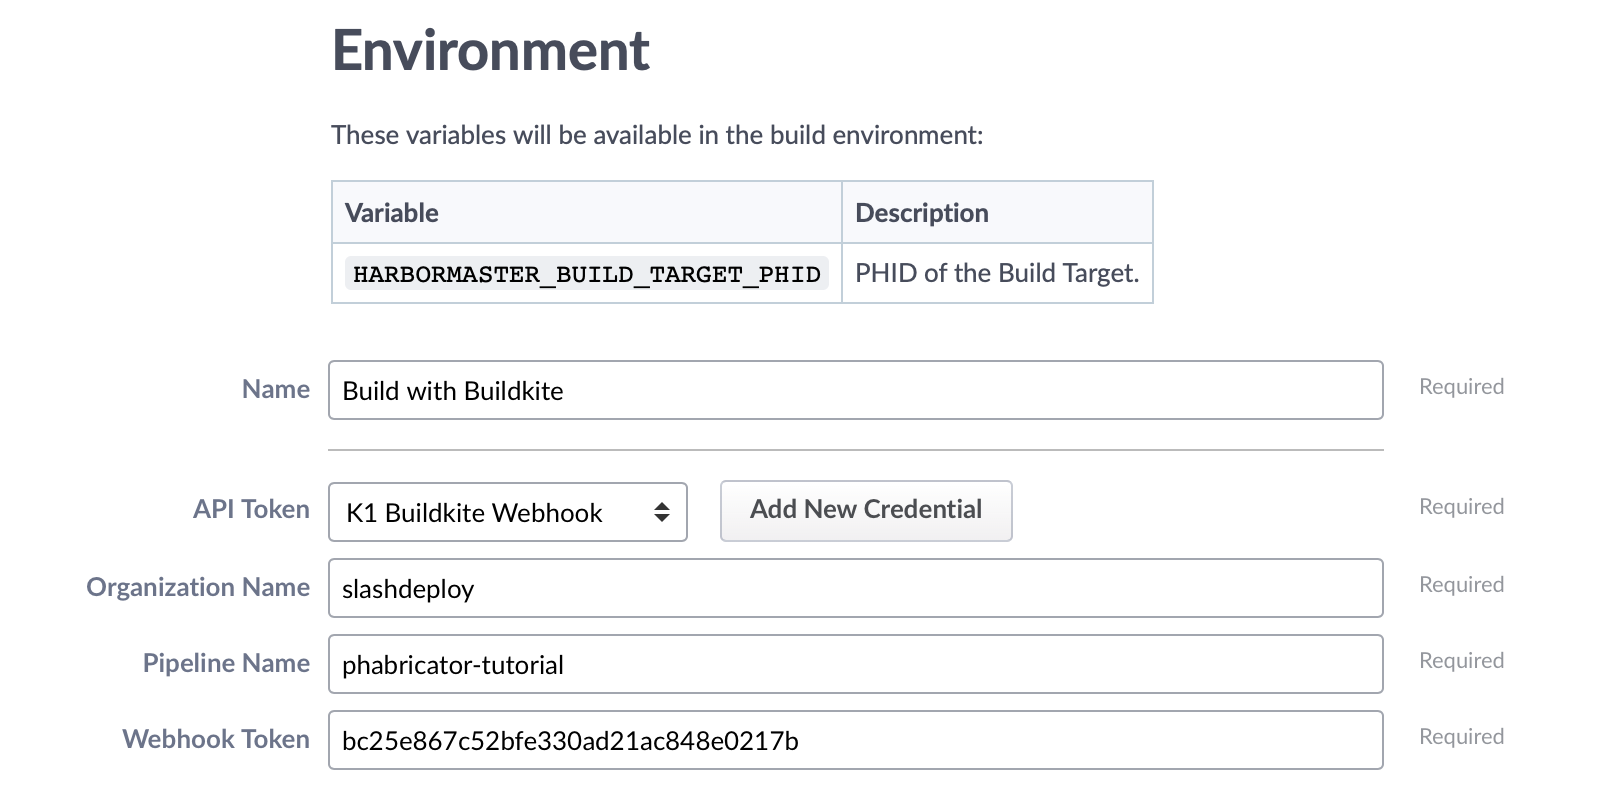
In Phabricator, click the Add New Credential button next to API Token. Provide a name and use the Buildkite API access token that you created earlier for the Token field.
Fill in the Buildkite Organization Name and Pipeline Name. Use the Token from Buildkite's Notification Webhook for Webhook Token in Phabricator.
Finally, click Create Build Step.
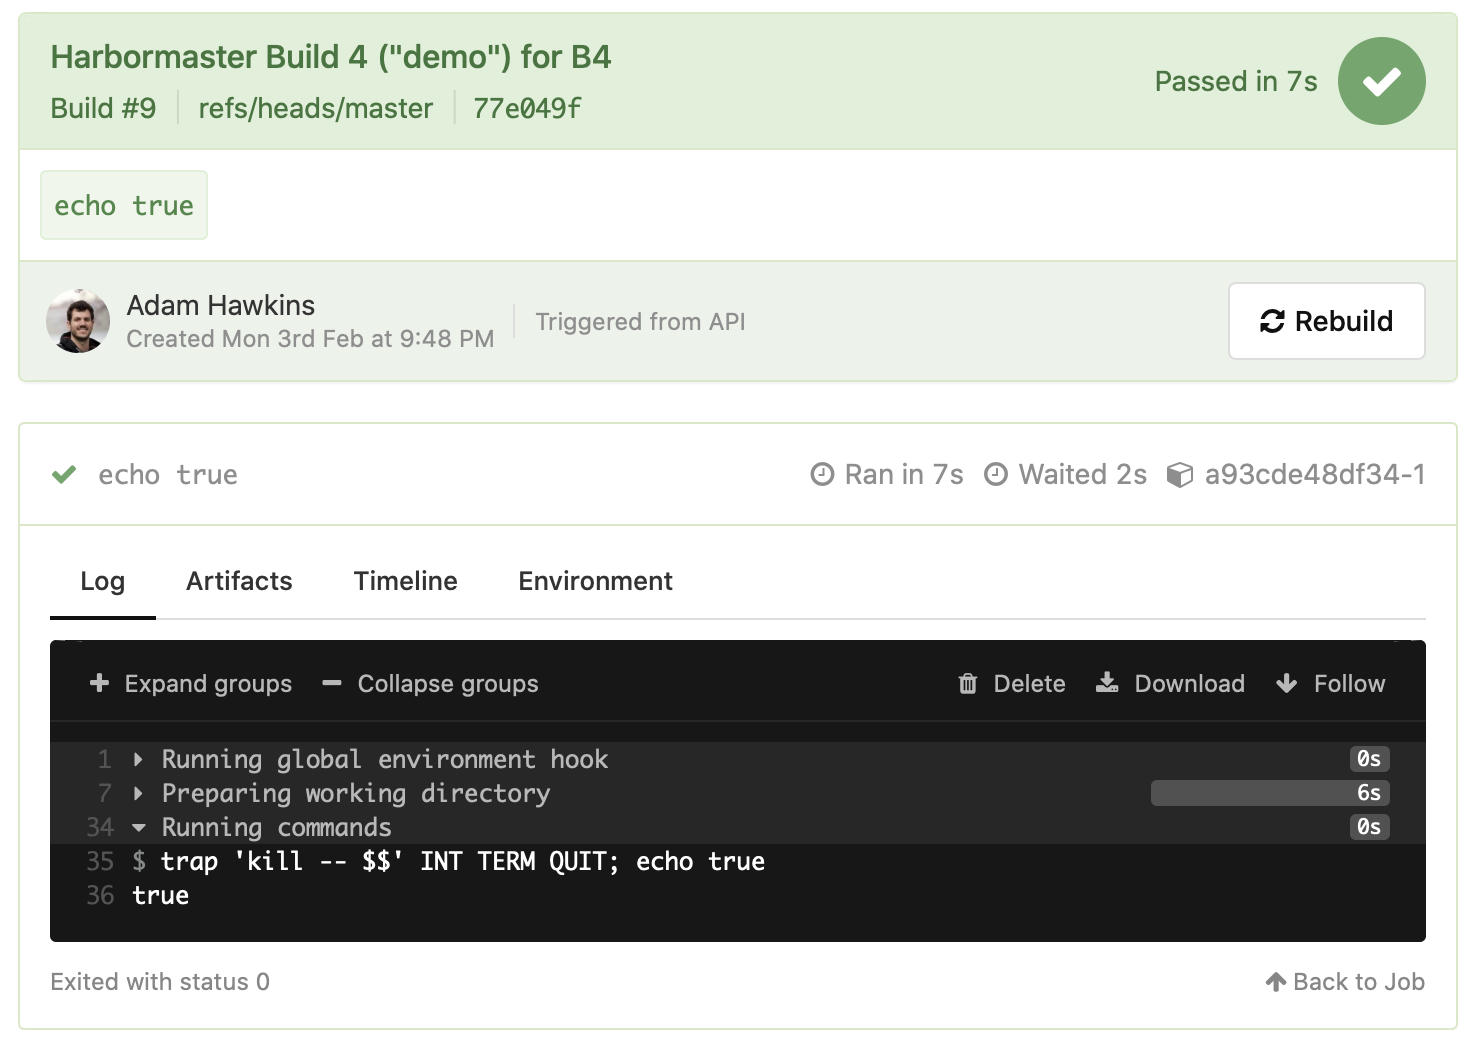
Step 4: Test with a manual build
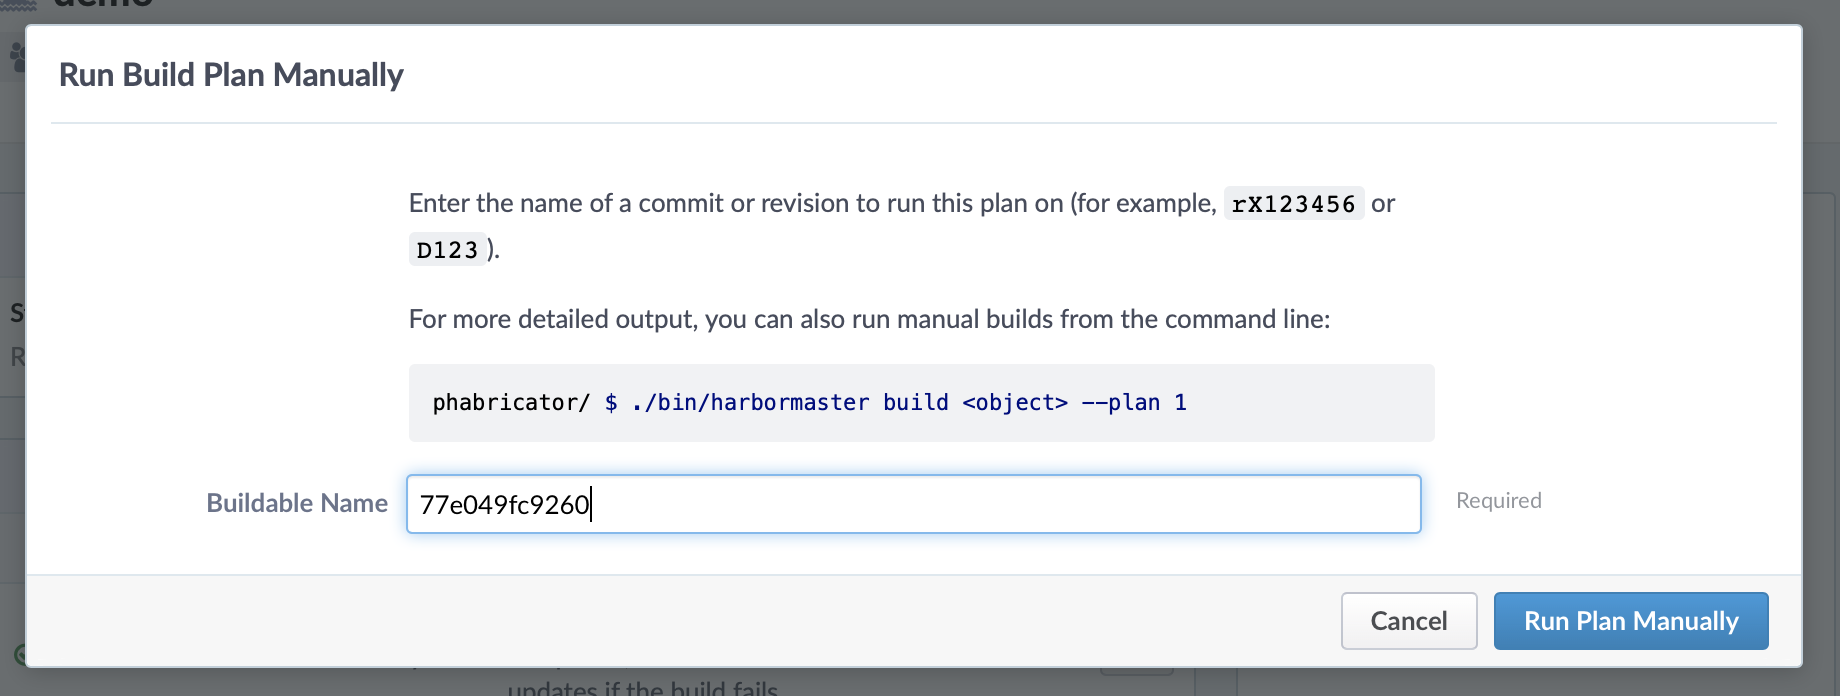
Click Run Plan Manually on the next screen. Provide a revision ID from the repository inside Phabricator.
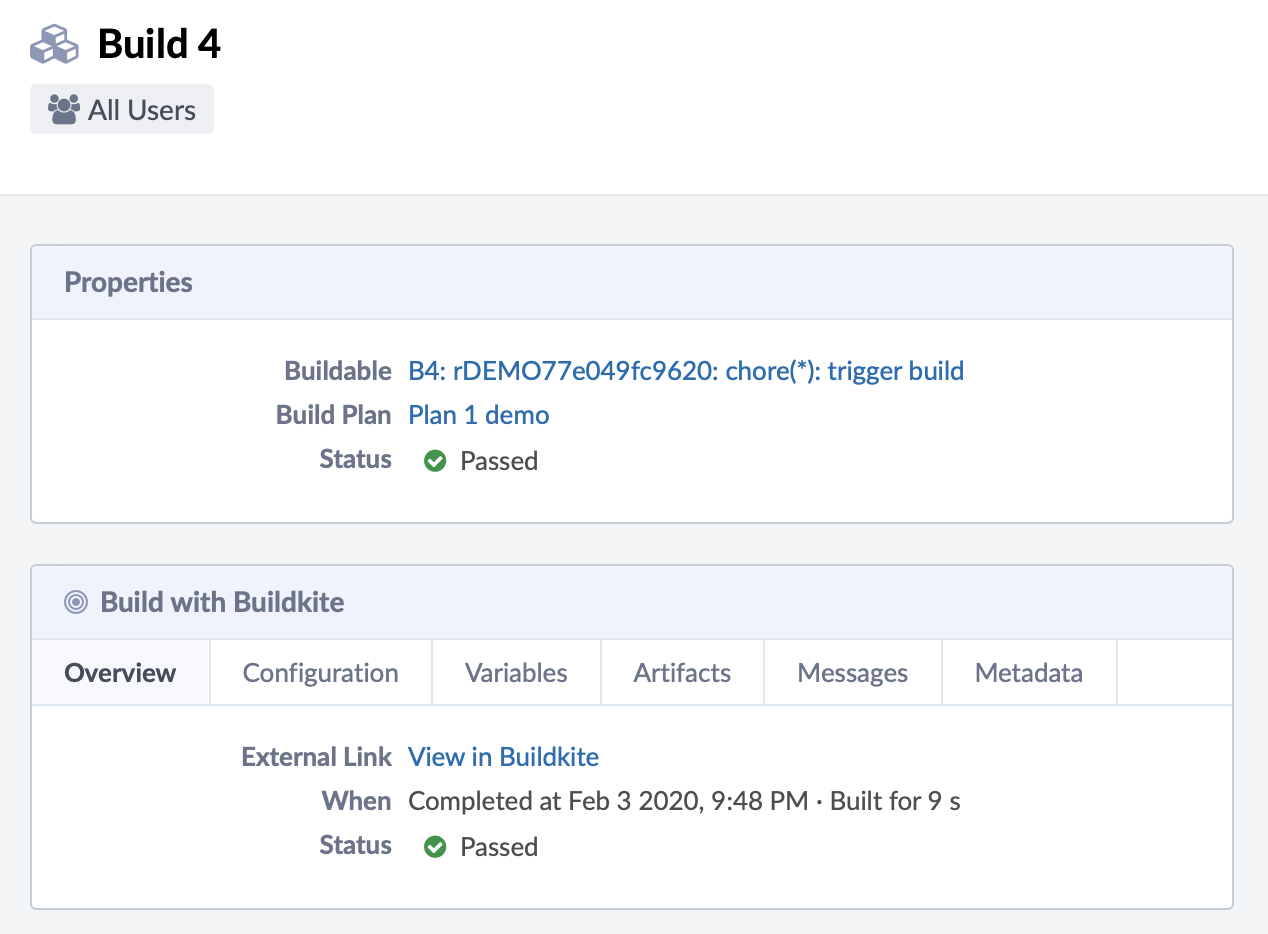
Your Buildkite pipeline should run, then report back to Phabricator.
Step 4: Configure builds on new commits
The Herald application acts as a "trigger" inside Phabricator. You can create a Herald rule that runs your Build Step on new commits.
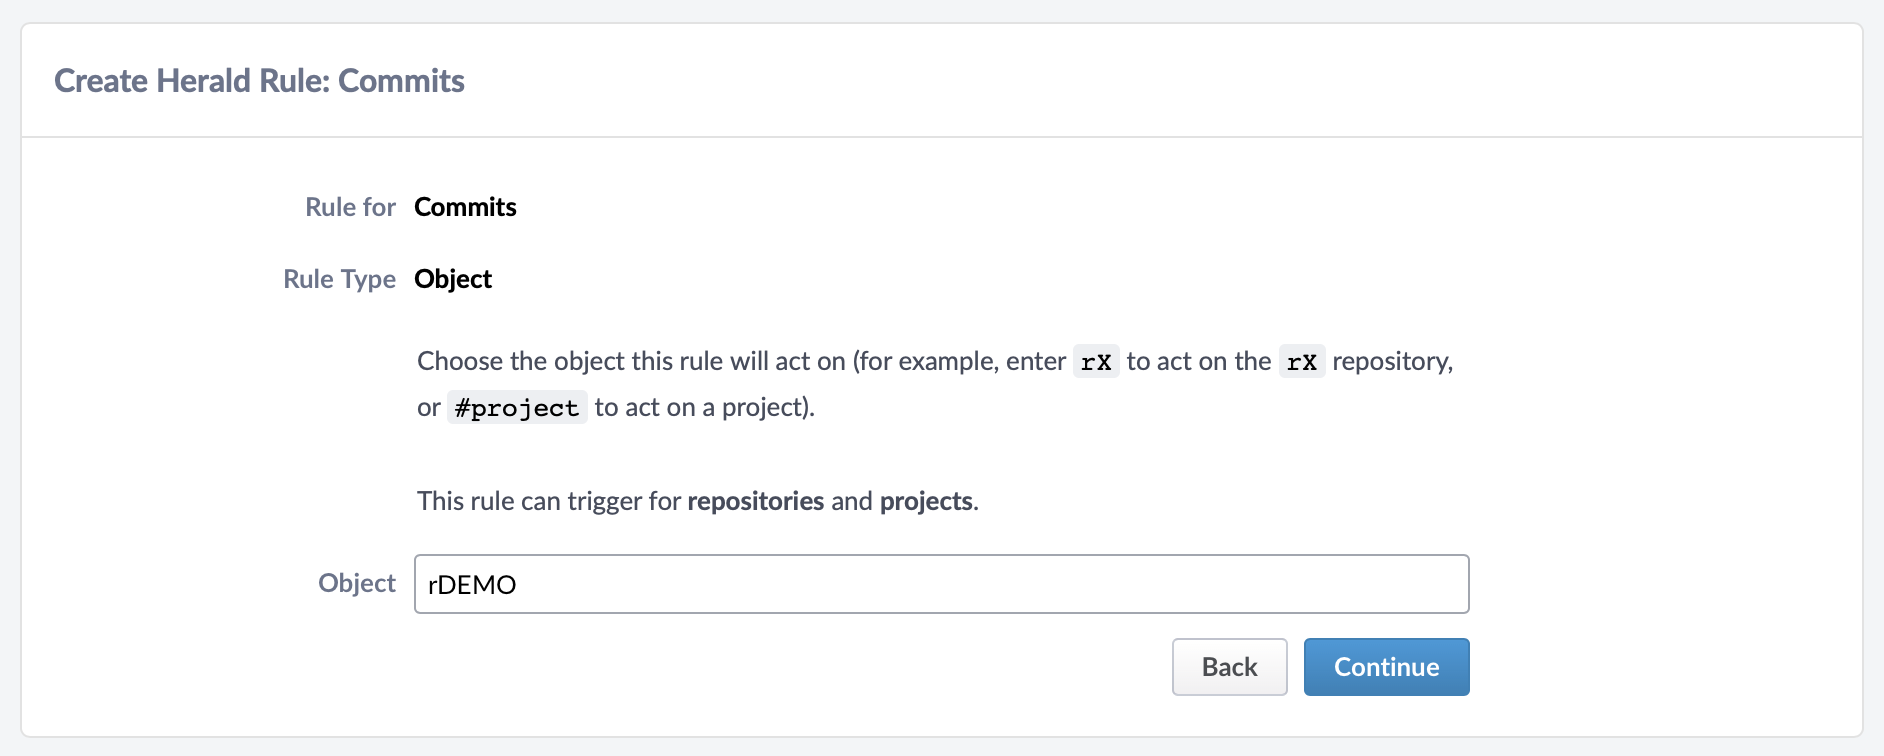
Open Herald, and click Create Herald Rule. Select Commits on the next screen, then select Object on the screen after that. This allows you to connect a rule to a specific repository which you'll configure on the next screen.
Fill in the repository name. It should start with r, so this example is using rDEMO.
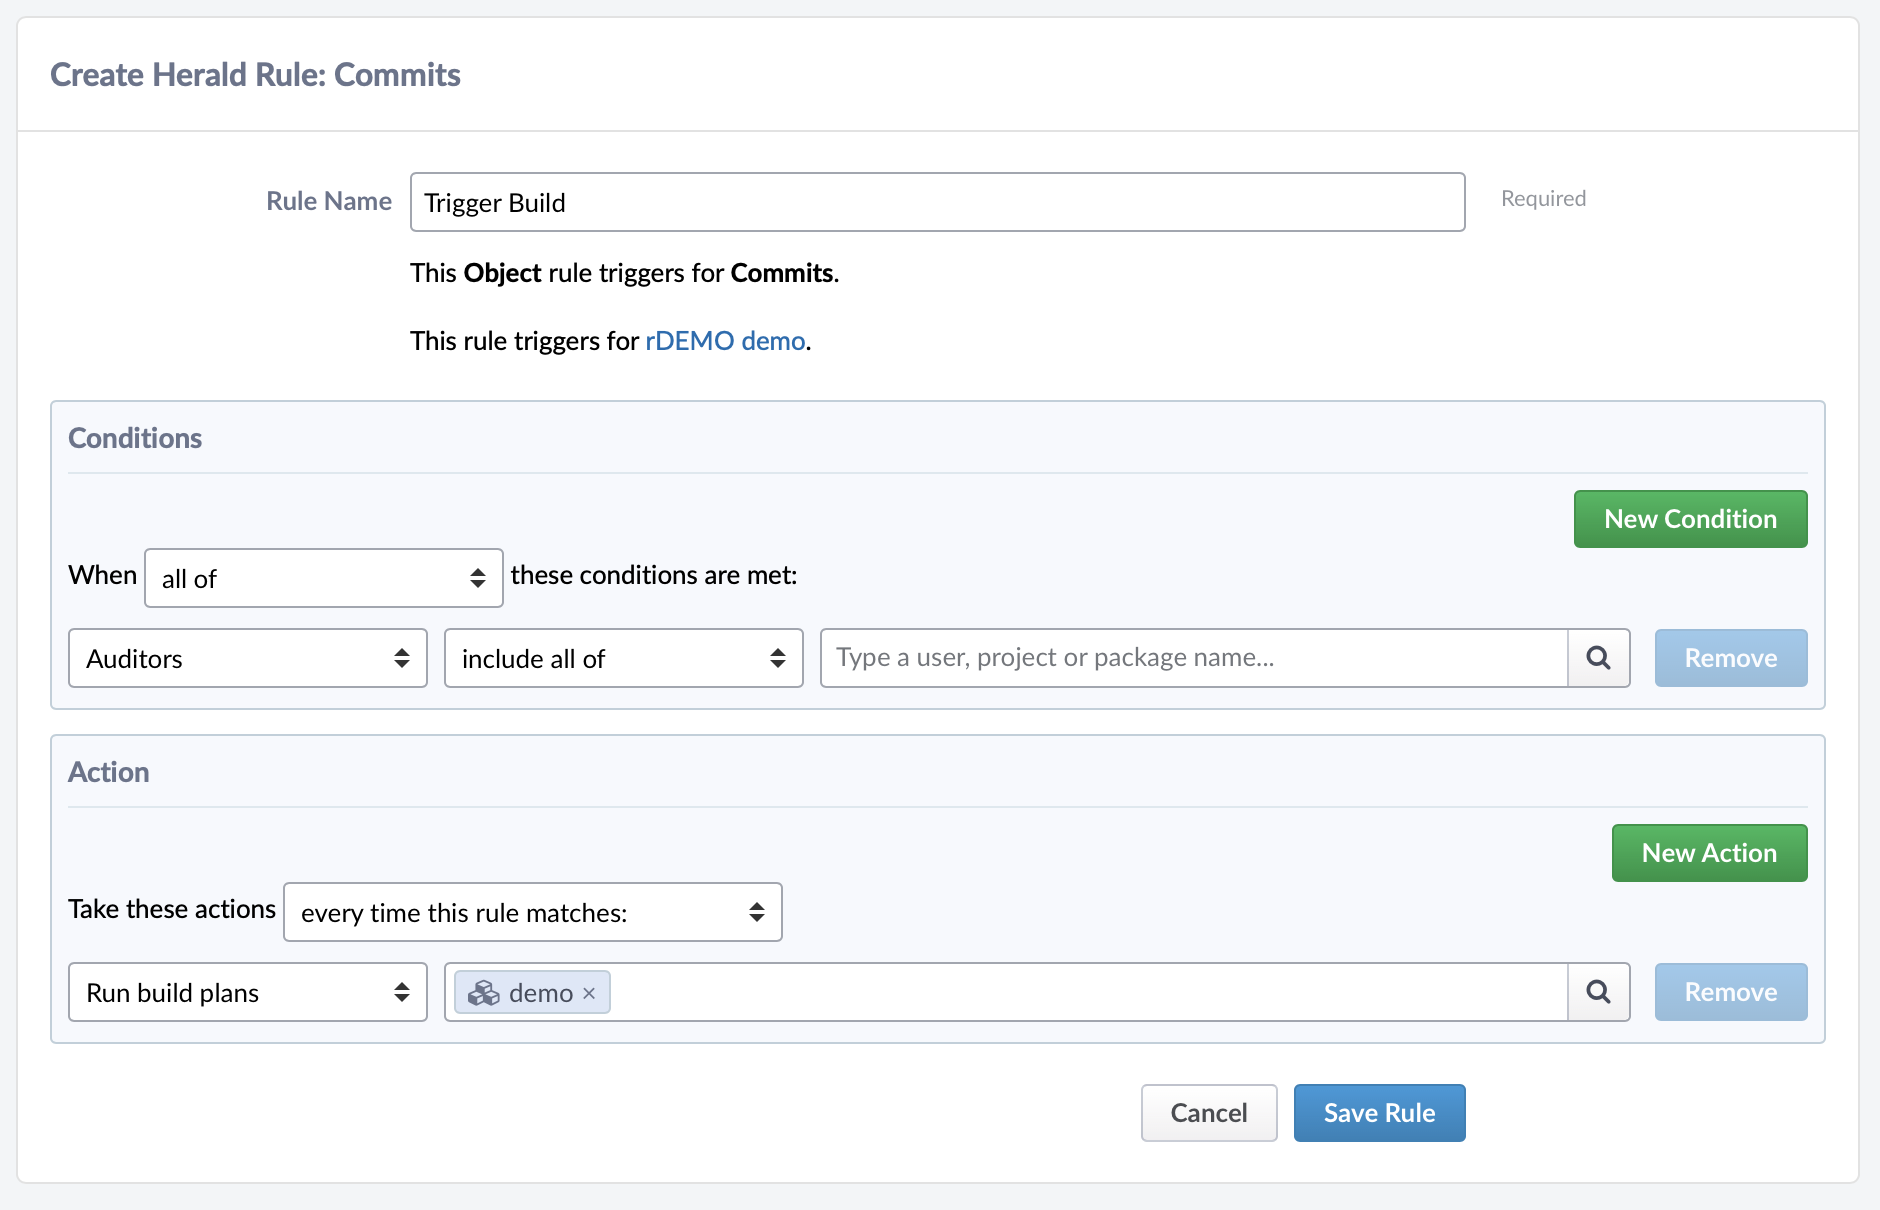
Finally, configure an action associated with this rule. Adding conditions is optional, but you could use this to, for example, limit builds to specific branches.
Select Run Build Plan, then provide the Build Plan created in the previous step. Finally, press Save Rule.
Now that your setup is complete, every time there is a new commit in your repository a build will be run on your Buildkite pipeline and the status will appear in Phabricator.