GitHub
Buildkite can connect to a GitHub repository in your GitHub account or GitHub organization and use the Commit Status API to update the status of commits in pull requests.
To complete this integration, you need admin privileges for your GitHub repository.
Connecting Buildkite and GitHub
You can use the Buildkite app for GitHub to connect a Buildkite organization to a GitHub organization.
Benefits of using the GitHub App
Using GitHub App removes the reliance on individual user connections to report build statuses. See the changelog announcement
If you want to connect using OAuth you can still do so from your Personal Settings.
Connect your Buildkite account to GitHub using the GitHub App
Connecting Buildkite and GitHub using the GitHub App lets your GitHub organization admins see permissions and manage access on a per-repository basis.
Required permissions for adding a provider
The user adding the provider needs to be a Buildkite user connected to a GitHub user who has administrative privileges on both Buildkite and the GitHub organizations.
- Open your Buildkite organization's Settings.
- Select Repository Providers > GitHub.
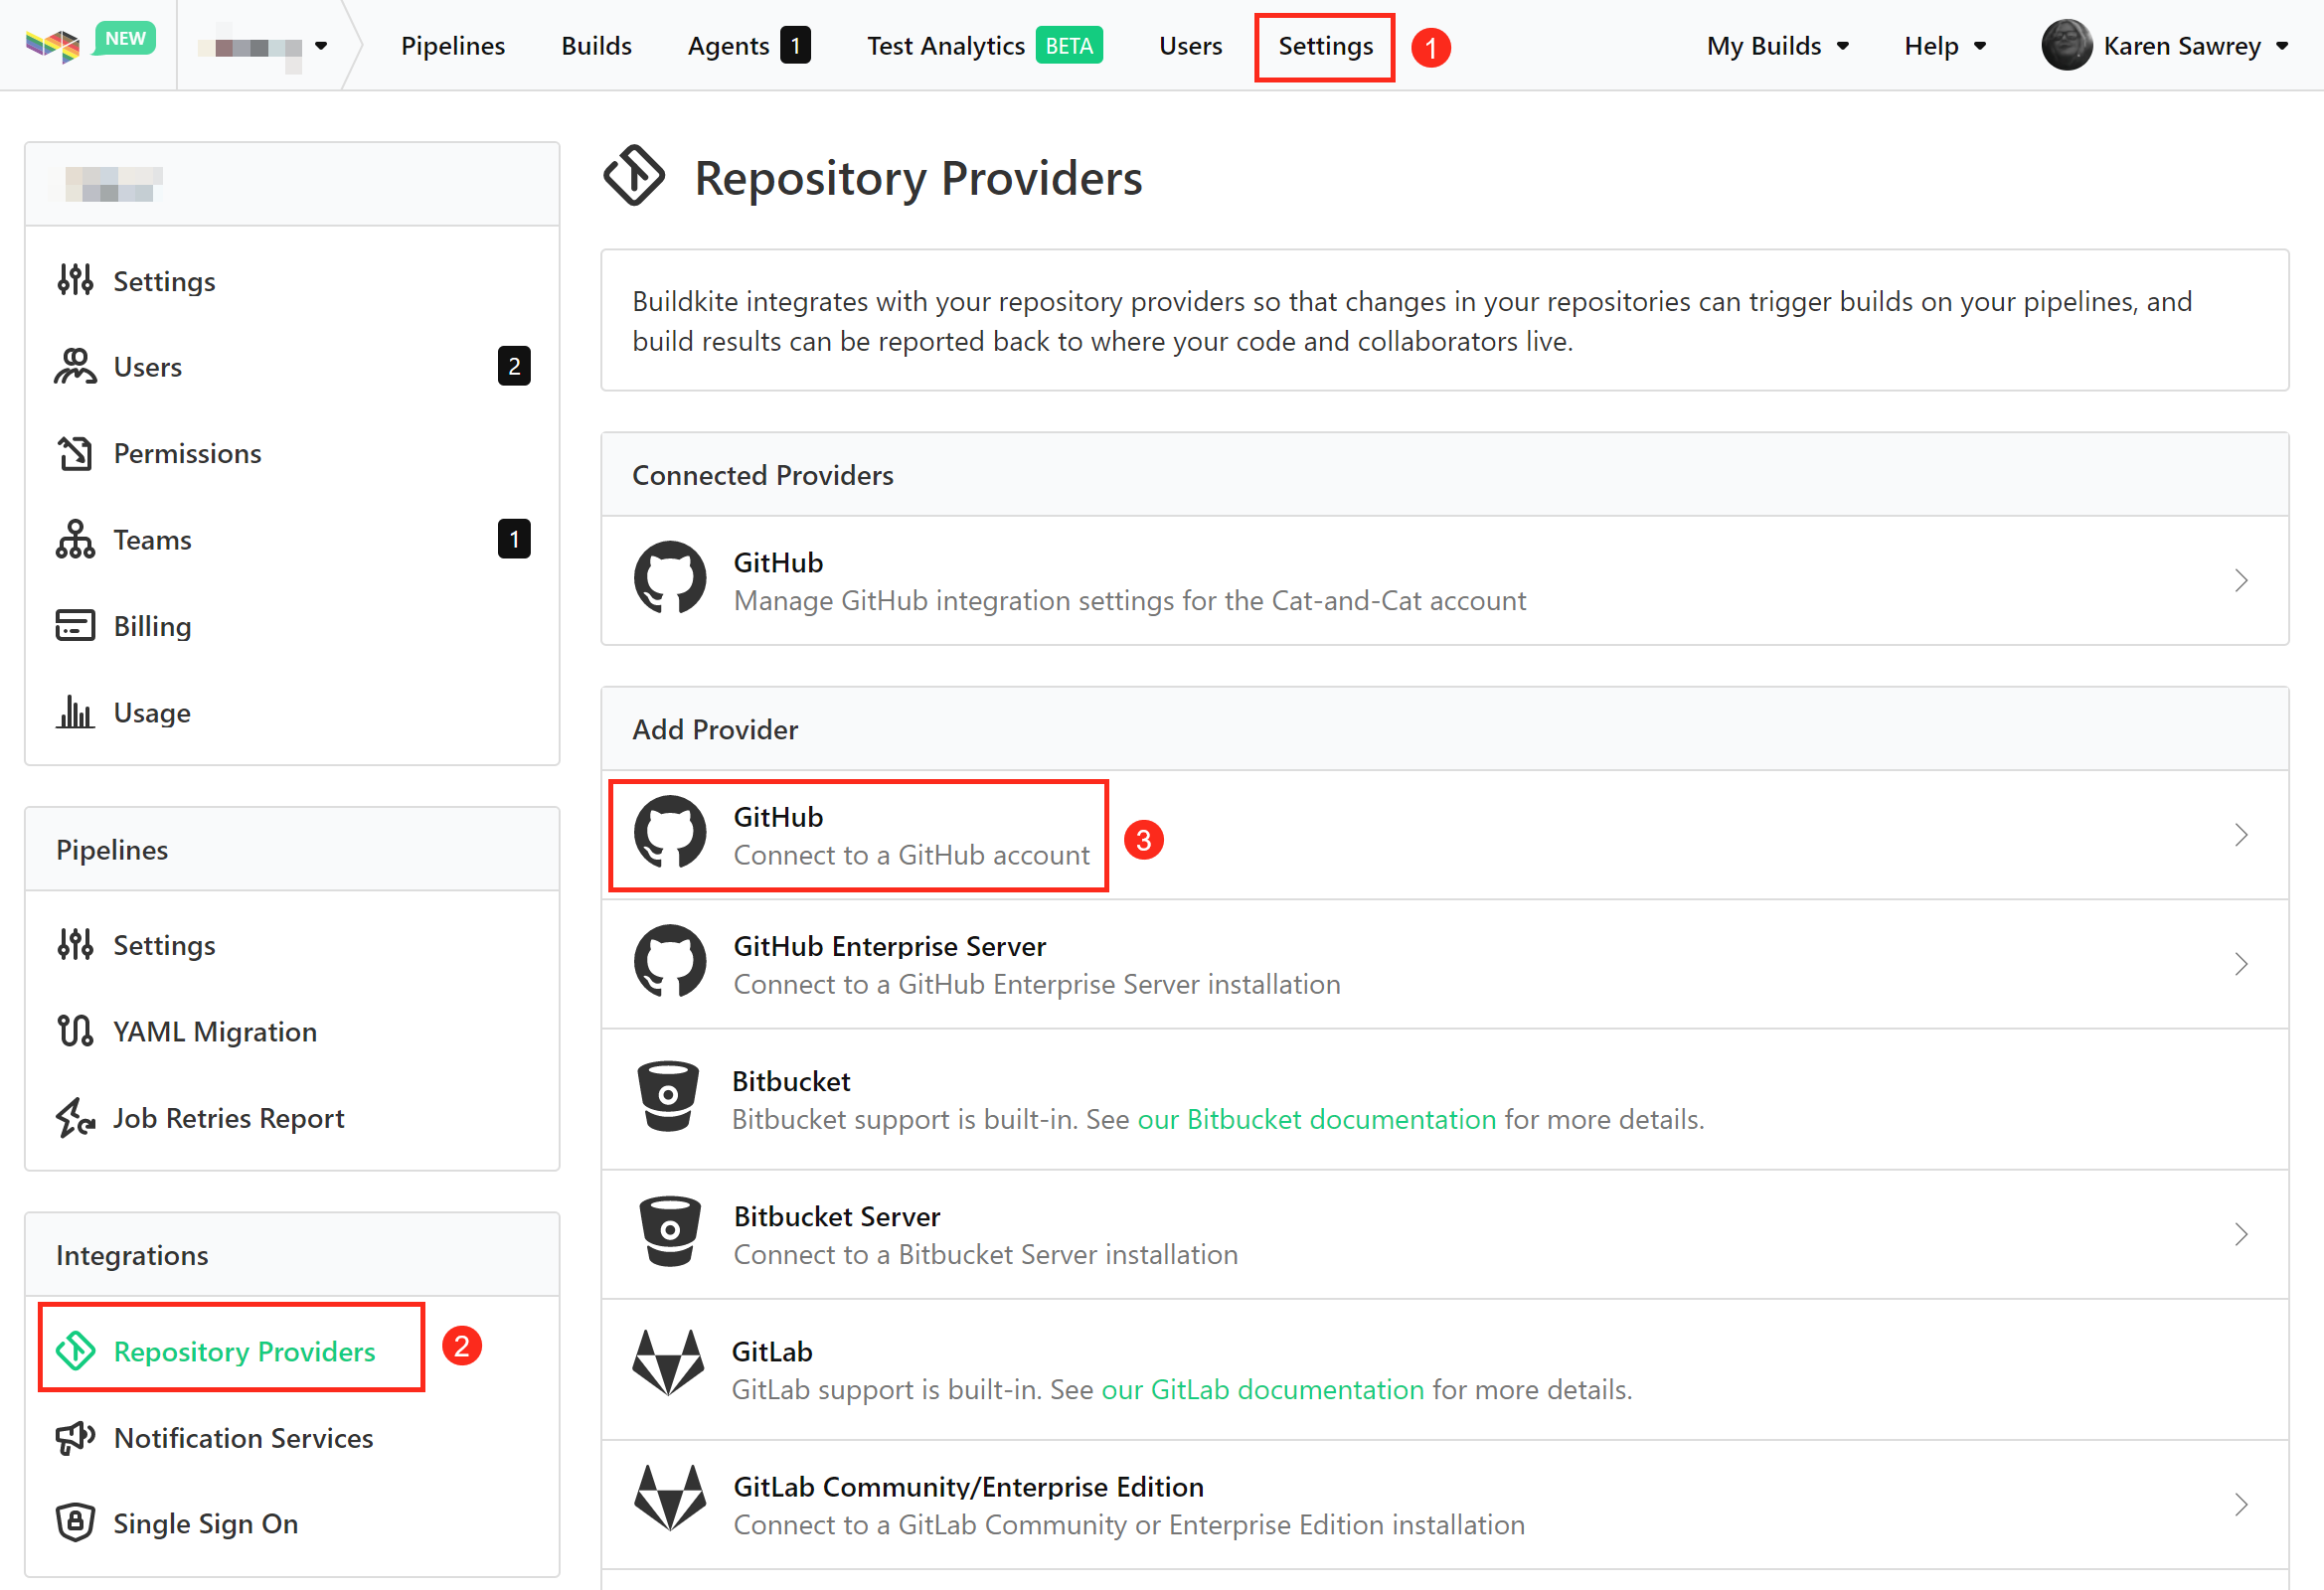
- Select Connect to a new GitHub Account. If you have never connected your Buildkite and GitHub accounts before, you will first need to select Connect and authorize Buildkite.
- Select the GitHub organization you want to connect to your Buildkite organization.
- Choose which repositories Buildkite should have access to, then select Install.
You can now set up a pipeline.
Buildkite GitHub permissions
When you connect your GitHub organization, Buildkite needs the following permissions:
-
Read access to metadata: this is a default permission for all GitHub apps. From the GitHub documentation:
GitHub Apps have the Read-only metadata permission by default. The metadata permission provides access to a collection of read-only endpoints with metadata for various resources. These endpoints do not leak sensitive private repository information.
Read and write access to checks, commit statuses, deployments, pull requests, and repository hooks: this is needed for Buildkite to perform tasks such as running a build on pull requests and reporting that build status directly on the PR on GitHub.
Set up a new pipeline for a GitHub repository
- Select Pipelines > New pipeline.
-
Enter your pipeline details, including your GitHub repository URL in the form
git@github.com:your/repo.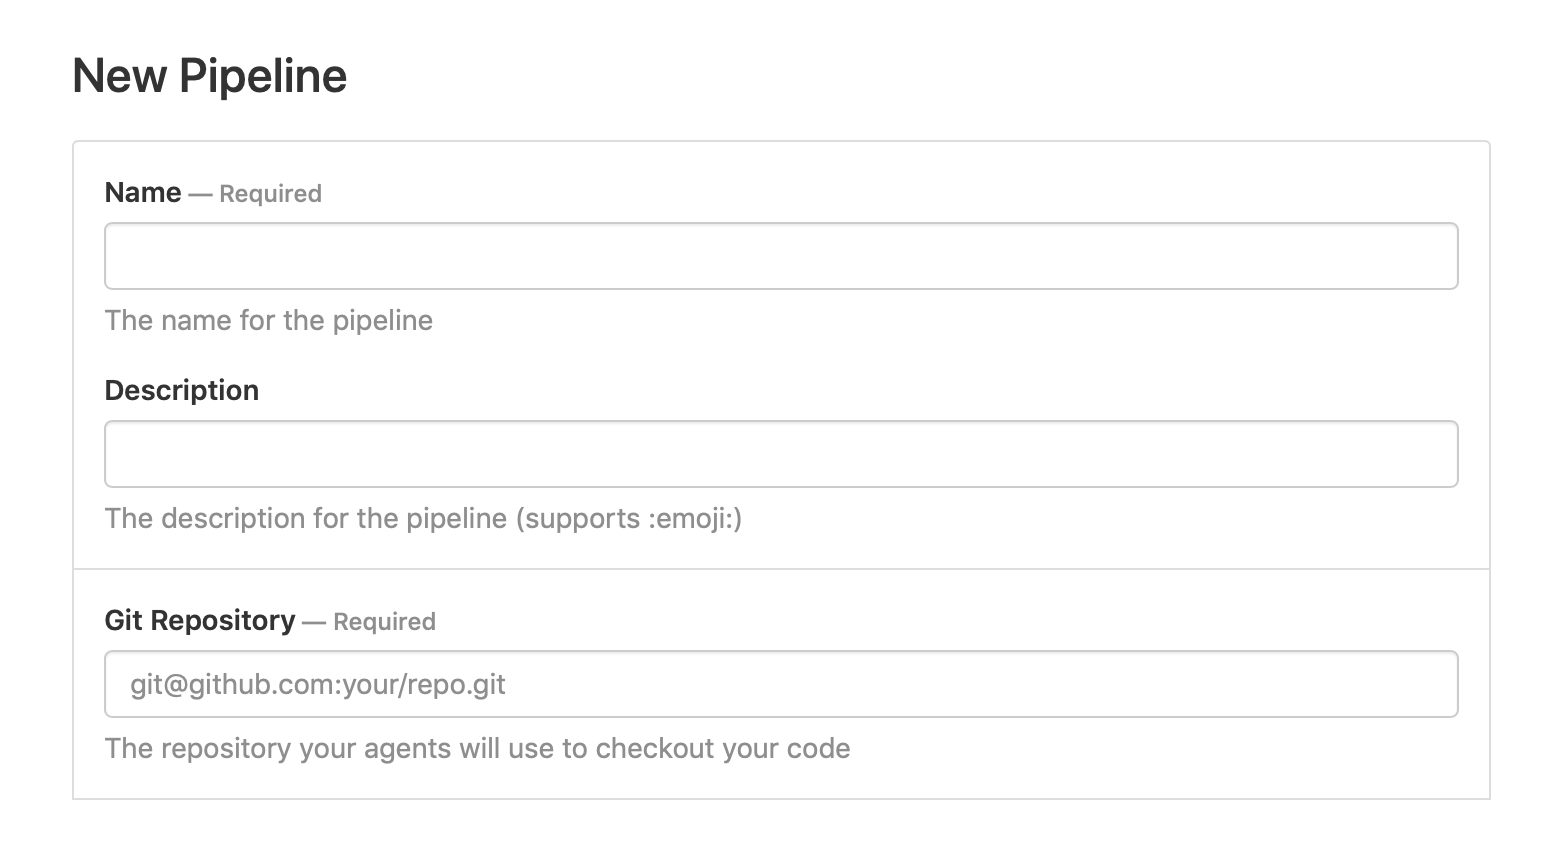
If you are still using the web steps visual editor, add at least one step to your pipeline. Refer to Defining Steps - Adding steps for more information.
Select Create Pipeline.
-
Follow the onscreen instructions to set up a webhook:
- Add a new webhook in GitHub.
- Paste in the provided webhook URL.
- Select
application/jsonas the content type of the webhook. - Select the
deployment,pull_request, andpushevents to trigger the webhook.
The repository webhook is required so that the Buildkite GitHub app does not need read access to your repository.
If using the YAML steps editor, add at least one step to your pipeline, then select Save and Build. Refer to Defining Steps - Adding steps for more information.
If you need to set up the webhook again, you can find the instructions linked at the bottom of the pipeline GitHub settings page.
You can edit your pipeline configuration at any time in your pipeline's Settings.
Branch configuration and settings
You can edit the version control provider settings for each pipeline from the pipeline's settings page. Go to Pipelines > your specific pipeline > Settings > your Git service provider.
If you need more control over your pipeline configuration, add a pipeline.yml to your repository. Then you can use conditionals and branch filtering to configure your pipeline.
Running builds on pull requests
To run builds for GitHub pull requests, edit the GitHub settings for your Buildkite pipeline and choose the Build Pull Requests checkbox.
Optionally, select one or more of the following:
- Limit pull request branches
- Skip pull request builds for existing commits
- Rebuild pull requests when they become ready for review
- Build pull requests from third-party forked repositories. Make sure to check the managing secrets guide if you choose to do this.
If you want to control which third-party forks can trigger builds in GitHub, you can prefix the branches from third-party forks with the contributor's username. For example, the main branch from some-user becomes some-user:main. You can then detect these using a pre-command hook or something similar before running a build. To enable prefixing the branch names, go to the GitHub settings for the pipeline and select Prefix third-party fork branch names.
If you want to run builds only on pull requests, set the Branch Filter Pattern in the pipeline to a branch name that will never occur (such as "this-branch-will-never-occur"). Pull request builds ignore the Branch Filter Pattern, and all pushes to other branches that don't match the pattern are ignored.
When you create a pull request, two builds are triggered: one for the pull request and one for the most recent commit. However, any commit made after the pull request is created only triggers one build.
Webhook events from GitHub pull requests that trigger Buildkite pipeline builds
A Buildkite pipeline's build can be triggered by pull request-related events, such as when a pull request (PR) is opened, a PR's stage is changed from Draft to Open (via Ready for review), and when a PR's labels are changed (if this setting is enabled in your pipeline's settings).
Noreply email handling
When you connect your GitHub account to Buildkite the email address associated with the GitHub account is added to your Buildkite account. If you've got GitHub set not to display your email, [username]@users.noreply.github.com or the more recent [username+id]@users.noreply.github.com is added instead. The email address of a commit is one of the ways Buildkite matches webhook builds to users.
Customizing commit statuses
The commit status is the label used to identify the Buildkite checks on your commits and pull requests on GitHub. Normally, Buildkite autogenerates these statuses.
For example, if you select Update commit statuses in your Pipeline Settings:
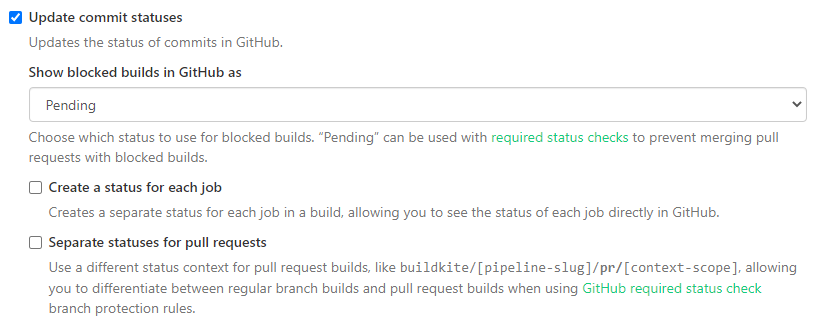
Your checks will appear on your pull request as buildkite/your-pipeline-name:

You can customize the commit statuses, for example to reuse the same pipeline for multiple components in a monorepo, at both the build and step level, using the notify attribute in your pipeline.yml.
Build level
-
Add the following to your
pipeline.yml, at the top level:notify: - github_commit_status: context: "my-custom-status" In Pipeline > your specific pipeline > Settings > GitHub, make sure Update commit statuses is not selected. Note that this prevents Buildkite from automatically creating and sending statuses for this pipeline, meaning you will have to handle all commit statuses through the
pipeline.yml.When you make a new commit or pull request, you should see my-custom-status as the commit status:

In a setup for a repository containing one codebase and one pipeline.yml, this customizes the commit status for the pipeline. However, if you have multiple pipeline.yml files in one repo, feeding in to the same Buildkite pipeline, this allows you to have different statuses when building different sections of the repo.
For example, if you have a monorepo containing three applications, you could use the same pipeline, with different pipeline.yml files for each application. Each pipeline.yml can contain a different GitHub status.
Step level
-
Add
notifyto a command in yourpipeline.yml:steps: - label: "Example Script" command: "script.sh" notify: - github_commit_status: context: "my-custom-status" -
In Pipeline > your specific pipeline > Settings > GitHub, you can choose to either:
- Make sure Update commit statuses is not selected. Note that this prevents Buildkite from automatically creating and sending statuses for this pipeline, meaning you will have to handle all commit statuses through the
pipeline.yml. - Enable both Update commit statuses and Create a status for each job. Buildkite sends its default statuses as well as your custom status.
- Make sure Update commit statuses is not selected. Note that this prevents Buildkite from automatically creating and sending statuses for this pipeline, meaning you will have to handle all commit statuses through the
When you make a new commit or pull request, you should see my-custom-status as the commit status:
You can also define the commit status in a group step:
steps:
  - group: ":lock_with_ink_pen: Security Audits"
    key: "audits"
    notify:
    - github_commit_status:
        context: "group status"

    steps:
      - label: ":brakeman: Brakeman"
        command: ".buildkite/steps/brakeman"
      - label: ":bundleaudit: Bundle Audit"
        command: ".buildkite/steps/bundleaudit"
      - label: ":yarn: Yarn Audit"
        command: ".buildkite/steps/yarn"
      - label: ":yarn: Outdated Check"
        command: ".buildkite/steps/outdated"
When you set a custom commit status on a group step, GitHub only displays one status for the group. A passing result only shows when all jobs in the group pass. If you want to show custom commit statuses for each job, set them on the individual step.
Using one repository in multiple pipelines and organizations
If you want to use the same repository in multiple pipelines (including pipelines in different Buildkite organizations), you need to configure a separate webhook for each pipeline. Follow the webhook setup instructions in the Buildkite UI. Buildkite shows you these instructions when you create the pipeline, but you can also find them in Pipeline > your specific pipeline > Settings > your Git service provider > your Git service provider's Setup Instructions.
If you want to integrate the same repository into multiple Buildkite organizations, you need to link each organization to GitHub using different Buildkite user accounts. You must use different user accounts because there's a one-to-one relationship between a Buildkite user and a GitHub user. The user needs admin permissions on the GitHub organization to link it to Buildkite. You can only install the Buildkite app for GitHub once per GitHub organization.
Build skipping
You may not always want to rebuild on every commit, or branch. You can configure Buildkite to ignore individual commits or branches, or to skip builds under certain conditions.
Connect your Buildkite account to GitHub using OAuth
To connect your GitHub account:
- Open your Buildkite Personal Settings.
- Select Connected Apps.
- Select the GitHub Connect button:
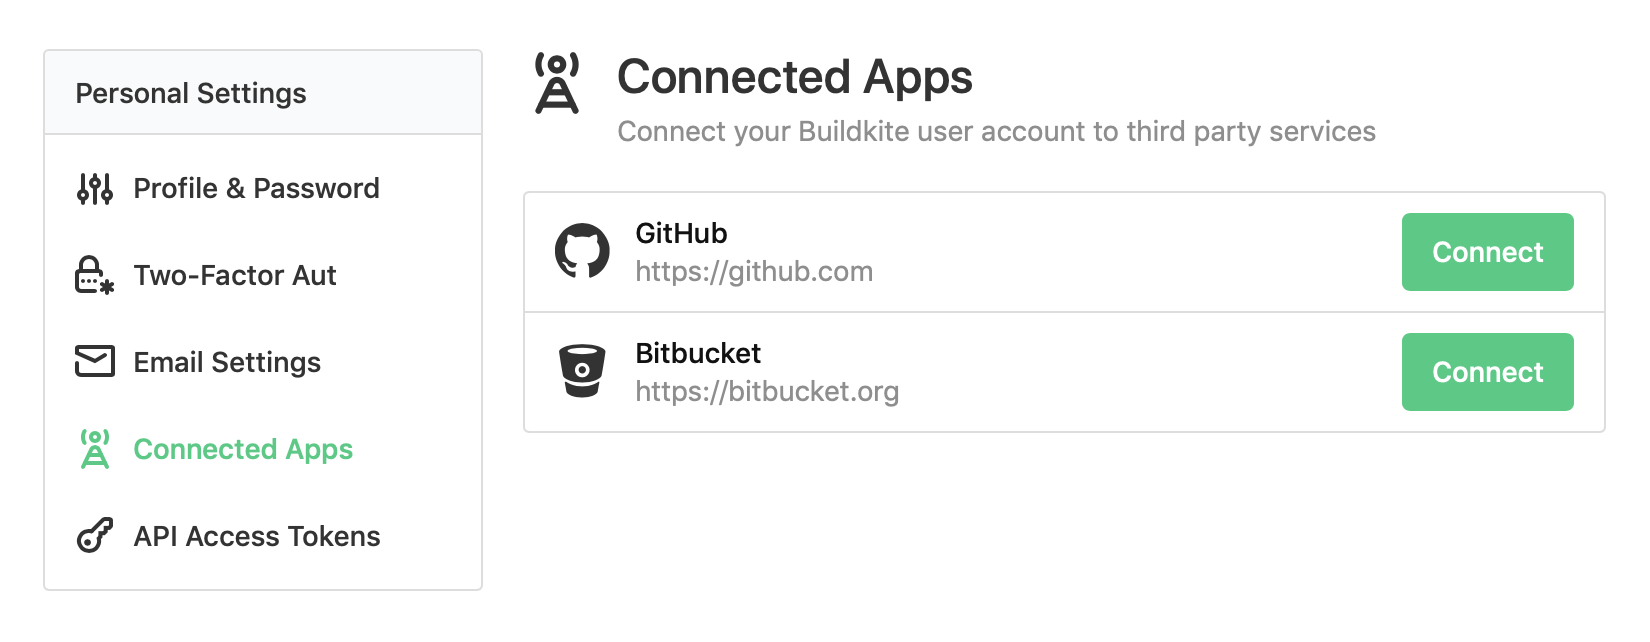
- Select Authorize Buildkite. GitHub redirects you back to your Connected Apps page.
You can now set up a pipeline.