Deploying to Heroku
You can test and deploy Heroku applications from your Buildkite pipelines.
For GitHub-based pipelines you can use Heroku's Automatic Deploys feature to have a branch deployed once Buildkite has marked the commit as 'passed'. To get started with automatic deploys: enable it in your Heroku dashboard, check "Wait for CI to pass before deploy", and when Heroku sees the passing Buildkite commit status it will automatically perform a slug deploy. You can also auto-deploy pull requests using Review Apps.
If you don't use GitHub or need more control of deployments, this guide will run you through the steps required for performing a manual deployment using git push. You can also use these methods to create pipelines for heroku cli tasks you'd like to automate.
Setting up the Heroku command-line interface (CLI)
You can deploy to Heroku using the same git push command you'd run from your development machine.
First step is installing the Heroku CLI on your Buildkite agent machine. For example, this is how you'd do it on a linux agent machine:
$ wget -O- https://toolbelt.heroku.com/install-ubuntu.sh | sh
You can find OSX and Windows installers here.
And now verify it installed correctly by checking the version:
$ heroku --version
You should see version numbers for both the heroku-toolbelt and heroku-cli packages.
The next step is to login using the CLI and your Heroku credentials. We recommend creating a new user in Heroku that you only use for this purpose (a "machine user"). To create a machine user in Heroku, sign up to Heroku as a new user and then add that user as a collaborator to your existing Heroku application.
If you're ready to login with the Heroku user credentials, make sure you're running as your buildkite-agent user (which for most packages is "buildkite-agent") and then run the heroku login command:
$ sudo su buildkite-agent
$ heroku login
You're now ready to run heroku commands in your Buildkite pipelines! 🎉
Setting up your build pipeline
In your pipeline, add a command step for your deploy. Limit it to the branch you want to deploy, and add the commands to push to Heroku:
steps:
  - label: ":ruby: Tests"
    command:
      - cp .env.sample-dev .env
      - foreman run rake db:setup spec

  - label: ":heroku: Deploy"
    branches: "main"
    command:
      - "heroku git:remote --app my-app"
      - "git push heroku \"$$BUILDKITE_COMMIT\":main"
What's happening here? heroku git:remote ensures the Git remote is always pointing to the correct Heroku application and doesn't have an old value from previous builds. The git push specifies the exact commit, to make sure we're pushing the same commit we've tested.
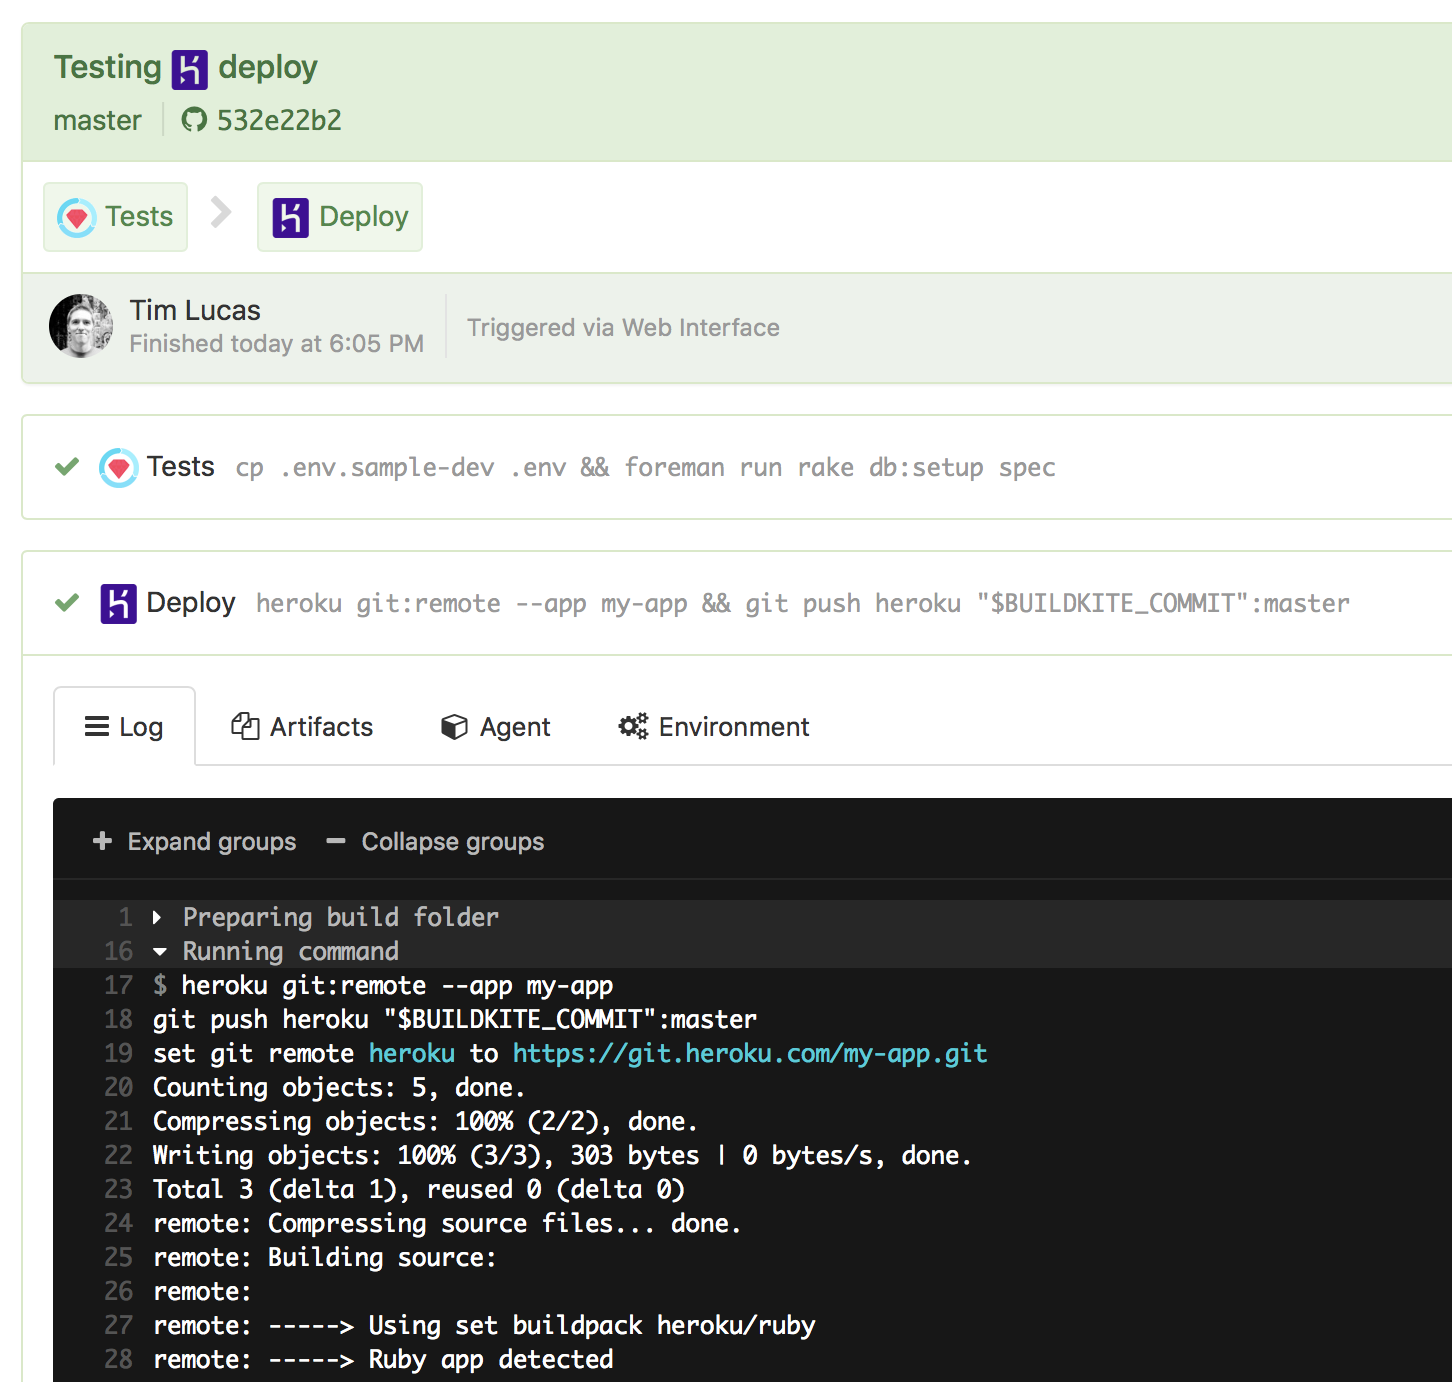
Running a build
Once you've saved the pipeline settings the final step is to push a commit to the main branch and watch it automatically deploy to Heroku:
Post-deploy scripts
If you want to run tasks after the deploy, such as running database migrations, you can add a wait step and additional command step that uses heroku run, for example:
steps:
  - label: ":heroku: Deploy"
    commands:
      - "heroku git:remote --app my-app"
      - "git push heroku \"$$BUILDKITE_COMMIT\":main"

  - wait

  - label: ":heroku: DB Migrations"
    commands:
      - "heroku git:remote --app my-app"
      - "heroku run rails db:migrate"