buildkite-agent annotate
The Buildkite Agent's annotate command allows you to add additional information to Buildkite build pages using CommonMark Markdown.
Creating an annotation
The buildkite-agent annotate command creates an annotation associated with the current build.
There is no limit to the amount of annotations you can create, but the maximum body size of each annotation is 1MiB. The size is measured in bytes, accounting for the underlying data encoding, where the specific encoding used can affect the size calculation. For example, if UTF-8 encoding is implemented, some characters may be encoded using up to 4 bytes each. All annotations can be retrieved using the GraphQL API.
Options for the annotate command can be found in the buildkite-agent cli help:
Usage
buildkite-agent annotate [body] [options...]
Description
Build annotations allow you to customize the Buildkite build interface to show information that may surface from your builds. Some examples include:
- Links to artifacts generated by your jobs
- Test result summaries
- Graphs that include analysis about your codebase
- Helpful information for team members about what happened during a build
Annotations are written in CommonMark-compliant Markdown, with "GitHub Flavored Markdown" extensions.
The annotation body can be supplied as a command line argument, or by piping content into the command. The maximum size of each annotation body is 1MiB.
You can update an existing annotation's body by running the annotate command again and provide the same context as the one you want to update. Or if you leave context blank, it will use the default context.
You can also update only the style of an existing annotation by omitting the body entirely and providing a new style value.
Example
$ buildkite-agent annotate "All tests passed! :your-emoji: like 🚀"
$ cat annotation.md | buildkite-agent annotate --style "warning"
$ buildkite-agent annotate --style "success" --context "junit"
$ ./script/dynamic_annotation_generator | buildkite-agent annotate --style "success"
Options
--no-color #
|
Don't show colors in logging |
|---|---|
--debug #
|
Enable debug mode. Synonym for `--log-level debug`. Takes precedence over `--log-level` |
--log-level value #
|
Set the log level for the agent, making logging more or less verbose. Defaults to notice. Allowed values are: debug, info, error, warn, fatal (default: "notice") |
--experiment value #
|
Enable experimental features within the buildkite-agent |
--profile value #
|
Enable a profiling mode, either cpu, memory, mutex or block |
--agent-access-token value #
|
The access token used to identify the agent |
--endpoint value #
|
The Agent API endpoint (default: " |
--no-http2 #
|
Disable HTTP2 when communicating with the Agent API. |
--debug-http #
|
Enable HTTP debug mode, which dumps all request and response bodies to the log |
--trace-http #
|
Enable HTTP trace mode, which logs timings for each HTTP request. Timings are logged at the debug level unless a request fails at the network level in which case they are logged at the error level |
--context value #
|
The context of the annotation used to differentiate this annotation from others |
--style value #
|
The style of the annotation (`success`, `info`, `warning` or `error`) |
--append #
|
Append to the body of an existing annotation |
--priority value #
|
The priority of the annotation (`1` to `10`). Annotations with a priority of `10` are shown first, while annotations with a priority of `1` are shown last. (default: 3) |
--job value #
|
Which job should the annotation come from |
--redacted-vars value #
|
Pattern of environment variable names containing sensitive values (default: "*_PASSWORD", "*_SECRET", "*_TOKEN", "*_PRIVATE_KEY", "*_ACCESS_KEY", "*_SECRET_KEY", "*_CONNECTION_STRING") |
Removing an annotation
Annotations can be removed using the buildkite-agent annotation remove command.
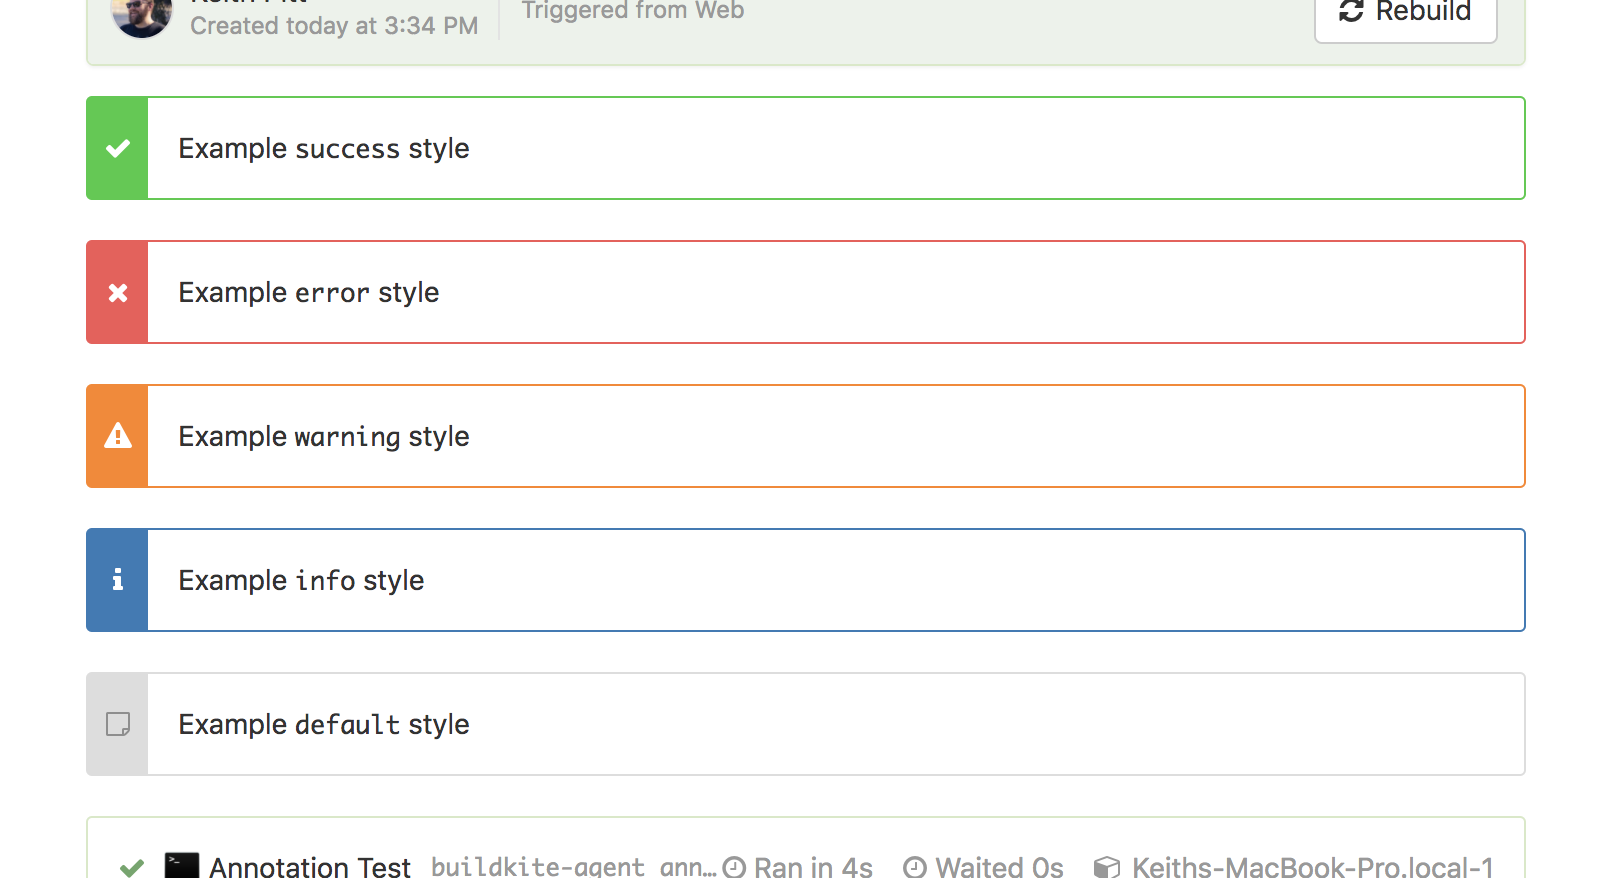
Annotation styles
You can change the visual style of annotations using the --style option.
This is an example pipeline showcasing the different styles of annotations:
steps:
  - label: ":console: Annotation Test"
    command: |
      buildkite-agent annotate 'Example `default` style' --context 'ctx-default'
      buildkite-agent annotate 'Example `info` style' --style 'info' --context 'ctx-info'
      buildkite-agent annotate 'Example `warning` style' --style 'warning' --context 'ctx-warn'
      buildkite-agent annotate 'Example `error` style' --style 'error' --context 'ctx-error'
      buildkite-agent annotate 'Example `success` style' --style 'success' --context 'ctx-success'
Supported Markdown syntax
We use CommonMark with GitHub Flavored Markdown extensions to provide consistent, unambiguous Markdown syntax.
GitHub kindly provides a guide to this syntax.
Annotations do not support GitHub-style syntax highlighting, task lists, user mentions, or automatic links for references to issues, pull requests or commits.
CommonMark supports HTML inside Markdown blocks, but will revert to Markdown parsing on newlines. For more information about how HTML is parsed and which tags CommonMark supports please refer to the CommonMark spec.
Supported CSS classes
A number of CSS classes are accepted in annotations. These include a subset of layout and formatting controls based on Basscss, and colored console output.
Basscss
Basscss is a toolkit of composable CSS classes which can be combined to accomplish many styling tasks. We accept the following parts of version 8.0 of Basscss within annotations:
- Align
- Border
- Colors
-
Flexbox
- All except
sm-flex,md-flexandlg-flex
- All except
- Margin
-
Layout
- All except Floats (Please use Flexbox instead)
- Padding
-
Typography
-
bold,regular,italic,caps -
left-align,center,right-align,justify -
underline,truncate list-reset
-
- Type Scale
An exhaustive list of classes that annotations support can be found below:
bold regular italic caps underline
left-align center right-align justify
align-baseline align-top align-middle align-bottom
list-reset truncate fit

inline block inline-block table table-cell
overflow-hidden overflow-scroll overflow-auto

ml-auto mr-auto mx-auto
flex flex-column flex-wrap flex-auto flex-none
items-start items-end items-center items-baseline items-stretch
self-start self-end self-center self-baseline self-stretch
justify-start justify-end justify-center justify-between justify-around
content-start content-end content-center content-between content-around content-stretch
order-0 order-1 order-2 order-3 order-last

border border-top border-right border-bottom border-left border-none rounded

h1 h2 h3 h4 h5 h6

m0 mt0 mr0 mb0 ml0 mx0 my0 m1
mt1 mr1 mb1 ml1 mx1 my1
m2 mt2 mr2 mb2 ml2 mx2 my2
m3 mt3 mr3 mb3 ml3 mx3 my3
m4 mt4 mr4 mb4 ml4 mx4 my4
mxn1 mxn2 mxn3 mxn4

p0 pt0 pr0 pb0 pl0 px0 py0
p1 pt1 pr1 pb1 pl1 py1 px1
p2 pt2 pr2 pb2 pl2 py2 px2
p3 pt3 pr3 pb3 pl3 py3 px3
p4 pt4 pr4 pb4 pl4 py4 px4
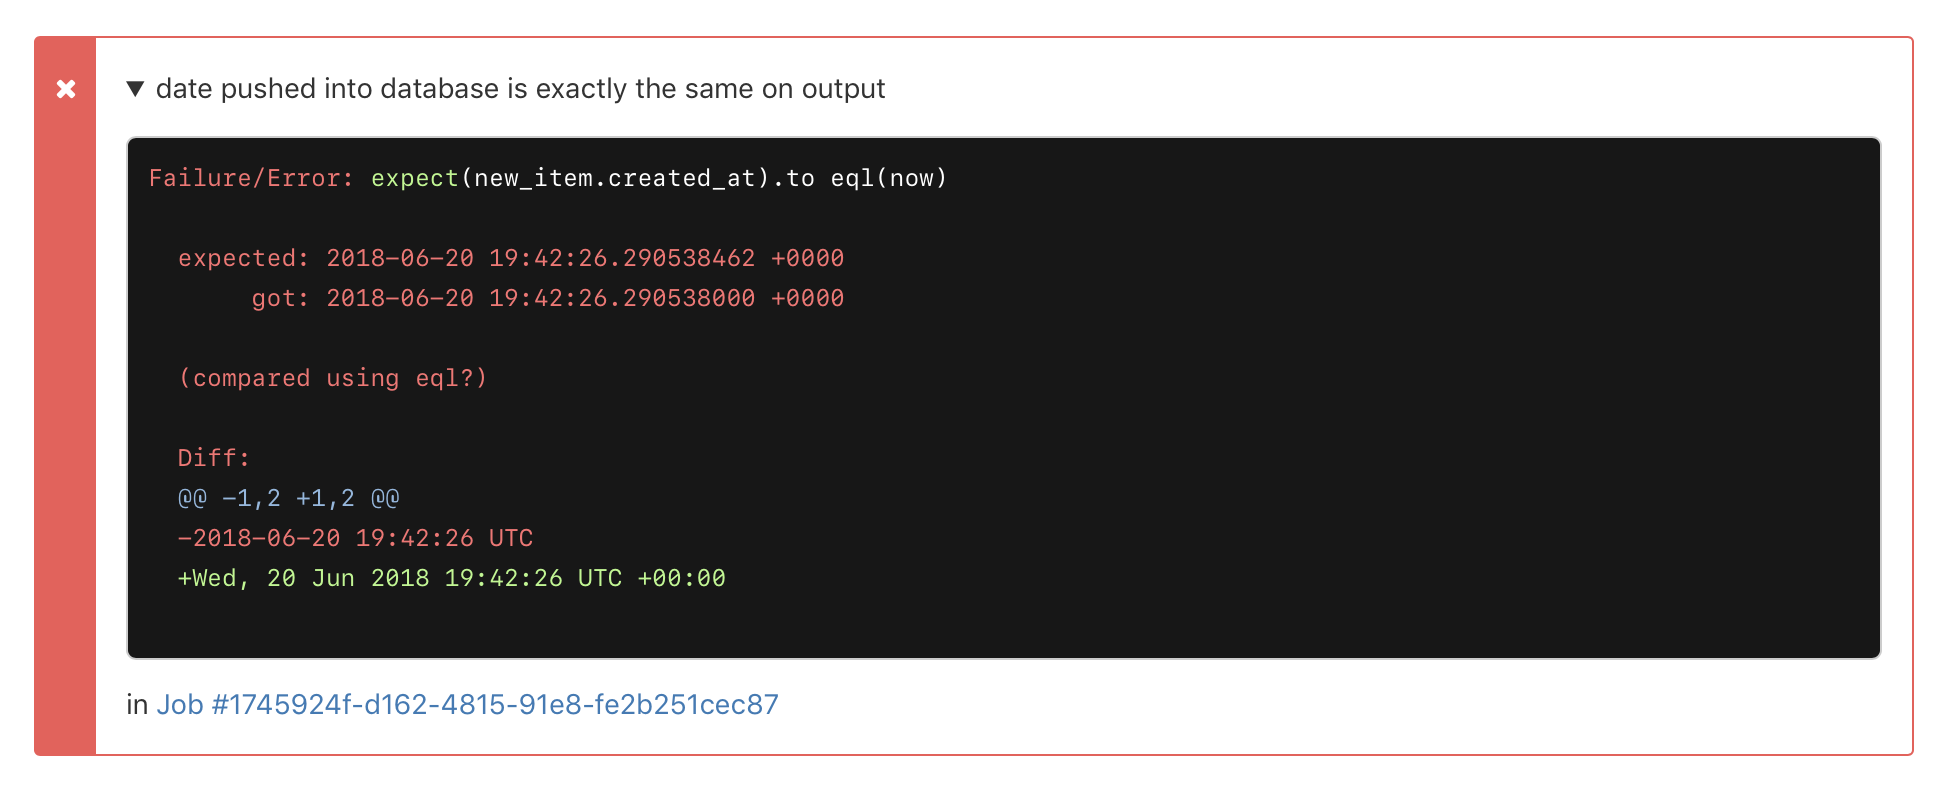
Colored console output
Console output in annotations can be displayed with ANSI colors when wrapped in a Markdown block marked as term or terminal syntax. There is a limit of 10 blocks per annotation.
```term
\x1b[31mFailure/Error:\x1b[0m \x1b[32mexpect\x1b[0m(new_item.created_at).to eql(now)

\x1b[31m  expected: 2018-06-20 19:42:26.290538462 +0000\x1b[0m
\x1b[31m       got: 2018-06-20 19:42:26.290538000 +0000\x1b[0m

\x1b[31m  (compared using eql?)\x1b[0m
```
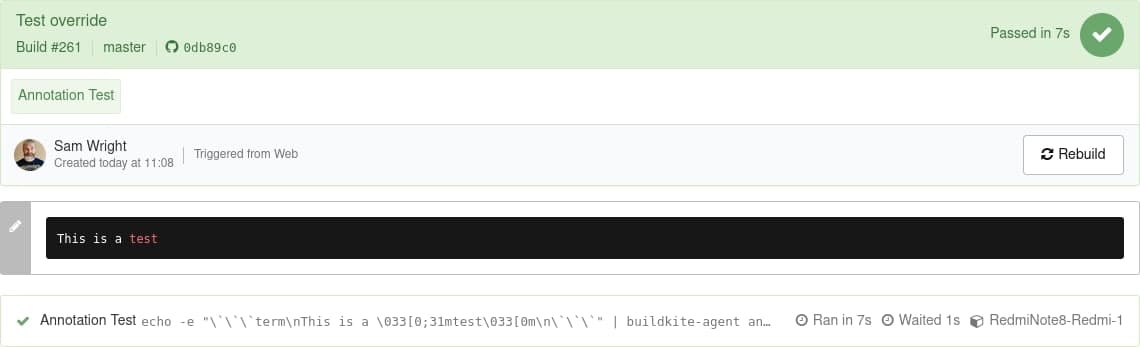
Make sure you escape the backticks (`) that demarcate the code block if you're echoing to the terminal, so it doesn't get interpreted as a shell interpreted command.
The following pipeline prints an escaped Markdown block, adds line breaks using \n and formats test using the red ANSI code \033[0;31m before resetting the remainder of the output with \033[0m. Passing -e to the echo commands ensures that the backslash escapes codes are interpreted (the default is not to interpret them).
steps:
  - label: "Annotation Test"
    command:
      - echo -e "\`\`\`term\nThis is a \033[0;31mtest\033[0m\n\`\`\`" | buildkite-agent annotate
The results are piped though to the buildkite-agent annotate command:
Or for more complex annotations, pipe an entire file to the buildkite-agent annotate command:
printf '%b\n' "$(cat markdown-for-annotation.md)" | buildkite-agent annotate
If you're using our terminal to HTML tool, wrap the output in <pre class="term"><code></code></pre> tags, so it displays the terminal color styles but won't process it again:
<pre class="term">
  <code>
    terminal-to-html output
  </code>
</pre>
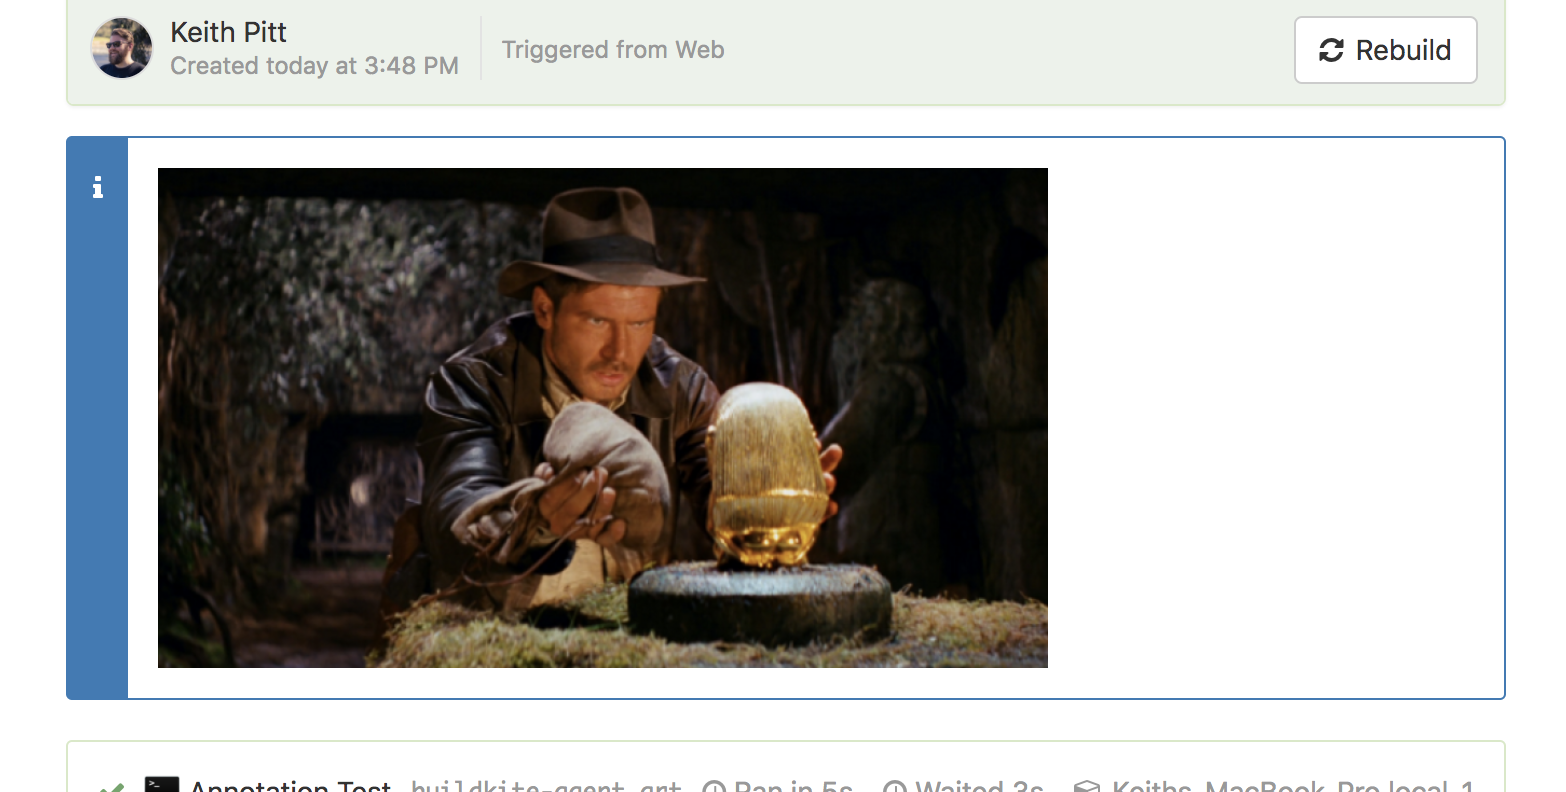
Embedding & linking artifacts in annotations
Uploaded artifacts can be embedded in annotations by referencing them using the artifact:// prefix in your image source.
steps:
  - label: ":console: Annotation Test"
    command: |
      buildkite-agent artifact upload "indy.png"
      cat << EOF | buildkite-agent annotate --style "info"
        <img src="artifact://indy.png" alt="Belongs in a museum" height=250 >
      EOF
You can also link to uploaded artifacts as a shortcut to important files:
steps:
  - label: "Upload Coverage Report"
    command: |
      buildkite-agent artifact upload "coverage/*"
      cat << EOF | buildkite-agent annotate --style "info"
        Read the <a href="artifact://coverage/index.html">uploaded coverage report</a>
      EOF
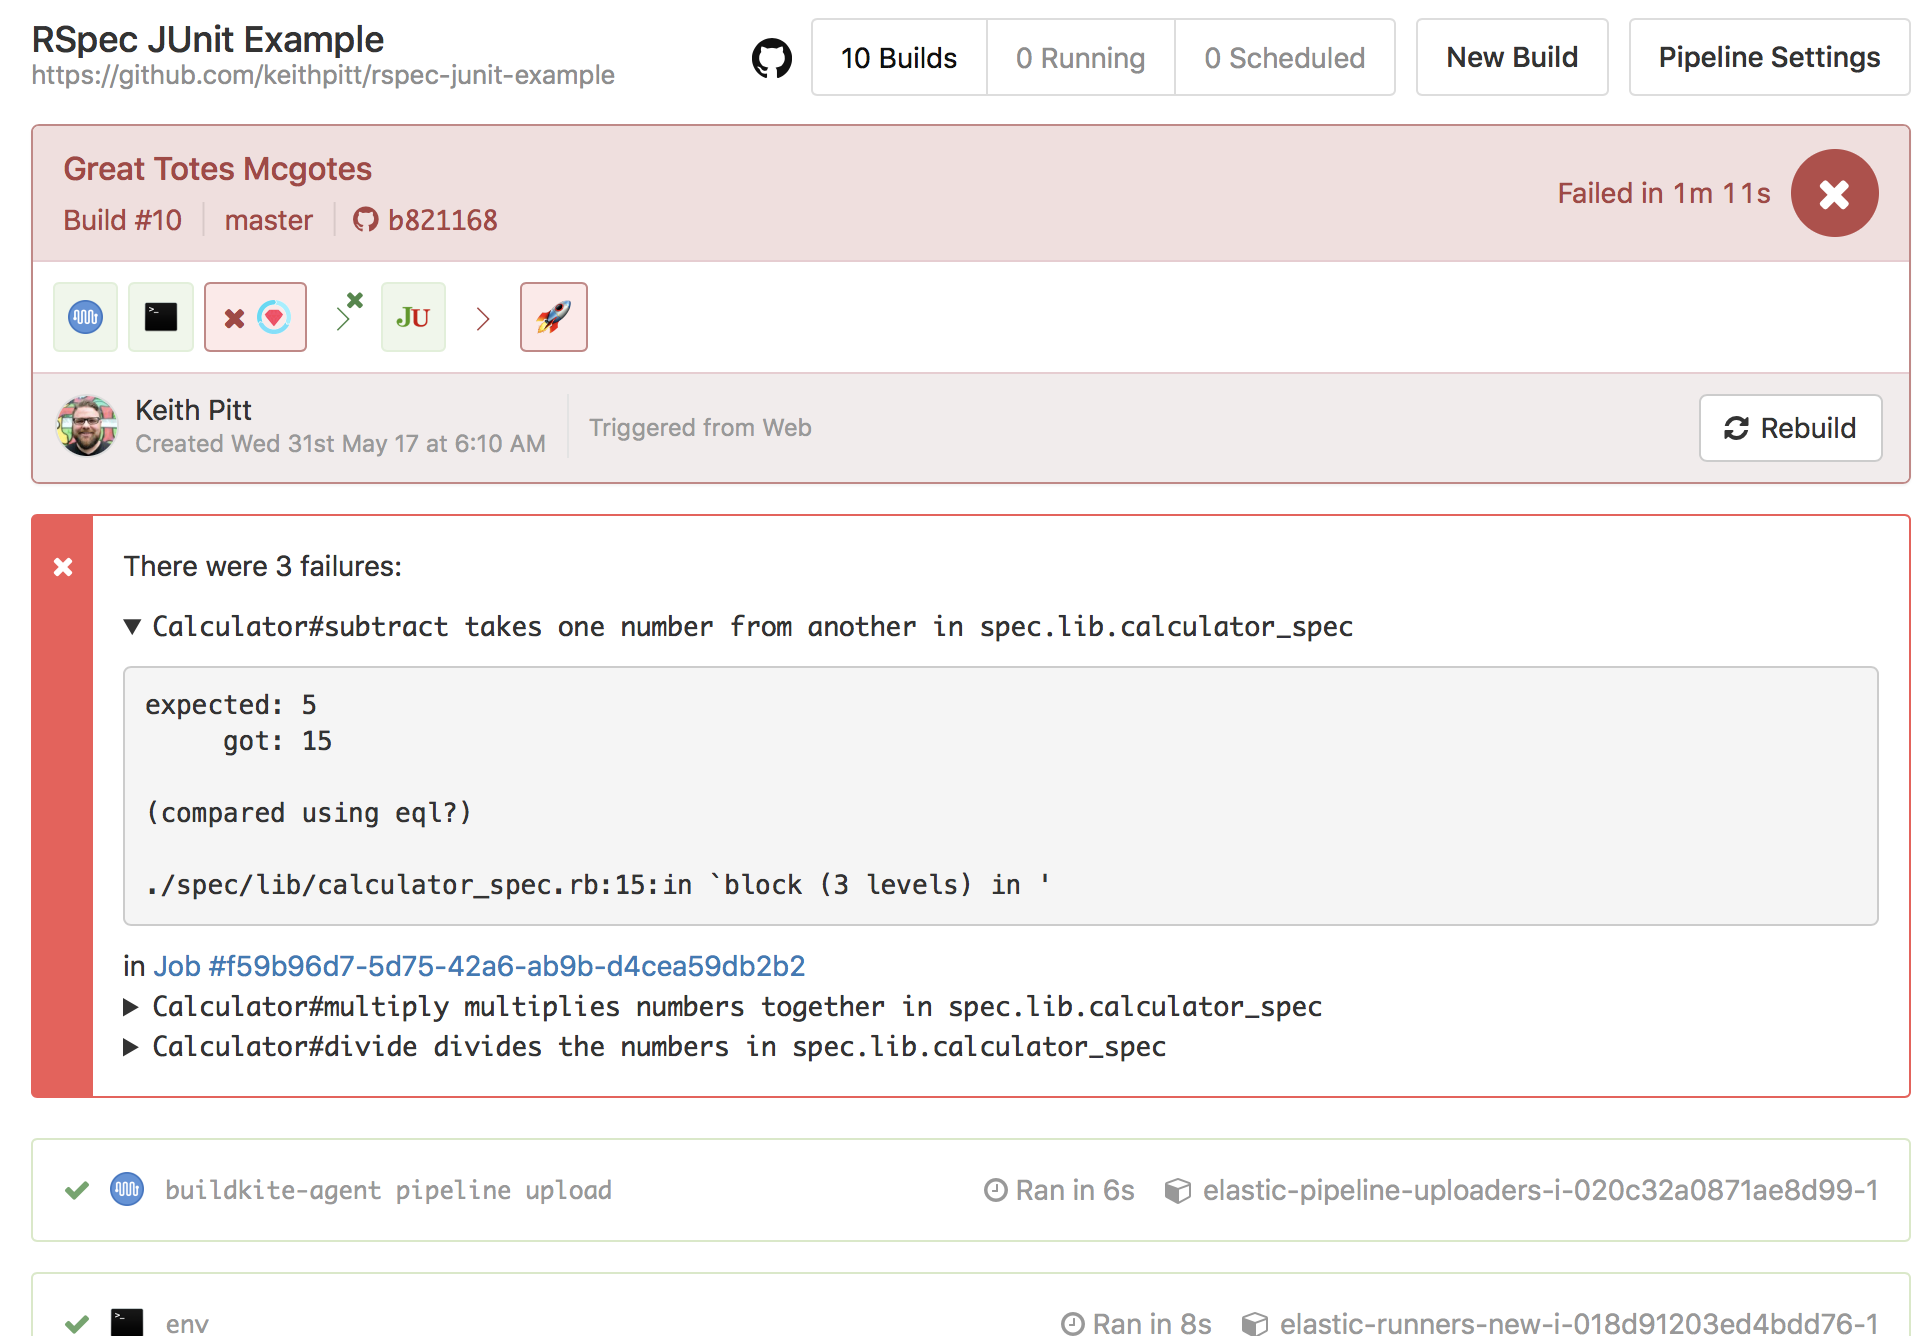
Using annotations to report test results
Annotations are a great way of rendering test failures that occur in different steps in a pipeline.
We've created a plugin to convert all the junit.xml artifacts in a build into a single annotation: https://github.com/buildkite-plugins/junit-annotate-buildkite-plugin
steps:
  - command: test.sh
    parallelism: 50
    artifact_paths: tmp/junit-*.xml
  - wait: ~
    continue_on_failure: true
  - plugins:
      - junit-annotate#v1.2.0:
          artifacts: tmp/junit-*.xml