Are you running your app’s full test suite on your machine after every fix? Meticulously inspecting code for style violations? With every manual process, it takes longer to write and merge even simple changes.
What's the answer? Adopting continuous integration (CI). CI keeps that critical feedback loop tight by automating linting, testing, and more. Each code change kicks off your CI pipelines, instantly surfacing bugs and style issues.
What is CI, though? Basically, it’s running automated workflows when your code changes. Tools like fastlane and Buildkite Pipelines make this possible and automate away the manual steps that slow you down.
This blog will show you how to create and run automated CI pipelines with fastlane for linting and testing your iOS apps. You’ll speed up your development loop so you can make changes quickly and easily, without skipping any important steps.
CI tools for iOS apps
To get started with iOS CI, you’ll need a few tools in your belt:
- fastlane: A mobile automation framework with a rich set of actions and plugins. This tool lets you build up complex workflows (lanes, in fastlane) to do almost anything your iOS project needs.
- SwiftLint: Enforces a consistent style for your Swift code, reducing the time spent deciding whether to use tabs or spaces, and how code should be formatted.
- scan: fastlane’s tooling for automatically running tests on Xcode projects.
- xcbeautify: Displays Xcode test output nicely, and generates JUnit reports to display errors in a rich way.
In this blog, you'll use Buildkite Pipelines as the CI platform to automatically run all of these tools. Buildkite lets you run builds on your own infrastructure, cloud providers, or Buildkite’s hosted agents. The flexibility means you control which systems can access your secrets, signing credentials, and even your source code.
So how does all of this come together? fastlane uses a Fastfile to define the different lanes (workflows) that can run on your application. For example, you can have lanes like lint, build, take_screenshots, publish—whatever works for your app.
Here’s a sample iOS Fastfile with a test lane:
default_platform(:ios)

platform :ios do
  project_path = "myProject/myProject.xcodeproj"

  desc "Run iOS tests"
  lane :test do
    run_tests(
      project: project_path
    )
  end
end
In the available actions in the fastlane docs, there’s a page for the run_tests action to outline the functionality and options. In this sample, when the test lane is run, it executes the run_tests action.
Now, how do you hook these lanes up to CI so they run on every commit? Let’s talk about templates.
CI templates
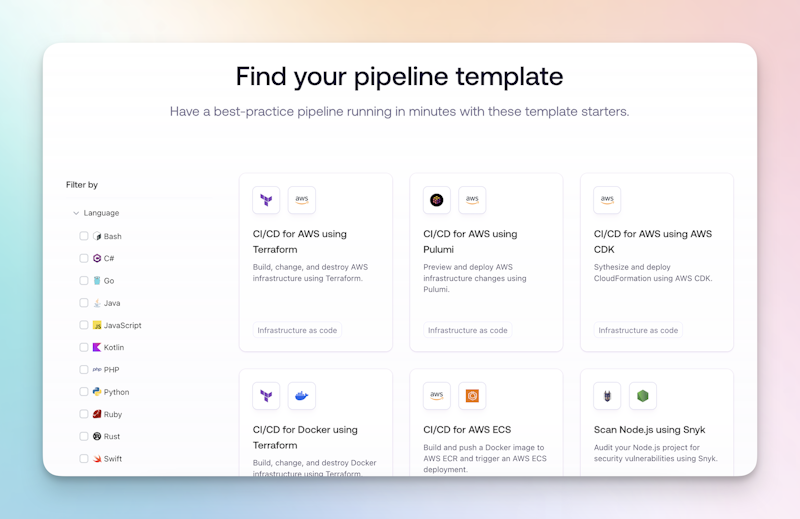
While you can build CI/CD pipelines from scratch, Buildkite provides a handy gallery of pre-made templates to help you hit the ground running. Whether you're using common tools like fastlane or frameworks like React Native, there's likely a template tailored for your stack. Best of all, the whole gallery is open source so you can request or submit changes.
fastlane template for CI
For this project, you’ll use the fastlane iOS template. This template comes packed with everything you need to automate your iOS CI out of the box:
- Dependencies: Bundler installs fastlane and any required Ruby gems.
- Testing: scan runs your project's unit tests.
- Linting: SwiftLint performs static code analysis, ensuring your Swift style stays sharp.
Even if you're new to fastlane, there's an example project alongside the template with a ready-to-use Fastfile that defines the build, test, and lint steps. In just a few clicks, you can stand up a complete CI pipeline for kicking the tires on iOS automation. You’ll need to follow the steps in the template’s description, which mostly means setting up the lanes in your project to match those in the template.
Here’s a look at exactly how the template works:
This diagram shows the pipeline steps and their order of execution. In this blog, you’re most interested in the “Install dependencies,” “Test,” and “Lint” steps.
Run CI for an iOS app
Now, it’s time to create and run a CI pipeline. This blog will follow along with a simple iOS app (based on Apple’s About Me), but you can use your own iOS app.
The sample app is written in Swift and shows several screens and pieces of data, with a few test cases to ensure everything keeps running. While modest in scope, the sample app incorporates some common iOS app tools and practices that make it a great candidate for CI:
- SwiftLint for enforcing Swift style guide rules.
- XCTest for unit testing.
Create the CI pipeline
Next, you’ll dive into Buildkite to get a pipeline up and running!
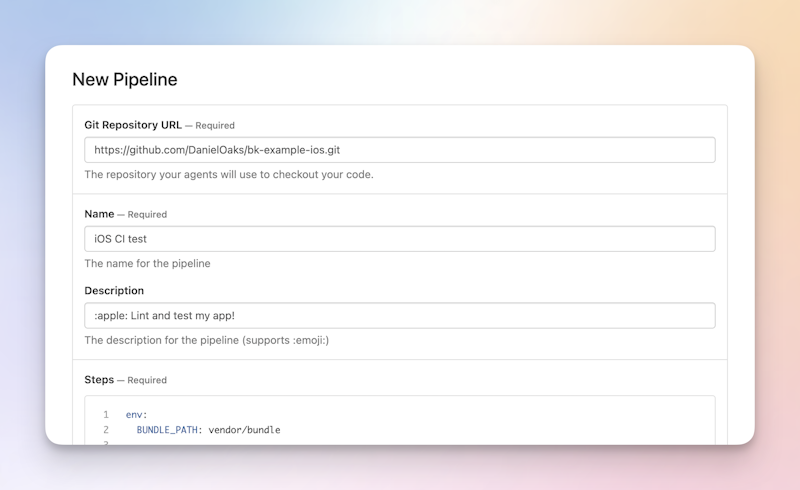
If you haven’t already, open the fastlane iOS template and select Use template. That will direct you to sign up if you haven’t got an account with Buildkite, then ask for a few details like your repository URL and the pipeline name.
For the pipeline name, you can use something like “iOS CI test”. For the Git URL, you can use private or internal URLs, so long as your agents can successfully clone the repos (if you’re running your own agents, Buildkite never needs to see the code).
I’m using the sample app with this repo URL:
https://github.com/DanielOaks/bk-example-ios.git
Now, take a closer look at those steps:
env:
  BUNDLE_PATH: vendor/bundle

steps:
  - label: ":bundler: Install dependencies"
    ...

  - label: ":fastlane: Test"
    ...

  - label: ":buildkite: Annotate"
    ...

  - label: ":fastlane: Lint"
    ...

  - label: ":fastlane: Build"
    ...

  - label: ":ios: Submit beta"
    ...
One of the best things about using a template is getting started quickly. But you should make the template work for you, not make your project fit the template. So, you’ll need to make some changes to the steps before creating the pipeline.
First, add an asdf install command before the bundle in each step to ensure Ruby is installed. For the "Lint" step, you’ll change:
command: "bundle exec fastlane ios lint"
To:
  command:
    - asdf install
    - bundle exec fastlane ios lint
Repeat this change for the steps labeled “Install dependencies” and “Test.”
Next, since this pipeline focuses on CI, skip the “Build” and “Submit beta” steps by adding a skip entry to these two steps:
- label: ":fastlane: Build"
  skip: "Only doing CI steps"
  ...

- label: ":ios: Submit beta"
  skip: "Only doing CI steps"
  ...
With the steps now customized, select Create Pipeline. After setting up the webhook to start builds on new commits, Buildkite directs you to set up an agent.
Run a local Buildkite agent
Let’s quickly talk about the platform you’ll run all of this on. Buildkite runs pipelines that can test, build, deploy code, and do anything else you can automate. These pipelines are run on the Buildkite agent, a cross-platform build runner.
You can run agents in a few different ways:
- Mac hosted agents let Buildkite handle the hosting, so you can get on with building your app.
- AWS EC2 instances let you create a group of auto-scaling Mac agents in the cloud.
- Local agents let you run the steps on your own infrastructure, either directly or with Docker.
All of these methods work, but in this post, you’ll set up a local agent:
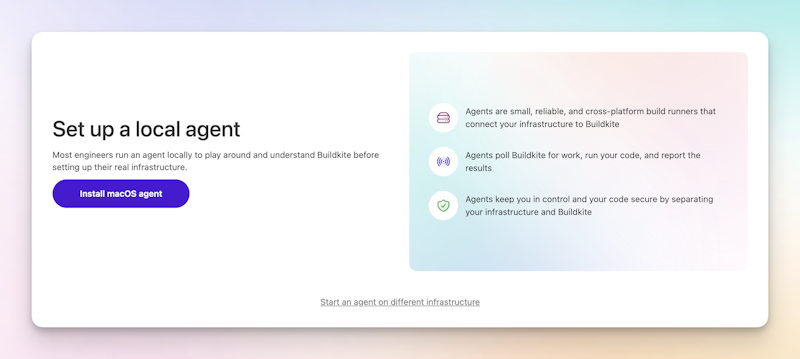
Here are the commands (using homebrew) to install the dependencies and the Buildkite agent:
# install project and template dependencies
brew install swiftlint xcbeautify asdf

# install buildkite agent
brew tap buildkite/buildkite
brew install buildkite/buildkite/buildkite-agent
xcbeautify is the recommended xcodebuild formatter for fastlane, which lets actions work with newer versions of Xcode, and asdf manages ruby runtimes on the sample project. Finally, we install the Buildkite agent.
You’ll also need Docker installed and running on your machine because the “Annotate” step of the pipeline uses Docker.
After this, Buildkite will show you a buildkite-agent start command with the token and tags to use. You can now start the agent, which automatically connects to Buildkite and waits for jobs.
Run the CI pipeline
Once you have an agent connected, Buildkite can run your new CI pipeline:
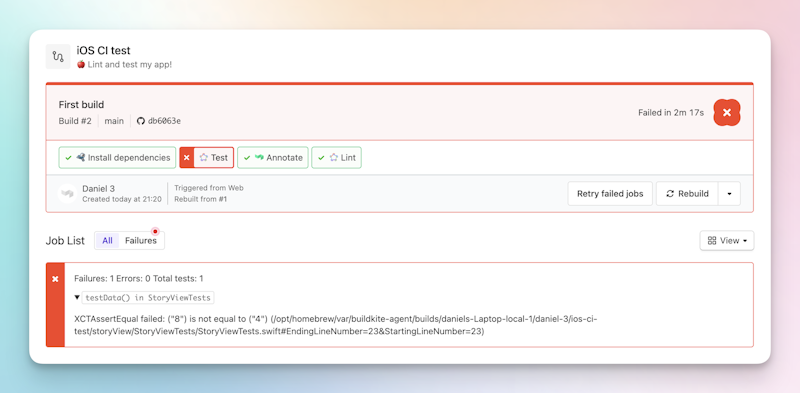
The agent is successfully running pipeline steps! However, the test suite fails. Looking at the annotation at the top of the build page, you can see why the test fails: the unit test checks for the value 4 instead of 8.
Having a CI workflow makes it easy to find issues and re-run the test suite. The fix-test branch corrects the failing unit test, so try running a build on that branch:
- From the Buildkite dashboard, select the pipeline to open the pipeline page.
- Select New Build.
- In the modal that opens, enter the branch name
fix-test. - Select Create Build.
With the fix on that branch, the new run succeeds:
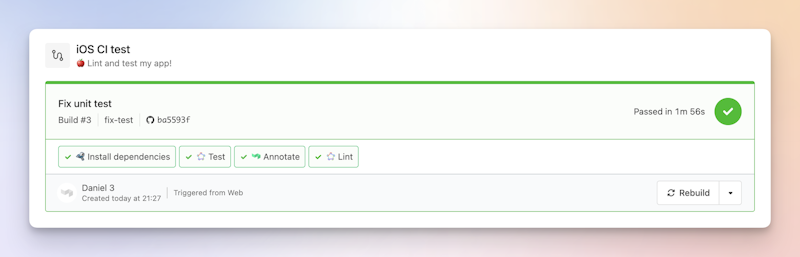
Congratulations, you’ve just set up a CI pipeline for your app!
Using CI lets you get on with other work while your CI infrastructure runs the test suite for you. Once you have multiple agents and run your test suite in parallel across them, you can get blazing-fast results.
Troubleshooting: Tests fail to run
If you see the following error message in your “Test” step:
Unable to boot the Simulator. launchd failed to respond.
(Underlying Error: Failed to start launchd_sim: could not bind to session, launchd_sim may have crashed or quit responding)
You can try these fixes:
- Re-open Xcode.
- Remove the simulator caches in
~/Library/Developer/CoreSimulator/Caches.
Next steps
What should you do after this? You have everything you need to go forward with your CI journey. Automate as much as you can to give yourself more time to work on the code.
You could create new lanes to grab translation files or take app screenshots. Or you could dive into continuous deployment (CD), where you use fastlane and Buildkite to automate building and signing your app, along with submission to TestFlight and the App Store. You can also configure Buildkite to automatically trigger on pull requests.
Finally, have another think about templates. In this blog, the Buildkite template gallery kickstarted adding CI to your project. But importantly, you had to modify it to suit the needs of your project, your dependencies, and the real-world things your app does. If you want to learn more about using templates and other Agile tools in a flexible way, check out Keeping the agile in ‘agile engineering’.
Buildkite Pipelines is a CI/CD tool designed for developer happiness. Easily follow and decipher logs, get observability into key build metrics, and tune for enterprise-grade speed, scale, and security. Every new signup gets a free 30-day trial to test out the key features. See Buildkite Pipelines to learn more.